VI-Suite v0.6 – Basic OpenFOAM analysis

Hello again.

I’ve just uploaded a video on how to use the FloVi component of the VI-Suite to conduct an air-flow simulation with OpenFOAM. The FloVi component only currently works on Linux, and I have only tested it on Arch Linux, but it should work on other Linux distributions.

A FloVi analysis requires as a minimum a manifold mesh object to act as a CFD domain. Additional manifold mesh objects can be added within the domain but geometries cannot overlap as this is not supported by Netgen.

There was a bug in the symmetry boundary specification which I fixed a few days ago so make sure you have a recent version of the VI-Suite v0.6 from github.

The example I show in the video is of a domain with ground terrain making up one of the boundary surfaces. If a building is to be modelled that touches the ground plane then one way is to extrude the shape up from the ground boundary. This way the skin of the building becomes a continuation of the domain boundary.

Extrusion

Extrusion from the ground plane

Another way is to add the building geometry as CFD geometry, but as said earlier this cannot overlap with the domain boundary. One way to get round this is to remove the ground plane that the building sits on, and then fill the edges between the bottom of the walls and the bottom edges of the domain.

A third way is to do a boolean difference between the CFD domain and the building geometry. The example below shows a boolean difference operation between the domain and an overlapping torus, which leaves the torus shape as a perturbation to the ground plane.

Boolean difference

Generating boundary geometry with a boolean difference

FloVi is experimental and generally works for me, but is not meant to intelligently apply boundary conditions for you. That is a manual process, and you should know what boundary conditions are appropriate for the simulation context you have. If the interface does not write out the correct boundary information based on your input then file a bug report at the github page and if there are additional boundary conditions you want added to the interface then post a request on the Google Group.

The default OpenFOAM solver I use in the video is simpleFOAM, and this is the one I’ve got working fairly reliably.

Finally, although the VI-Suite itself cannot visualise OpenFOAM results there is another another Blender node-based addon called BVTKNodes that can open OpenFOAM meshes and results and I have had some joy visualising results with it, so check it out if you want a complete Blender workflow.

That’s it I think. As ever, video below.

VI-Suite v0.6 – Basic Radiance Simulation

Sawtooth

Cutaway of a saw-tooth roof and lux simulation

Hello.

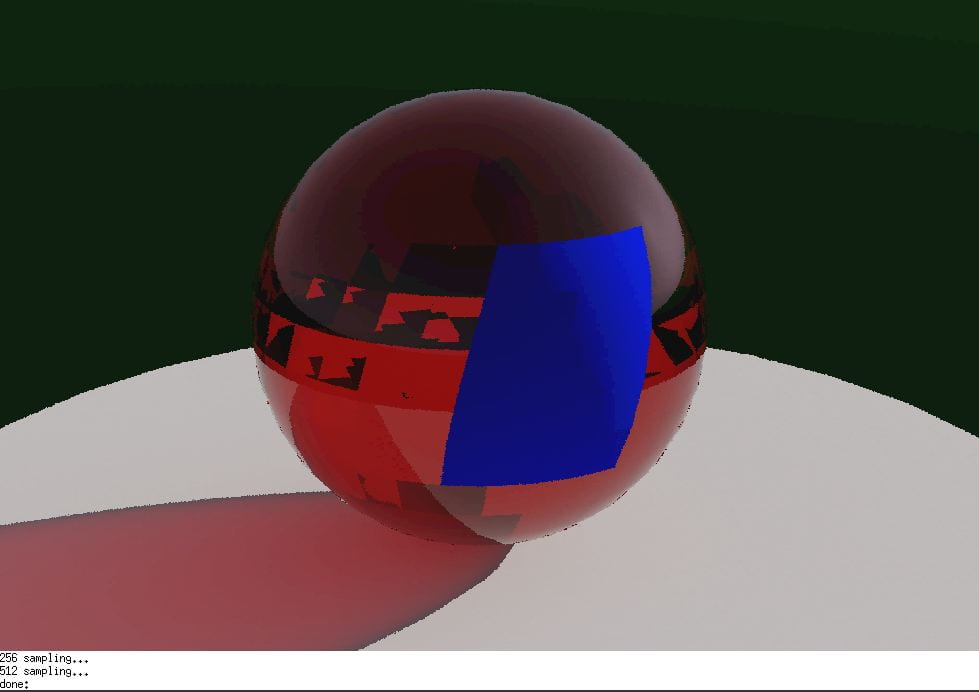
I have now uploaded a video tutorial covering the basics of Radiance simulation with the LiVi component of the VI-Suite. The video concentrates on the options within the relevant nodes and the Radiance material options. One thing I should probably reiterate is that a single Blender object can have more than one Radiance material attached as Blender allows you to associated materials with each individual face. The example below shows a red glass sphere with some blue plastic faces.

Radiance materials

Radiance per face materials


Also a version from today or later should be used to correspond completely with the options I talk about.

Otherwise I think the video mentions everything else I wanted to say and, as ever, can be viewed below.


VI-Suite v0.6 – Sky View Factor & Shadow Mapping

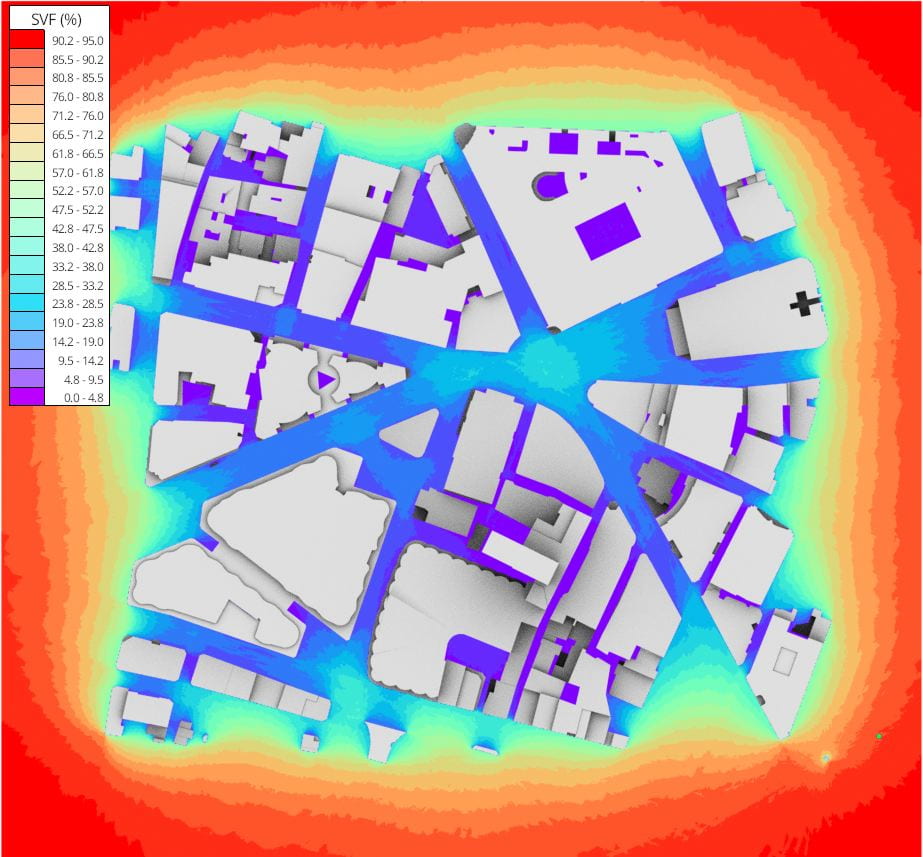
SVF calculation

Sky View Factor calculation

I’ve just uploaded a video that introduces the Sky View Factor (SVF) and shadow mapping capabilities of the VI-Suite.

The video also introduces the vi-suite-log file and how it can be used to provide data for some simple custom results processing.

As always I forgot some things in the video. The main thing is that coloured results geometry are placed in their own Blender collection called ‘LiVi Results’ although this video does not cover ‘LiVi’ analysis, but sky view and shadow are lighting related so I place these results within this collection. Once the VI-Suite has created this collection it is important to remember not to put your own geometry in it, as this geometry may then be ignored in subsequent analyses.

Results objects in this collection will be replaced every time a simulation is done, so if you want to keep this geometry for comparative analysis between scenarios move the object out of the ‘LiVi Results’ collection into the scene collection or your own collection.

I’ll also mention that clicking on the heat map analysis itself will bring up a matplotlib display window where you can set some options for the heat map and save that heatmap out to an image.

And finally, the ‘Results out’ sockets of the SVF and shadow mapping nodes can be connected to a VI Chart node for graphing, or the VI CSV node for outputting csv formatted results, but I will cover these two nodes in a separate video.

And finally, finally a github zip download from today or later is required to get the days reported in the VI-Suite log file.

And finally, finally, finally if in solid shading mode I suggest you choose ‘Flat’ shading, which can be found in the ‘Shading’ menu at the top right of the 3D viewport, for the best results visualisation.

I think that’s everything I’ve forgotten. Video is linked below.

VI-Suite v0.6 – Sun Path

I’ve just uploaded a video tutorial for sun path and simple shadowing analysis in v0.6.

The video covers sun path creation and the features of Blender’s viewport shading for single and multiple sun shadow creation.

There’s a couple of things I forgot to mention in the video. One is that when creating a new sun path you’ll notice that a new collection is created called ‘SunPath’ and the sun path object is placed within it. As mentioned in the previous video you should avoid putting your own geometry into this collection. Another is that the colours of the sun path base can also be altered with the material properties associated with the sun path base object.

And one final thing. The time used for the sun position is local solar time, not clock time. Any local daytime saving, or time zone adjustment, should be factored in by the user.

Link to the video is below and to those who celebrate it I wish you a very Merry Christmas.

Ryan

VI-Suite v0.6 – Installation video

The first video of the v0.6 tutorial series is now live on YouTube in the v0.6 playlist https://www.youtube.com/playlist?list=PLySrjcxbIMorzxpFjc1Mwdsemn4ab1Tas. Nothing too interesting in this video as it really only deals with the installation procedure and some of the new interface elements.

In other news, there was a problem with Radiance and EnergyPlus file permissions when using the github zip file on OS X and Linux. This should now be fixed. If there are continuing problems than as ever report on the github page https://github.com/rgsouthall/vi-suite06/issues.

Regards

Ryan


VI-Suite v0.6 – Update 3

Dear all.

I have, I believe, finished adding features to the VI-Suite, for now, and I am now moving into bug-fixing mode. I do not have the access to other computing platforms that I used to have due to the pandemic, so I am interested to hear if there are any activation issues with v0.6 on OS X, Windows and different flavours of Linux.

The zip file of the source code can be downloaded from https://github.com/rgsouthall/vi-suite06/archive/master.zip. This zip file should be installable directly from Blender’s addon preferences window. I have been working purely with Blender 2.83.6 LTS, and while it may work on later Blender versions I am primarily interested in any activation issues with 2.83.6 LTS.

I have not yet finished updating the user manual for v0.6 but for simple sun path, shadow mapping, SVF and LiVi (Radiance) calculations the process is quite similar to v0.4 and the tutorial videos for that release will hopefully give you enough to get started. EnVi (EnergyPlus) and FloVi (OpenFOAM) have changed quite a bit, and I advise waiting for updated documentation before trying those components. I will post here again when a basic manual is available. Tutorial videos will follow after that.

Any bug reports should go in the github page https://github.com/rgsouthall/vi-suite06/issues and general questions on the google group https://groups.google.com/g/vi-suite. Please include in any bug report platform information, the nature and version of the Blender install and any relevant terminal output.

Cheers

Ryan


VI-Suite v0.6 – Update 2

Dear all.

EnVi has now been transferred over to Blender 2.8, and most of the changes the user will see are within EnVi. The EnVi material system has been converted into a node system to allow up the EnergyPlus maximum of 10 layers in constructions. EnVi now supports the simulation of photovoltaics and phase change materials and you can now save your custom materials and constructions to a JSON database.

An example of EnVi Material node set-up

An example of an EnVi Material node set-up

The other major change in EnVi is that as ‘Layers’ now no longer exist in Blender – ‘Collections’ are used instead – EnergyPlus zones are specified by the Blender objects contained within collections. This allows multiple Blender objects to make up an EnergyPlus zone, and this has some advantages I hope to make use of in the future. I have not yet however finalised the logic of how muliple Blender objects become one EnergyPlus zone.

In other news the VI-Suite is now completely self-contained within the addon zip folder (at least on Windows and Linux). This means that you can install in Blender the git zip directly, and it will hopefully make it easier to get the VI-Suite working on a variety of Linux platforms.

I have general bug fixing still to do and Wind Rose display to finish, but I am hoping to announce a beta release for testing soon.

There is one fly in the ointment. The Blender 2.8 series does not currently allow the keyframing of custom node parameters. As most of the Vi-Suite parameters exposed to the user are custom node parameters, it means that automated parametric analysis is largely not possible.  This has been recognised by the Blender developers and if you want to register your interest in getting this fixed you can do so at https://developer.blender.org/T66392. The more people asking for it to be fixed the more likely it is to be fixed.

Regards

Ryan

VI-Suite v0.6 – Update

Dear all.

As some people have been asking what my plans are regarding a Blender 2.8 version of the VI-Suite, I thought I would post an update.

The eagle-eyed amongst you may have noticed that the title of this post skips a version. v0.5 was going to be the last VI-Suite version of the 2.7 series but as 2.8 is now out I decided to roll those changes in to v0.6.

Over the last couple of weeks sun path, wind rose, shadow maps, sky view factor and LiVi have all been, at least in part, transfered over. I am in the process of tranferring EnVi over. There are many bugs remaining, and I would not say v0.6 is ready for usage, but good progress is being made. I’m hopeful that early next year an initial release might be ready.

Once things have stabilised a bit I will post the link to the github repository here.

Regards

Ryan

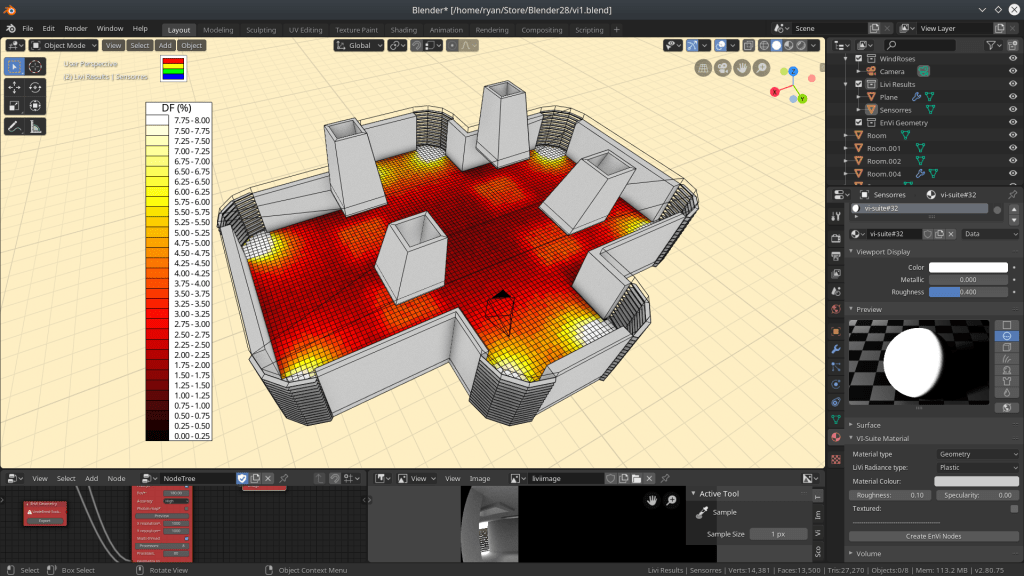
Blender 2.8 - LiVi

LiVi in Blender 2.80


VI-Suite v0.4.13a & Ubuntu 18.04

I have pushed version 0.4.13a to the download links which fixes an EnVi bug to account for syntax changes in EnergyPlus 8.9.

In other news, a couple of users have told me that the VI-Suite works on Ubuntu 18.04. I can confirm that their method does work on a fresh install of 18.04, although I have had problems running it on an 18.04 system that was upgraded from 16.04.

The process is pretty simple.

Make sure there is no existing Blender installation

Install Blender from a PPA with the terminal commands:

sudo add-apt-repository ppa:thomas-schiex/blender

sudo apt-get update

sudo apt-get install blender

This version of Blender should use the system installed Python distribution which will now require the ancillary libraries. To install these use the terminal commands:

sudo apt-get install python3-psutil

sudo apt-get install python3-pyqt5

sudo apt-get install python3-matplotlib

sudo apt-get install python3-kivy

The last command to install kivy should work in future but the current Python 3 version of kivy (1.9.1) is broken on Ubuntu 18.04. To get round this:

sudo add-apt-repository ppa:kivy-team/kivy-daily

sudo apt-get update

sudo apt-get install python3-kivy

I have changed the tar.gz compressed Linux VI-Suite download to a zip compressed one on the main download page. This can be installed directly from the Addons page within Blender’s User Preferences window with the Install-addon-from-file button. Alternatively, decompress and copy the folder to Blender’s Addon directory as before.