It’s great to share your work on social media, especially Instagram but quite often I hear people complaining their images lose quality when they publish them. You have some control over this image quality if you use a few simple Photoshop tricks to export your Instagram images.
Here’s a quick tutorial to make sure they don’t turn into a pixelated mess.
Image Aspect Ratio
Instagram supports image aspect ratios of anywhere between 1.91:1 and 4:5. The most common being:
- Square – 1:1 or 1080 x 1080 pixels
- Landscape – 1.91:1 or 1080 x 566 pixels
- Portrait – 4:5 or 1080 x 1350 pixels
- Stories and IGTV: 9:16 or 1080 x 1920

It’s said that the optimum ratio for images in your Instagram feed is 4:5 because it uses the most ‘real estate’. In other words, this ratio takes up more of the screen on Instagram.
Instagram Image Size
Whatever aspect ratio you use, make sure the maximum width (longest edge) is 1080px Any bigger and Instagram will compress it to 1080px and you risk losing image quality.
The ideal image height is between 566 and 1350 pixels (depending on whether the image is landscape or portrait).

To change the image size in Photoshop go to Image – Image Size and use settings:
- Image Size width: 1080px (be sure to turn on ‘constrain aspect ratio’)
- Resolution: 72 pixels per inch
- Resample: Select Bicubic Sharper (reduction)
Export for Web
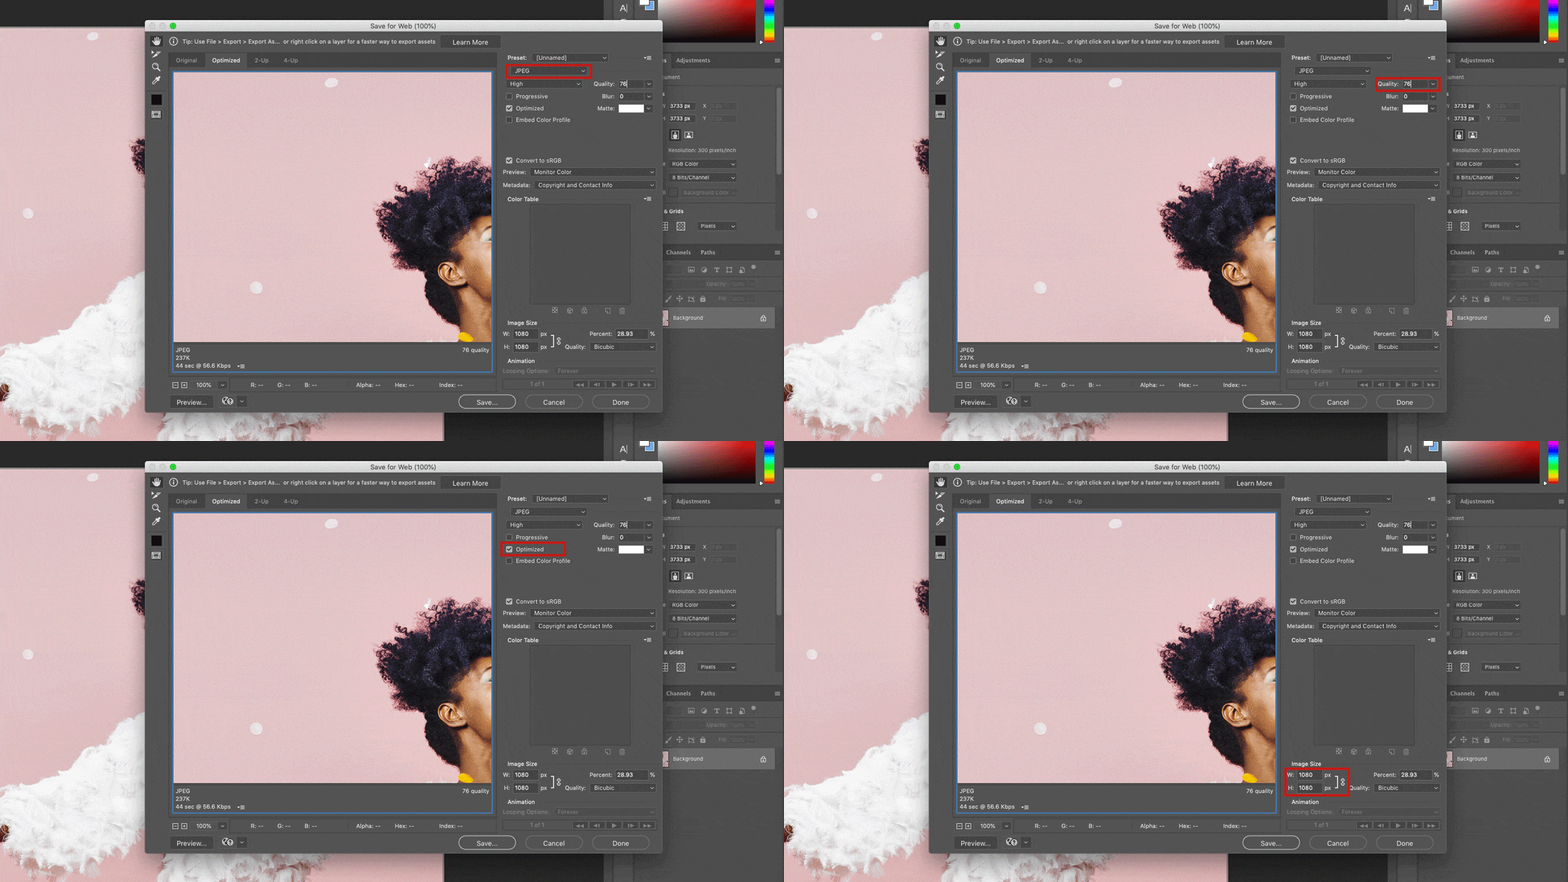
Once you’ve set the aspect ratio for your image and its image size, go to File – Export for Web and use settings:
- JPEG
- Quality – 76% the Instagram sweet spot for image quality.
- Optimised
- Convert to sRGB
- Check image size is width 1080px
I hope you found that useful! If you have any questions regarding Photoshop and your project work, email Mark. Also, I’d love to hear what other tutorials you would find useful in not only Photoshop but also Illustrator and InDesign.
Main image source: Adobe Stock


