RSS Feed
  1. Little boxes

    February 17, 2017 by Robin Englebright

    We’re currently involved in a national JISC programme to support the wide scale implementation of Learning Analytics in UK Higher Education (Sclater and Footring, 2016). A Learning Analytics readiness review undertaken at the University of Brighton by JISC indicated that the University could improve the speed at which attendance data is gathered and processed, as timely analysis of attendance data in other institutions has been

    (Sclater, 2014).


    The eLearning team looked for opportunities to improve our attendance data gathering, and talked to Deshinder Singh Gill in the school of Computing Engineering and Maths, who has been using an RFID card reader to log student cards for a number of years.
    The device reads the userID into a spreadsheet on a standalone PC, and the data is then handled by the Course Administrators to construct an official register.
    It was envisaged that this system could use a web form to improve efficiency, however following discussions it was identified that the standalone PC is not connected to the network, and that using the networked lectern PC was impractical, as there are always a few stragglers who come in late. Wide scale adoption of any solution would also be hampered by the cost of the Unicard scanner at around £200.

    A better solution would be to have a standalone unit, like a wall mounted card swipe.

    The JISC consultants highlighted the approach taken at Aberystwyth University who had deployed a large number of Arduino based Mifare card readers as part of their attendance tracking offering, and it was the Aberystwyth approach that prompted this project, with an aim of creating some inexpensive devices which could gather attendance data for use in our Learning Analytics Pilot activities.

    I took the opportunity to meet the Aberystwyth University team at the JISC offices in Castle Park Bristol during a workshop to devise a specification for attendance recording.

    Leslie Johns from Aberystwyth University described their legacy attendance system and the shortcomings in terms of useful data generation, and their new solution which used a branded Arduino Uno running on Power over Ethernet (POE), with an rc522 RFID reader shield, and buzzer/LED breakout board at a cost of around £57 per unit. The device passes data to a central server.
    Their initial deployment of 200 access points registered 400,000 attendances in the first semester, and was expanded to 350 access points, failure rates are very low, and the system has been a success.

    At the same meeting Chris Stedham the Head of Service Planning and Governance – IT Services at Bath Spa outlined their aim to improve their student retention though the use of effective Learning Analytics. A key part of their Learning Analytics solution was to gather accurate attendance data.
    Bath Spa operate across multiple sites, with lots of grade 1 listed buildings, so can’t fit devices to walls like at Aberystwth, and settled on a card reader in a podium bolted to the floor with a metal plate, more expensive at @£250 each using power over ethernet – the Gemini 2000 desktop case.
    The devices are configured through DHCP and web services, (option 72 on DHCP set to card reader), and write to a simple database that only records: student activities that are expected, successful card reads, card reader configuration including mac address and card location.
    On power up their device reads a configuration from DHCP, which tells the reader which web server to use. The reader sends a Power Up message, checks a security key, then sends configuration of silent mode, with a “heartbeat” every 60 seconds to check in.
    Their setup provided a tutor interface that showed a photo classlist highlighting those students who had swiped in.

    The common aspects to both of the card swipe based hardware solutions seemed to be the use of wired ethernet connections, with POE to minimise wiring, and keeping the units as simple as possible, reading only cardID and performing any processing on servers.

    I undertook a period of rapid prototyping a range of hardware solutions based on these two principles. It is interesting to note that the final result did not adhere to either of these principles.
    Our Unicards are based on NXP Mifare 4k cards, which offer 4096 bytes of data storage, with the memory split into 40 sectors protected by A (read) and B(write) keys. 16 bytes of each sector are reserved for keys and access information, and the first 16 bytes contains the read only unique serial number of the card and manufacturer details. The serial number can be read directly without any keys. Initial investigations identified a USB card reader for @£10. However, the Unicard system doesn’t use this cardID, so instead we need to access the userID which is held in Sector 2 Block 8
    The previously undocumented complication here is that whilst we count the blocks from 0-3, identifying the UserID data as being stored in Sector 2 Block 0, and assigning each sector blocks 0,1,2, &3, the Mifare card library understands this as Block 2 sector 8, if you count (zero based) through the sectors, Mifare encryption is proprietary (crypto1) and uses a 48bit key, the table shows the location of the UserID U on the Mifare card. Key A = A, Key B = B, Protected bytes = P.

    My first attempt version 0.1 used an Arduino nano linked to a RC522 RFID 13.56MHz card reader.
    The device read the cardID which is accessible without the need for encryption keys, and passed it to the serial monitor.

    version 0.1 of the card reader

    Version 0.2 replicated the Aberystwyth approach, using an Arduino Uno, and RC522 card reader and a HanRun Ethernet shield (not POE as provision of POE access points was uncertain. The device worked, but I wasn’t happy with security as it couldn’t run https as the Uno doesn’t have sufficient processing power. The more advanced Arduino Yun mates an Arduino to a coprocessor running a minimal Linux install and would allow a more secure connection, but at a much higher cost, the boards costing around £60 compared to £3 for an Arduino clone.
    To avoid the network access issues, I tried a wholly software approach, presenting the tutor with a list of student data and photos which they could tap to record presence. The initial iteration of the software was tested and met some needs, but the card swipe approach was requested for larger cohorts, so Iteration 0.3 used an Arduino Leonardo which has the ability to act as a Human Interface Device(HID) on a USB connection, and thus act as a plugin USB Keyboard card scanner. A smaller ABS case was tested in v0.4.

    The device design changed in version 0.5 to improve robustness when carried in a bag, using a smaller ABS case, a lower profile activation button, and moving the “active” LED and “read” LED to the side, also making them easier to see. The buzzer fitted to the initial device was removed as it was a distraction, and the whole thing was filled with hot glue.

    version 0.3 (right) and version 0.4 (left)


    internals of version 0. 4 showing RC522 card with soldered leads to Arduino Leonardo clone


    Version 0.5 with lower profile switch, and side mounted LEDs

    I provided access control through a Blackboard secondary role which allows the user to add a custom HTML “course” widget to a module page. The widget passes the username and module code to a php script that looks up the students registered on that module and displays their photos and details, writing the register to a MySQL database. It would have probably been easier to do all this within a Building Block, but my .jsp is rustier than an old plough.

    To provide a little more security the scripts require windows 401 authentication challenge and perform a referrer check.
    As with the hardware the software went through a number of iterations, with adaptations based on user feedback.

    There are four major components in the software, the compiled C code running on the Arduino, the html widget running on the studentcentral platform, the php scripts providing the attendance registers, and the MySQL database storing the data.

    Instructors with special secondary roles can add the widget to a course dashboard

    The Arduino code consists of a short setup routine that imports the required libraries and initialises a number of pins on the Arduino to talk to the RC522, pin 9 is connected to the RESET, pin 10 to SDA the data line. Pin 16 to Master Out Slave In, and pin 14 to Master In Slave Out, with the clock running on pin 15.
    Additional connections are made to pin 2 which is set as a pull-up, activated by the switch (This doesn’t turn the device off, but merely prevents it from acting a s a keyboard) pin 3 to a green LED through a 220Ohm resistor which will be triggered to indicate a swipe, and a Red LED to indicate the device is active on pin 5.
    The script creates an instance of the A read key for the UserID, and then in a main loop looks for cards presented to the tag reader. When a card is presented a brief bounce check happens to prevent multiple writes, and the ASCII is written to the keyboard followed by a carriage return, and a flash from the LED.

    The standalone card swipe register gives autofocus to the form field. When the card reader is used it writes the UserID into the field, and sends a carriage return. The form writes to the database and returns a list of the last ten card swipes as a confirmation that a particular card has been read.


    Whilst the hardware and software to record attendance are relatively simple to build and implement, the infrastructure within which they exist is complex.
    The chief lesson learnt was that one solution does not meet all needs. A large lecture cohort could use the Unicard swipes, but had too many folks to make the use of photo classlist practical.
    Similarly, the use of swipe boxes in smaller cohorts could take up too much time, and a simple photo classlist that could be checked by the tutor at the start or end of a session was far more useful.
    The devices and software are being piloted throughout Semester 2 by the Business school, and useful feedback continues to be gathered, and iterations developed.

    So what’s next? The Teaching Space Modernisation Programme are looking providing an integration with the timetabling solution, which would add a swipe in facility to teaching space doors, much like the Bath Spa solution.
    There is also the potential to use inexpensive mobile devices, as many android devices have an RFID, reader. Unfortunately, iOS doesn’t allow programmatic access to the inbuilt RFID API.
    I am trying some small scale tests using a first generation Nexus 7 tablet. Unfortunately, only phones that have NXP brand of NFC hardware are fully compatible with Mifare Classic Tags, which seems fairly arbitrary, as the original Nexus 7 had support, the next generation Nexus 7 doesn’t.

    To sum it all up, I’d say security concerns can dictate the route the solution takes, but gathering attendance data requires an understanding of the variety of teaching sessions that may be recorded, and it is vital that any decisions are tested to gather the range of situations that will be encountered.
    The value of the actual attendance data gathered in terms of learning analytics is yet to be determined, although initial returns from early business school pilots shows a definite correlation between attendance and grade, and absence and grade.
    References
    Bailey, P. (2016) Effective learning Analytics [Online], Available: https://analytics.jiscinvolve.org/wp/2016/08/04/exploring-approaches-to-attendance-tracking/

    Martin, T. and Downes, A. (2012) Programmable e-learning and experience tracking [Online], Available: https://tincanapi.com

    Sclater, N. (2014) Learning analytics the current state of play in UK higher and further education/licenses/by/3.0, [Online]. Available: http://repository.jisc.ac.uk/5657/1/Learning_analytics_report.pdf

    Sclater, N. and Footring, S. (2016) Effective learning analytics [Online], Available: https://www.jisc.ac.uk/rd/projects/effective-learning-analytics


  2. Loving the Elevator

    May 18, 2016 by Robin Englebright

    One of the best things I’ve seen Jisc do is the Summer of Student Innovation, SOSI.
    It’s based on a simple idea that students are often in a better position to point out how and where things can be made better in Uni life, and maybe are even best placed to action the solutions in terms of available time, energy and motivation.
    The first stage of the SOSI project uses an online “Elevator pitch” tool, so the overhead for submitting an idea is really low too, meaning even super busy students can grab their phone record an idea, and submit.

    Because it’s such a good idea when we were asked by Holly at Santander Universities for some ideas on how to gather ideas for a “Digital Award” I instantly nagged Paul Bailey and Andy McGregor at Jisc to let me use the Elevator tool. Luckily they were in the process of turning the tool into a service, and our little competition had the potential to provide some useful feedback from a service user point of view.
    I’ll blog more on the pros and cons of the system once we’ve finished the competition, as I want to try the online marking tools.

    digitalaward1920x1080idea1

    Our Digital award has £5k funding from Santander Universities, who do lots of these sort of interventions in their host Uni’s. The award asks University of Brighton students and/or staff to submit ideas that would use technology to improve some aspect of Uni life. We publicised the competition with an “Elevator” based marketing campaign…

    Elevator in an elevator

    Mr_Rob_Work___rob_work__•_Instagram_photos_and_videos

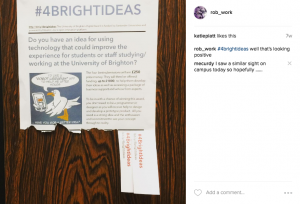
    The top 4 ideas… the #4brightideas each get £250, the chance to join our Entrepreneurship Summer School, and if the idea is the sort that could be developed into an app or a service, then there’s another £1000 available to help build prototypes and whatnot.

    Anyway, our Digital award competition has reached the voting stage.
    So I thought I’d encourage readers of my blog to vote, even if you aren’t at the University and won’t benefit from the ideas. Share the ideas on social media, comment on the site, or send me any feedback.

    VOTE NOW


  3. Streaming video from a GoPro camera

    March 16, 2016 by Robin Englebright

    Short clip showing how to stream video from a GoPro camera


  4. Screen Sharing using Reflector2

    March 16, 2016 by Robin Englebright

    Short clip showing a macbook connecting to a pretend classroom monitor, and then sharing an iPad screen using AirPlay.


  5. Screen sharing using an AppleTV demo

    March 16, 2016 by Robin Englebright

    I recorded a short clip showing the setup, and connection using airplay to give an idea of how easy it might be to use in a classroom situation.


  6. Screen Sharing How to… appleTV

    March 11, 2016 by Robin Englebright

    Following on from the HEA event where Vikki showed how she improved visibility of the fine close up work she does on knitting machines, I’ve had several people ask me about how to set the appleTVs up.
    The answer is… it depends… but I thought it worth sharing my solution.

    In order to enable “conference room” screen sharing the devices have to be on the same network, which means getting an eduroam account for each of the devices.
    Policy demands we don’t use a common account for all, meaning each configuration of the device is different, and the profile has to be edited before pushing to the apple TV.
    To “build” an appleTV to the required configuration takes about 20 minutes plus testing, and final “lock down” where additional or superfluous items are removed from the home screen, and the device is set to default to conference room mode.
    Less time is required for additional configurations as the latest version of iOS doesn’t have to be pushed to the devices.
    Set up and installation of the devices has proved problematic for a number of reasons.
    Whilst much of the setup can be done through the “configurator” software the final step requires access to the individual device menus, which means connecting up an HDMI monitor.

    On a (newish) mac download configurator:
    https://itunes.apple.com/gb/app/apple-configurator/id434433123?mt=12

    Launch Configurator and in the “Supervise” section select “Create Profile”>
    (At this point we “Import Profile” and pick eduroam.mobileconfig which will then be listed in the Profiles pane.)

    First off you’ll need to get hold of whatever certificates you use on your network, once you have them, select the “Certificates options” in the left hand panel of the configurator and add them using the + button.

    Next select the Wi-Fi menu and set the SSID to eduroam, check the “Auto Join” box, and pick WPA/WPA2 Enterprise as the security type.
    check the PEAP box and and set the Username and Password for the device, this needs to be different for each device.

    configurator
    Next select the “Trust” settings, and check all of the certificates you have installed and Save.

    Connect the appleTV with the USB cable and power up the apple TV.
    Configurator will launch a pop up “Apple TV Assistant”.

    Select “Don’t Enrol”>Next
    Select “Erase and install latest version”>Next
    Name the device – this is the name that will identify the device to folk who look for it using AirPlay,
    default naming convention is the eduroam account e.g.: abc123
    More useful especially in situations where many appleTVs may co-exist and be offered to folk, is to describe the location
    e.g.: GP321 appleTV – This can be changed once the device is located using the on screen menus on the appleTV.

    Set language to English, and uncheck “Send Diagnostics Data to Apple”>Next

    Pick the eduroam configuration profile Next

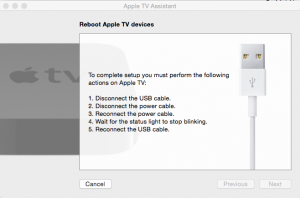
    unplugitthenplugitbackinagain

    Once configured you’ll need to follow the instructions, disconnect the usb, disconnect the power, reconnect the power, wait till the LED stops flashing, connect the usb again.

    With luck you then get a big green tick.

    The devices can then be further configured using the onscreen menus to enable conference mode with an onscreen password, to hide the unneeded icons, and to set a passcode on the device.

    Testing revealed that whilst the devices are pretty much uniform, some proved harder to get to the point where they accepted a profile. Some devices required 2 or 3 (in one case 4) attempts before the settings took, there is no clear reason why this should be the case.

    Deployment has proved complex due to the lack of capacity of the existing infrastructure control panels for auxiliary inputs, and the lack of HDMI inputs at all.
    This means the likely solution is to plumb the devices in to the PC laptop port using a VGA converter, OR to connect to the HDMI and then use the remote control to select the source.
    On my site there are no two installations that are completely the same, which means slightly different instructions are required for each installation, and awareness of this difference by those intending to use the devices.
    This is further complicated by the need for a power supply for the appleTV and more pressingly, a way to cycle the power if the device goes to standby, and needs to be restarted.

    instructions

    Risks

    – Complexity and inconsistency of connection may put people off using the devices
    – Reliability of the appleTV units once active (they often require multiple attempts to connect) may have a considerable technical support overhead.
    – Configuration of the devices takes a significant time.

    Recommendations
    The biggest barrier to use is the varied connection to the screens. A common approach at least within a campus would be beneficial.
    What works well:
    Free roaming devices, with HDMI cable and VGA/HDMI adaptor for personal use.
    Connection by HDMI cable to modern Flat screen devices.

    Even better if:
    Identify requirement as part of the room refits and agree a common approach, common connections, capacity for future expansion.
    Review common software alternatives – use of reflector,(I’ll write up Reflector details shortly) or air parrot for laptop users and a solution for fixed desktop units.
    Look at design of the instructions to provide concise, clear common approach.
    Work with Learning Technology Advisors, site technicians and school technicians to ensure awareness, and support capacity and capability.


  7. Sharing your screen

    March 7, 2016 by Robin Englebright

    At the HEA arts and humanities conference  on the 3rd March 2016, Vikki Haffenden presented her research into improving the student experience in workshop sessions.

    When teaching Vikki demonstrates really intricate settings on knitting machines and close up work, to University of Brighton Textiles students,  and it can be hard for the students to see. After much experimentation she settled on using the camera on an old iphone4S in a chest harness to stream video to an appleTV and then onto a 32″ TV screen, so students can see even if their view is obstructed, and in fact can see in more detail as the image gets magnified.

    To test the decisions Vikki made the session then moved to a hands on workshop, comparing a range of screen sharing technologies and drawing out the pros and cons of each.
    We started with a quick Poll using PollEverywhere to gather thoughts from the delegates on potential uses for the technologies.

    PollEv

    PollEverwhere performs the function of the older style voting buttons, but using mobiles to access the poll either through the website: PollEv.com/brightonhea or by Texting BRIGHTONHEA to 020 3322 5822.

    For our demo the question was “How do you think you might use screen sharing for in your teaching?””

    We then spilt into two teams, to see how easy it is to set up the kit, as this was one of the areas Vikki identified as important, if it’s too tricky to set up, or unreliable it leads to a bad experience.
    Team one (team Vikki) used Vikki’s iPhone in a chest harness streaming to an apple TV and screen combination.

    Team two used a Go Pro with a head harness (because a head harness is way funnier) streaming to the Go Pro app, connected to a projector by an adaptor cable.

    GoPro app

    Both teams had the kit up and running with minimal support, and both setups seemed to offer similar functionality. The GoPro has more settings and a removable sdcard which could be a benefit, as video recording takes up loads of memory.
    There are some interesting points with both devices  that need consideration however.

    When using the appleTV setup both devices must be on the same wireless network. This means a personal appleTV setup carried to a teaching space is ok, but slightly trickier is one leaves the device setup in a room, as it will require it’s own eduroam account, which may not be popular with IT depts. In order to setup an eduroam account one needs to connect the apple TV to a modern mac, and run the configurator app, which is a bit of bother.

    The GoPro bypasses the problems of requiring an eduroam account by acting as it’s own streaming server, and in order to connect the app one has to first connect to its wifi network. The downside of the GoPro is that it streams to a mobile device, which is slightly harder to then connect to a screen, we used an adaptor cable, and to be honest were quite surprised when it worked. There is a way of accessing the GoPro stream via a PC web browser, but it seems quite a faff.
    Our next Demo failed, probably due to the conference centre wifi, but I’m not totally sure.
    I tried it again as soon as I got back to the office and it worked fine.
    Reflector2  works in a similar way to the appleTV, screen sharing requires both devices to be on the same wifi network, and the person sharing their screen has to swipe up to reveal their “Airplay” settings, and then pick the device to stream to, The upside of reflector is it only costs around £10 and runs on your laptop, so if you already take a laptop to your lectures/demos, it doesn’t require much other work. It also (in theory) allows android (and windows phone) users to share their screens, although I’ve had no luck with my Nexus 4 or Nexus 7.
    A big difference is that it allows multiple screens to be shared simultaneously, we’ve tested it with 9 devices before it all went wrong.

    9reflections

    As an added bonus individual shared screens can be recorded on the laptop, I’ve no idea what would happen if you tried to record 9 simultaneously, but it would probably be ugly. Whilst you could have multiple mobile devices streaming from their cameras, Reflector seems to lend itself to sharing sketches, or photographs to compare and contrast.
    After spending most of the session looking at sharing detailed work, we moved to sharing at a grander scale.
    The SWIVL device is a small motorised base unit that can hold an iPhone, or iPad, and will track the movements of a presenter who wears a small wireless lanyard.
    This lends itself to more expansive demos, maybe where those watching are viewing remotely, so we paired it up with an iPhone running Periscope, which streams to the web.
    It is worth noting that whilst I’ve found the cheaper basic appleTVs work better in conference mode setting  the new devices have a periscope app, which could make connecting easier…

    We closed the demo using Nearpod which allows the presenter to control the screens of the delegates whether they are in the room or not, and push slides, links questions and activities out to them, and then share the responses back.

    Nearpod

    For University of Brighton Folk on Monday 14th March 12-1 in G4 I’ll be running a Lunch hour app swap, where we’ll revisit the hands on part of the session, and I’ll bring along:
    A visualiser, an AppleTV and GoPro, Reflector2, SWIVL, Periscope and Nearpod.
    …and of course there’ll be a chance to share your ideas and favourite apps.

    See you there.


  8. The look of things

    May 20, 2015 by Robin Englebright

    This post is very much thinking out loud…As previously discussed we’ve been looking for a simple way of generating assessment timelines using readily available tools, and little or no training overhead and minimal ongoing support.

    We’ve found a useful Excel timeline template the output of which should help staff visualise assessment timing, and consider the overall assessment burden on their students… and once set assist students in their time management.

    But what’s the best way of rendering that data? In documents it’s a clear case of copy and paste from the source spreadsheet, but online, how well does Excel data travel.

    Linking to a spreadsheet is a bit poor, the spreadsheet has to be downloaded, though it may be worth investigating embedding a spreadsheet shared through O365, or Googledocs.

    Office 365 is a whole different kettle of fish… staff don’t have it by default here, so for the moment I’m going to skip this option (testing offers tantalising hints, but it needs proper investigation).
    Google doesn’t like the Excel spreadsheet format, but does offer some alternative timeline tools, unfortunately Edublogs doesn’t seem to like the iframe this sits in, and ignores it when added in the “text” view screen.

    <iframe src="https://docs.google.com/spreadsheets/d/19OUEsmUdpBX40m7dwC16DwNe55cFISy0nlEdqkb-MYU/pubhtml?widget=true&amp;headers=false"></iframe>

    Alternatively we can try and build the actual outputs as html, Excel offers SaveAs a single file webpage, and .mht file… this is a web archive format, and doesn’t seem to play well with the blog, which is a shame as keeping all the components together is tricky when adding assets to a CMS like WordPress. Saving as a webpage provides an .htm file and a folder of assets, and in fact creates a .PNG of the timeline, which hints at the approach we will probably end up taking, simply taking a screenshot and adding that to our planning blog:

    assessment timeline as a .PNG


  9. badges

    May 6, 2015 by Robin Englebright

    I got my first Open Badge at Mozfest 2013, and was delighted by the opportunity to have sweet little dinosaurs linked to me.

    reveller
    At Brighton Katie Piatt and Emma Illingsworth had run a small pilot which combined badges and gamification to encourage a more enaging library induction, which proved successful but the awards weren’t transferable.

    Infobadges

    Encouraged by The University of Southampton who shared their experience awarding badges for Student Digital Champions , we outlined a trial which would use Open Badges to reward non-curriculum activity, curriculum activity already rewarded through module credits.
    Badges would be unlocked for activities already completed by the students, based on what has been done not a value judgment on how well it was done.
    Mozilla were promoting their Open Badge infrastructure, and their “back-pack” had emerged as the defacto solution for surfacing badges issued elsewhere.
    The Mozilla hosted badge issuing server solution “badgekit” was available as a closed beta, with indications that the service would be opened in October 2014. The code base was available on Github in two components which ran on a Node.js server, and was available as a development tool in the form of a Vagrant VM.
    It seemed prudent to investigate the Mozilla route first, as it was Open Source, allowing us to review the code base and APIs, and adapt it to better fit our needs. The lure of a Mozilla offering a hosted solution was quite strong – removing the requirement to administer yet another server (at the time we were trying to rationalise the number of servicesand servers we supported as a team) – and building into the active Mozilla community

    Unfortunately we couldn’t get the VM or code to run consistently, and the activity log on the Github repo showed some things were not being actively developed. Whilst we waited for the October release of the hosted solution we thought it would make sense to look at the tools built in to Blackboard. We had just upgraded from Blackboard Learn 9.1.6 to Blackboard Learn April2014 bringing a wealth of new (to us) functionality, including “Achievements”

    The Blackboard tool has a few fairly top level settings:
    Issuing Organisation – University of Brighton,
    Issuer-course or Org – We opted for Course level- as we don’t do much with organisations- however Organisations may be a more useful home for the achievemnts in many use cases,
    Issuer name – University of Brighton,
    Issuer URL (which seems preset),
    Issuer contact email – we created a functional account to handle any queries,
    Verifcation code- a long GUID,
    and publish to Mozilla- yes/no.

    The My Achivements tool shows only badges generated within Blackboard, though BB generated badges can be displayed in Mozilla Backpack IF the user email registered in Blackboard is the same as that registered with the Mozilla Backpack.
    PublishToMozilla

    At the Achievement delivery point the user can “publish to backpack”
    Critically for our trial was the ability to surface the badges in the users mahara portfolio – studentfolio. This was possible, but required some hoop jumping that seemed out of proprtion to the reward.  The user has to gain the Achievement in Blackboard, publish it to a Mozilla Backpack using the same email address, then surface it in Mozilla using the open badge displayer plugin.
    Alternatively the badges can be added to a public collection which can can been shown in the mahara portfolio by emedding a link in an iFrame, this method is supported in the mahara docs.

    To test the Achievements tool we awarded badges to a completing cohort of PASS leaders and PASS Ambassadors.
    UOB_PASS_Leader_small

    We set up a shell course and enrolled the users.
    The Achievements tool requires a triggering event, which is linked to the grade centre, and takes a little finessing to render useful information back to the badge recipient.
    Some fields have limted characters, or only partially render depending on where the badge is viewed… In the my achievements area you get about 3 short words….

    limited space for description details

    Deeper down you can get away with slightly longer descriptions, but the text is still limited.

    badge details

    Sara did a sterling job refining the descriptions to around 20 words, which from trial and error we established was an effective limit.

    PASS Leader description: Facilitated Peer Assisted Study Sessions with first year students. This included lesson planning and leading sessions on discipline-specific knowledge skills.

    PASS Ambassador description: Co-coordinate Peer Assisted Study Sessions within their course. This involved liaising with academic supervisors, supporting leaders, and aiding in delivery.

    Another limitation is that however you provide the badge to Blackboard, it converts it to a 90×90 png, which tends to spoil the look of the badge, their compression algorithm gives the badges jagged edges, and I’d foolishly put too much detail in the badges, and used too delicate a font.

    The award of a badge produces a useful notification flash for the recipient when they log into the course area, and through Global Navigation notifications.
    However if the course area is a shell as in our testing, there is little to encourage users to visit the area, and this reason may make the use of the higher level Organisations as the awarding unit more effective.
    Another possible problem is that once Achievements has been enabled, anyone with edit rights on a module can authorise badges, which has the potential to devalue badge awarding. We needed a policy for badge issuing and I joined an international effort to draft a policy document with the Badge Alliance  –

    Whilst the process was instructive the result was slightly too high level for our immediate needs which were closer to a guidance doc for those planning to use it, to ensure they are aware of what they are doing.

    Just when we were about to go live we ran into another glitch with the Blackboard setup which threw errors when publishing to Mozilla-

    "Remote assertion must match local assertion".

    This was documented in Blackboard Article No: 000039381 and scheduled for a fix in the April 2015 update (Blackboard have moved to a bi-yearly update cycle in April and October -unfortunately testing and stability concerns mean we run an update cycle out of sync with this cycle)

    The experience of issuing badges in Blackboard was slightly disappointing, it offered a solution, but the snags and glitches proved to be deal breakers, particularly the need to bind the badge to a common email address, and the poor quality copy of the original badge graphic.
    We decided to maintain the Achievements tool for internal use, and investigate an alternative for surfacing badges in external locations.
    We discussed our findings with Anne Hole at the University of Sussex who use Open Badges as a way of accrediting staff CPD activity.
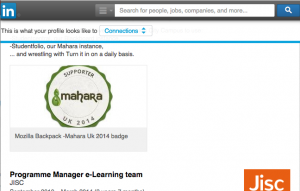
    Their solution was to use Credly which seemed to have several benefits for the end user, specifically that the badges can be surfaced in Linked-in profiles  which aligns well with our employability strategy.

    old fashioned badge linking in Linked-in

    old fashioned badge linking in Linked-in


  10. just in time

    May 6, 2015 by Robin Englebright

    I’ve seen timeline tools being used to great effect in a number of situations , but unfortunately they are all a bit of a palaver to set up, and in some situations are just too darn interactive.

    We’ve been discussing how best to view assessment timings down here at the city campus, both for students, so they have a clear overview to help them manage their time effectively, and for staff, who are mainly focused on a modular delivery, to help appreciate the bigger picture.

    For simplicity I’ve decided to have a look at what sort of timelines can be created by staff on a mac using standard office software. The output is a visualisation of a table of data, so whilst it would be good if it produced accessible output, it may be better to create an time ordered plain text version of the data to support screen reader use.

    Excel templates

    Microsoft offer some timeline templates which are fairly simple to use, but these are linked to Office365, and do require a Microsoft account for access.

    Office timeline templates

    However there are plenty of other templates available. The one below was from tidy form. It generates the timeline from data in a small table, and includes a label height setting so long tags don’t run together.

    tidyform timeline template

    Powerpoint Templates

    A number of Powerpoint timeline templates utilise “SMART ART”, this one came from fppt.com 
    The output is a little more flexible, but doesn’t build the chart automatically. This sort of chart displays the span of a time period more effectively than the previous example, but they could equally be tweaked to produce similar output.

    powerpoint timeline template

    Keynote templates

    Keynote is pretty fantastic tool for laying out elements in an appealing way. I’ve always found the guides which allow centralised alignment really useful, and of course the export options are pretty comprehensive.

    James Welch offers a keynote template which looks good, and is easy to edit.

    Keynote  timeline template


    What becomes apparent in creating these timelines is that having a good set of data upon which to build is invaluable.  Next step is to have a look at whether the information presented this way is any more clear for students.


Skip to toolbar