iAnnotate and Goodreader – a class act when that file is JUST too big
A few folks who are iAnnotatePDF enthusiasts, using it for formative feedback and audio commentary, have asked me if there is a workaround when the PDF file produced by the annotation process is too large to send by email. There is the traditional solution to send the file to iTunes, but as many folks choose to sync to iCloud rather than through a direct wired connection this is not ideal. The workflow below is a possible solution. I am unable to offer hands-on support for this app due to the sheer volume of users, but it is my hope (as a fellow iAnnotate fan) that you find this useful. The workflow also has the added bonus of syncing your files back to secure university servers to ensure that you have a copy of your annotations.
Workflow Rating: Intermediate – Advanced (iPad and file management)
Requirements: iPad, iOS7, WiFi connection, university login credentials, iAnnotate PDF for iPad [App], Goodreader [App]. IMPORTANT: you must have a pincode on your device, this workflow could potentially involve handling university data which will temporarily be stored on your device.
[In iAnnotatePDF App] Step 1: Add a My Files connection in iAnnotate PDF (sharepoint)
From your document library in iAnnotate press on Connections and select Add WebDAV
Add the following credentials:
Name: My Files
URL: https://mysite.brighton.ac.uk/user/ms30/MyFiles (replace m230 with your alpha-numeric username)
Username: your alpha-numeric username as above
Password: as per your credentials

The select Set Up Connection
What is MyFiles?
My Files is a network storage drive which you will find mounted on your office PC, you can also access it through a web-browser (Mac option). You can use it as a secure location to store and save files. It is possible to use it within certain iPad apps as a more secure alternative to dropbox.
Step 2: A little pre-preparation
In order to keep things organised I recommend making a folder in My Files for your annotated files. You can add files to it from your work computer and add files which you open in iAnnotate (e.g. someone sends you an email with a PDF attachment and you open it in iAnnotate, you can save that to this new folder too.

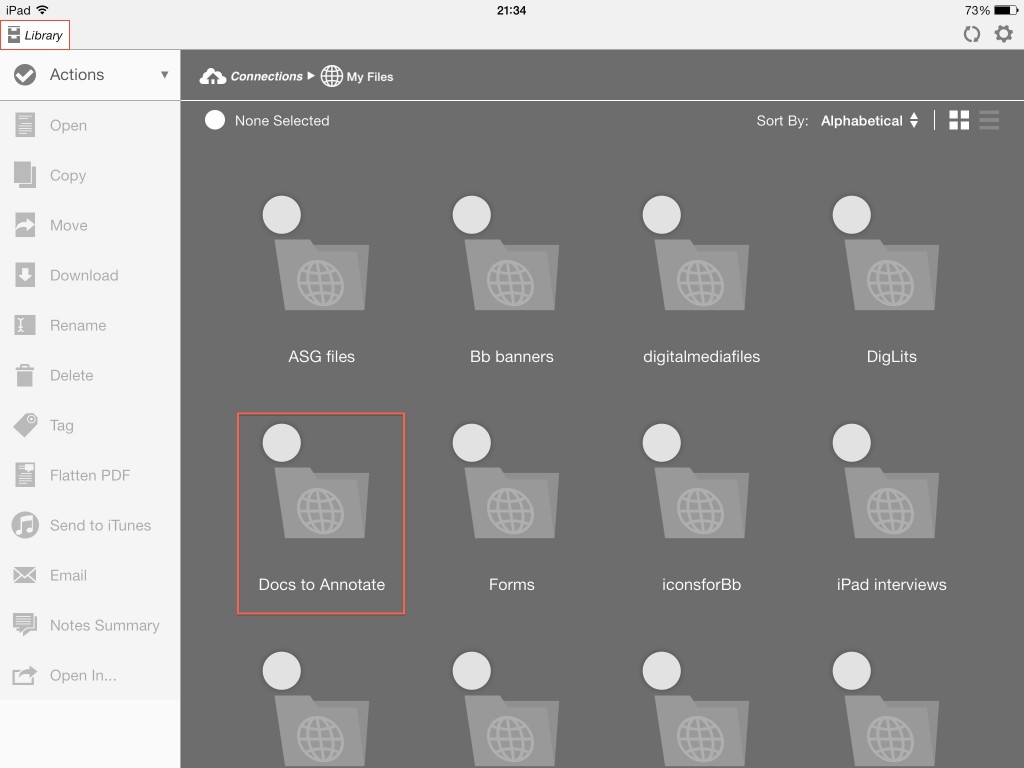
Access this folder by selecting the My Files file icon in the library and find the folder – in my case I created a folder called Docs to Annotate (NB: you cannot use iAnnotate to create folders in MyFiles). In the folder you will find anything which you might have added from your PC, in my case I have three PDFs to which I would like to add annotations.

Press on a PDF in order to download it, this will download a copy which will be stored locally on your iPad until you sync it back to My Files in a later step.

Step 3: Start annotating
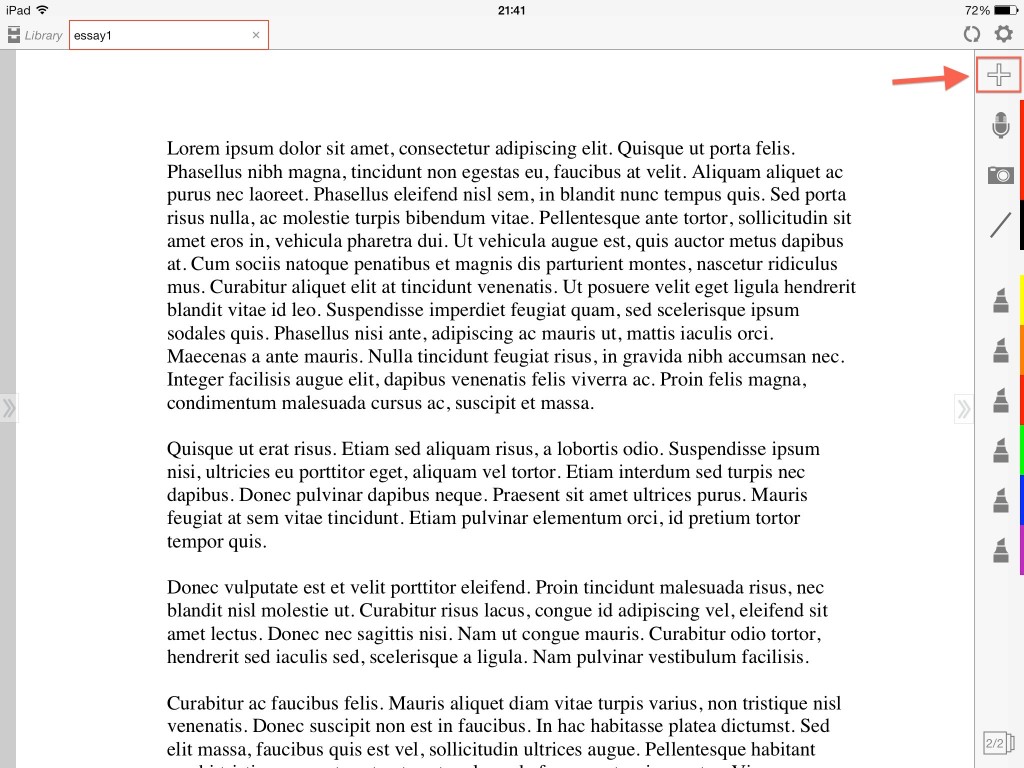
The audio annotation tool is not on the standard toolbar in iAnnotatePDF so if you would like to add it. Click on the + sign on the top-right.

This will bring up the annotation tool options, drag any tools that you would like over to the toolbar. Anything that you don’t want, simply drag it off the toolbar.

To add audio annotations press the Mic icon and the press on each area of the document which you want to annotate.

Step 4: Fastforward…The annotation is finished, but the file is huge, what can I do?
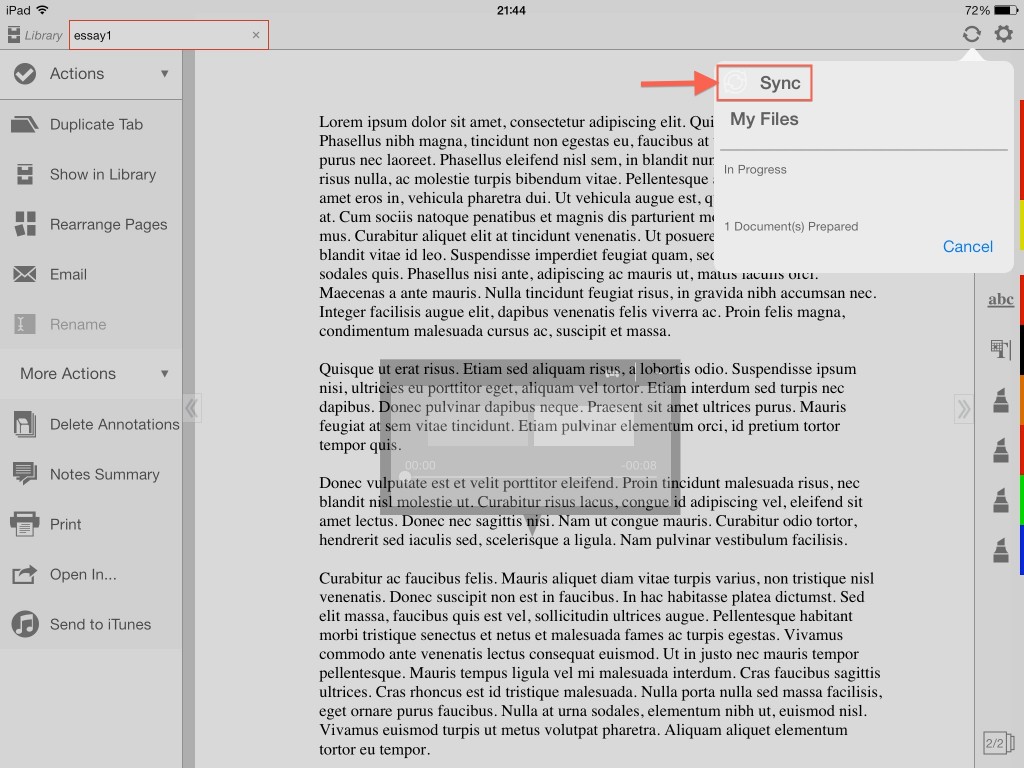
If you have three or more audio annotations, you can be fairly sure that the file will be too large to send by email. Fear not though you can sync it to your My Files area. Look up at the top-right hand side of the interface in the app, on the top-right you will see a red-circle icon with arrows; this is the sync icon.

Press on it and it will tell you it’s progress and let you know when your file is safely synced and saved back to My Files.

[In Goodreader App] Step 5: Add My Files in Goodreader
Goodreader is the swiss army knife of apps and it is really helpful for managing your files. Click on the connect icon which looks like a globe and then press the Add option and then select WebDAV server. Then add the same information which you added in iAnnotate above for My Files.


Step 6: Download/Sync the files which you would like to send
Once My Files is added it will show up under your Known Servers list. Press on it and select the Docs to Annotate folder in the list and click Download on the bottom-right. If you are planning to use this folder for a lot of file transit, then you can select Sync and then changes to the file will be synced when Goodreader is open and connected to WiFi.

You will be asked where you would like to keep the folder – the My Documents area in the app is fine.
Step 7: The sending part
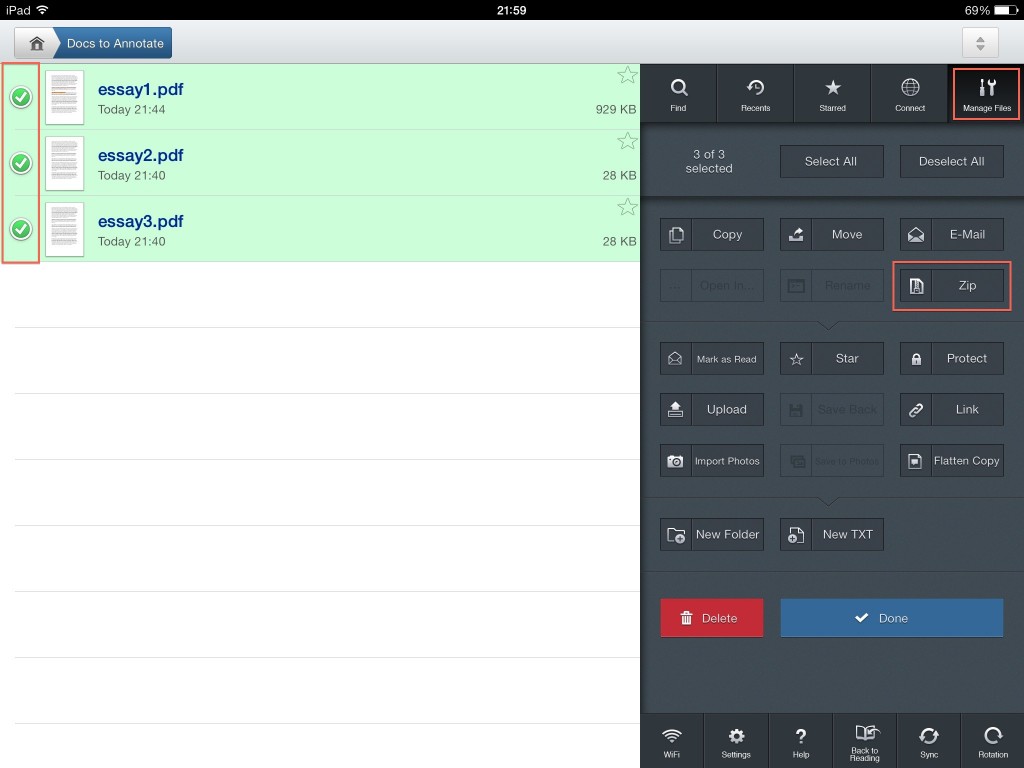
Press on the now downloaded folder in your My Documents area and then press on the Manage Files option and then select the files which you would like to send.

You can zip multiple files, using the Zip option and then you can E-Mail ‘said’ zip file.

The recipient of your files:
Remember: If you include audio annotations the person viewing/listening to the feedback document needs to open it in Adobe Reader [FREE] or Adobe Acrobat Pro. If your PDF includes only text-based annotations then they can view the document in any standard application which opens PDFs.