A guest entry

As I mentioned in my previous entry, I have a treat for you: the second guest entry on this blog! The text has been written by Textile Conservation student Emma Hartikka (also Finnish, so I get to promote Finnish know-how too!) who was on a placement with Zenzie Tinker. I hope you find the entry as fascinating as I did…

“A few years ago, two carpet samples from the University of Brighton Design Archives were conserved at Zenzie Tinker Conservation by Emily Austin, a Textile Conservation student at the time. She wrote a guest entry about the project.  Two other carpets samples from the archives were conserved at Zenzie Tinker’s again – this time by conservators Geoffrey and Jamie from the studio and me, a Finnish textile conservation student from Metropolia University of Applied Sciences and a summer intern at the studio. I will follow Emily’s lead and write another guest entry about the newly conserved carpet samples.

Both of the carpet samples at hand date to the late 1950’s and have quite bold graphic designs. One of them has a green and black geometrical pattern and the other a rotating pattern in three different shades of blue on a darker, blueish-green background. Their pile is wool and the back weave jute and cotton. The piece mentioned first is a sample of Axminster Body Carpet with the design “Royal Gobelin”. The pattern of the carpet was designed by Neville and Mary Ward and the carpet made by Tomkinsons Ltd. The second piece is a Wilton Body Carpet with a pattern called “Mandala”, designed by Audrey Tanner. This carpet was made by The Carpet Manufacturing Company Ltd. Both designs were recognised and awarded The Duke of Edinburgh Design Prize for 1958 and 1959 respectively.


Images (above): The “Royal Gobelin” carpet sample and its label before conservation.


Images (above): The “Mandala” carpet sample and its label before conservation.

The goal of the project was to do the necessary conservation treatments and remount the carpet samples in order to improve their preservation and use for research. The condition of these samples was relatively good, much better than the other two carpet samples previously conserved at the studio. Like the previous ones, these two had also been victims of a moth infestation. They had piles of moth droppings, such as casings and eggs, found especially between the carpets and the wooden panels on which the pieces were mounted. Luckily, the moths hadn’t done much damage here as they had to the previous two. There were only a few little spots where some woollen pile was missing. However, to kill any possible remaining ravenous moth babies the carpet samples had to go through freezing before anything else could be done to them.


Images (above): Moth droppings on the wooden frame and on the edge of the carpet sample.

The carpet samples were prepared for freezing by removing the old wooden panels and vacuuming the worst of the surface dust and moth droppings off. Otherwise the dust could be stuck to the textile fibres even tighter if condensed moisture dampened the textile during the freezing process. To prevent that from happening, the samples were also wrapped in acid-free tissue and polyethylene plastic as air-tightly as possible. The temperature of the freezing process must be low enough so that even the tenacious, more cold-resistant eggs are eliminated. Research has shown that -30°C is low enough to kill the eggs. Due to the unseasonably warm weather during the late summer, the studio freezer was only reaching -25°C, so a decision was made to freeze in two parts: firstly, 75 hours in -25°C, then 24 hours in room temperature and finally a further 75 hours in -25°C again. The day’s warm period in-between imitates a warm spring encouraging the eggs to hatch. The newborn, vulnerable larvae would be then killed by the second winter. It sounds kind of harsh but it can save the object!

The blue carpet sample had cotton tapes supporting the raw edges glued along the edges on the verso but the old adhesive was dry, brownish-yellow in colour and giving away. The cotton tapes were therefore removed. They gave away easily by simply pulling lightly. Then dried adhesive was scraped away with a spatula.


Images (above): The old cotton tapes were removed and the crusty, dried adhesive scraped off.

In some places the adhesive was still sticky and couldn’t be scraped off. Some solvent cleaning tests were done to find an effective substance for removing the remaining adhesive. A mixture of petroleum spirit and a solvent called Rhodiasolve proved to be effective to soften the adhesive enough so that it could be removed but would not penetrate deeper into the weave structure. The swab cleaning was performed successfully by conservator Geoffrey. His method of scraping off the remains of the softened adhesive with a round brush was simply great.

Image (above): The sticky adhesive being removed with the help of a solvent mixture.

After solvent cleaning, both carpet samples were vacuumed carefully to get rid of any remaining surface dust, moth bits and loose pieces of adhesive. The raw edges of blue carpet sample were fraying and had to be supported with cotton tape and blanket stitches along the edge. The other piece had more stable edges which didn’t need extra support.

Then it was time to make padded boards for the samples to be mounted on! The principle of the process was similar to what was done for the previous two carpet pieces. Two strips of Velcro tape were stitched both to boards and the reverse side of the objects. This gave a means of attaching the carpet samples to the boards so they could be easily detached if someone wished to take a look at the labels on the verso. Care was also taken not to cover the labels with Velcro or cotton tapes. Finally, the labels were protected by covering them with a piece of see through Melinex film.


Images (above): A padded board in the making and Jamie preparing the Velcro.

After conservation, the carpet samples are now cleaner, more stable and moth free. The new mounting system makes the research of them easier. They are now ready to return to the Design Archives to join the other two previously conserved pieces!”
Images (above): The recto of the green carpet mounted after conservation, and the verso of the blue carpet after conservation, before mounting.

On that note, I want to wish you all the best of Season’s Greetings as this year rolls towards its end. The Design Archives have a big year ahead in 2019, and I am hoping I will get a chance to write a little more about that in due course! So keep your eyes peeled…

Archival deep cleaning discoveries

At the end of January this year, we embarked upon an archival deep cleaning mission here in the Design Archives. Archival deep cleaning is not something to be taken on by one person alone but requires a minimum of two people – not only for health and safety reasons, but in order for it to be a practical exercise. We were fortunate enough to be in a position to be able to hire freelance conservator colleague Kristy Woodruffe to come in and help me – and more so for her to say yes to this rather laborious and time-consuming task!

Fast forward to now, and taking into consideration we have been working on the project on average a day per week, the two of us have made considerable progress. The dusting and vacuuming of boxes and shelves in itself is not something to get excited about, but while working through our collections aisle by aisle, we also came across some more actual objects in our care. As you will know, our collections are mainly paper-based, so ‘unearthing’ more 3-dimensional objects to add to our small collection of them was quite exciting!

They came in the shape of various sizes of wooden boxes with objects housed within. The boxes were a part of the County Council of the West Riding of Yorkshire Education Committee’s School Museum Service, and were used for educational purposes. They held within them some Council of Industrial Design’s Duke of Edinburgh Award winning objects, having been given the award for their good design.

The boxes hadn’t been looked into for quite some time, and Kristy and I took precautions by wearing masks and gloves before opening them. The crates were not suitable for archival storage, so we investigated what was inside and re-housed the materials in a more archive-friendly manner.

The very first box we opened contained within it plates and other pieces of miscellaneous kitchenware.

I personally have a real soft spot for these plates. I have memories from the big digitisation project I undertook in 2006, scanning and cataloguing the photographs and colour transparencies of the objects which had won the Duke of Edinburgh’s Design Award, all housed in the Design Council Archive. The digitisation project took place to celebrate the Awards’ 50th anniversary and I – for reasons unknown to me –  specifically fell in love with a 5×4 colour transparency we have in our photographic collection (catalogue number: DCA-30-7-1960-3-1) showing these plates (below).

The plates are called Fiesta and made from melamine. They were designed by Ronald E. Brookes and manufactured by Brooke and Adams Ltd. They were one of the eighteen designs winning the Duke of Edinburgh prize in 1960. It is so lovely to know we have these plates as physical objects too! They had some unknown sticky substance on them, so they were thoroughly washed and dried before re-housing more appropriately.

You might remember that back in 2013 we had two carpet samples from the Design Council Archive conserved. During deep cleaning, we made a discovery of two more carpet samples. Both of the ‘new’ samples were stored in one of the wooden boxes and were adhered on wooden backings. The carpet samples were mouldy on the carrier side and the samples themselves had evidence of moths. As we did back in 2013, they were take to local textile conservator Zenzie Tinker‘s studio for treatment. A textile conservation student Emma Hartikka on a placement at Zenzie’s studio has kindly written a guest blog entry about the work involved, so be on the lookout for that soon!

To mention another object we uncovered, I feel like I have to give the baby bath some airtime! The Ekco Gold Seal Superbath was one of twenty products recognised by the Duke of Edinburgh Prize in 1958. It was designed by MO Rowlands MSIA and manufactured by Ekco Plastics Ltd. Below you can see the digitised black and white photograph we have of it in the Design Council Archive online (catalogue number DCA/30/7/1958/4/1). The bath comes with wooden legs to stand it on. One of the reasons for wanting to mention it is that our Archivist Sue Breakell has a cream-coloured version of this design in which she was bathed in when she was a baby, so there is a lovely personal connection to it within our team!I am especially fond of the ‘Gold Seal’ sticker which still remains intact at the bottom of the bath.As I mentioned before, we do not hold many 3D objects in our care here in the Design Archives and are by no means ‘known for’ having them, so it is very refreshing to see these, and other, items in the flesh – especially after so many years of working with (mainly black and white) images of them!

Salvage and Emergency Planning

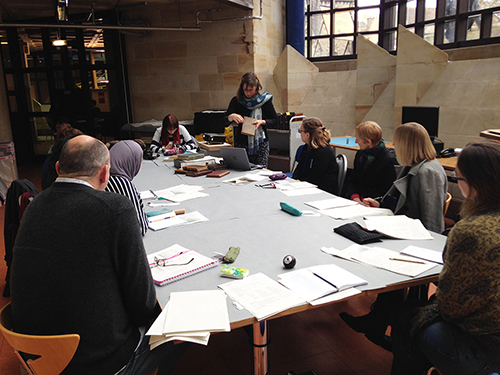
Last week I had the fantastic opportunity to travel to Birmingham to attend a 3-day course/workshop organised by Historic England, in collaboration with the West Midlands Fire Service. The course was titled ‘Salvage and Emergency Planning’ and was made up of practical and desktop exercises, as well as lectures, on all things salvage from museums, historic houses and archives in case of a fire or flood. The course was taught by Charlie Harris (Fire Safety Adviser for Historic England), Beth Stanley (Senior Collections Conservator), Christine Murray (Preventive Conservation Adviser for the National Trust), Fiona Macalister (Independent Conservator) and Nick Hunt, Mark Ralston and Clive Williams (all from West Midlands Fire & Rescue Service).

The course was centred around the importance of developing a good relationship between a museum, archive or historic house and their regional Fire & Rescue Service in preparation for an emergency event taking place. This relationship should involve working with the Fire & Rescues Services to, in effect, make them aware of the salvage and emergency plans in place with a collection. Obviously great focus was also given to salvage procedures and the treatment of water damaged items in particular.

We started out with the fire side of things with Nick, Mark and Clive all giving us valuable ‘inside’ information about the way in which the Fire & Rescue Services operate. For example, different members of the team can be identified by their helmets. The hierarchy goes from Fire Fighter, Chief Commander, Watch Commander to Station Commander. We also had discussions and practices on more general (and often forgotten) health and safety procedures. I thought this was an excellent aspect of the course, as when an incident happens in an archive/museum/historic house situation, it is important for the salvage teams to have clarity on who they need to speak to and liaise with. Fire & Rescue Services’ first call is to save lives, but they will help with the salvage of historic and archival materials.

One of the most valuable and eye-opening exercise was to experience first-hand what fire fighters face when they enter any building. The house in which we did all our practical exercises had been set up as a historic house with various pieces of furniture, books, paintings, crockery and archival materials. We entered the practice house in groups, in the pitch black, with smoke (‘club smoke’ in this instance!) surrounding the place. We went up and down stairs with zero visibility to attempt to find the fire, which ended up being located on the top floor of the 3-storey training house. It was incredibly disorientating, confusing and scary – even in a practice situation. I had massive respect for the Fire & Rescue Services before, but this has increased tenfold after this ‘hands on’ experience.

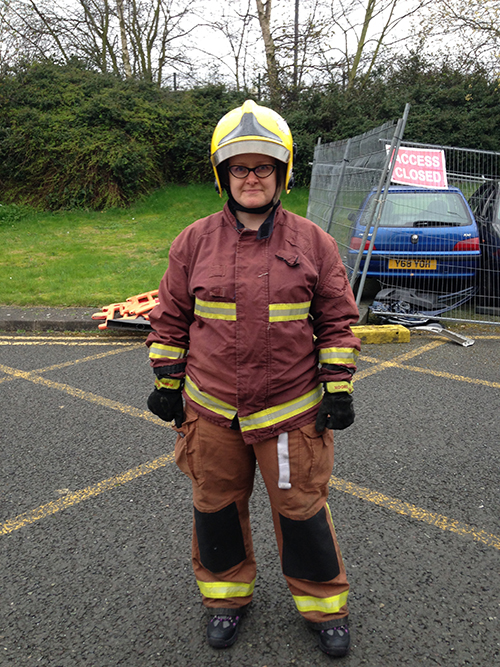
And yes, we were kitted up with the gear…. Who says conservators don’t get to wear uniforms?

In our fire training instance, one person was unaccounted for, so saving a life became the priority for the Fire & Rescue Services. Thankfully, they were rescued unharmed… if a little floppy.

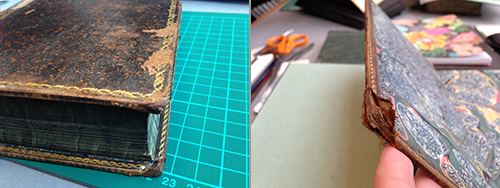
The other main aspect was going through and practising various flood, burst pipe and other water-related -scenarios – getting rather soaked in the process! The water exercises were an absolutely priceless training experience – using tarpaulins, various pipes and a massive selection of other materials to channel water away from the object(s) at risk. For example, working in teams to resolve the best way forward in a running-water-gushing-onto-your-priceless-historic-bookshelf -situation was very rewarding, but also very challenging. The panic sets in, and did so even in a training environment! The practice run also highlighted the importance of one person taking the lead, but while doing so involving all other members of the team in decision making and problem solving. Physically practicing emergency and salvage scenarios also can not be stressed enough!

Having the knowledge of the Fire & Rescue Services’ staff structures is helpful, but what is glaringly obvious is that the staff in an archive/museum/historic house needs to have their emergency staff stuctures clearly allocated if the worse was to happen. These usually include, in hierarchical order from ‘top’ to ‘bottom’: Incident Coordinator, Communications and Welfare Officer, Documentation and Inventory Officer, Quartermaster, Salvage Teams Coordinator, Recovery Teams Coordinator and Salvage Teams (wet and dry). These teams can usually also include Observers, who tend to be external people or people outside of the immediate work unit. Obviously with a smaller team this can become problematic, so this means engaging and training other colleagues and/or ‘external’ people in the specific salvage program and plan.

Every member of a salvage team should know – and practice, then practice again – the role they are responsible for in an emergency situation. However these roles can, and will, be fairly fluid. As you can imagine, it is very easy to panic, so team work and looking after your team members’ welfare, while not forgetting your own, becomes incredibly important. Its is essential to have clear plans on priority items (aka ‘grab plan’). This information should be printed and laminated, so it can also be passed on to the Fire & Rescue service on site. When items begin to come out of the secured premises at which the fire or flood has taken place, clear labelling on where they have come from, documentation on the Incident Coordinator’s exchanges of information with the Fire & Rescue Services and who enters and leaves the building and at what time are very important.  We were told the Fire & Rescues Services, once a relationship has been created, are more than happy to be instructed on the correct handling of items too, so this should not be shied away from.

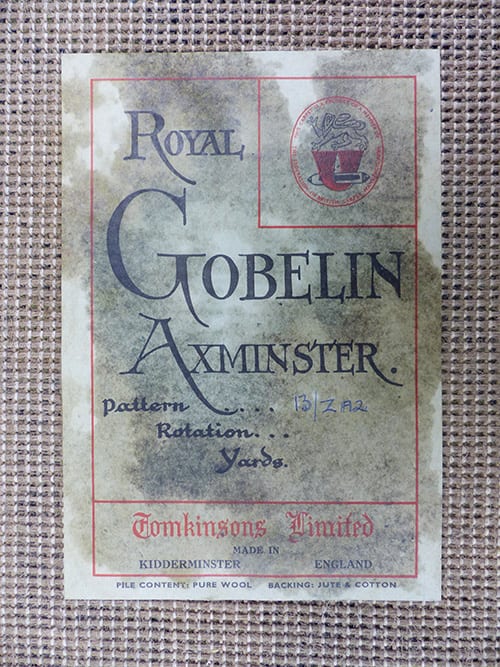
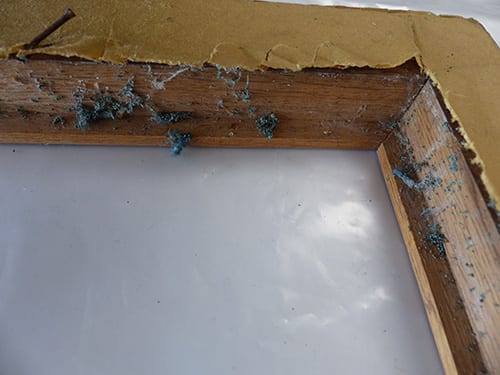
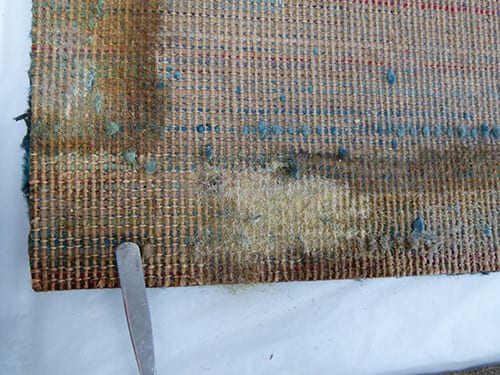
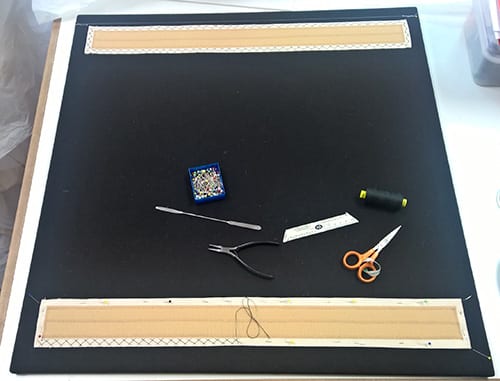
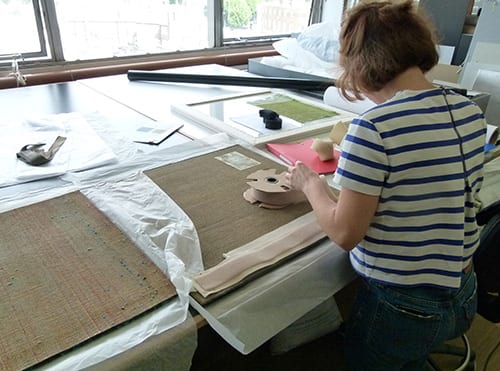
The response to a situation includes the emergency conservation and preservation procedures. The Salvage Teams, with direction from the Salvage Team Coordinator, lead on the wet and dry recovery of items, separating these as they come out. When items have become wet, the importance of being able to start to ‘deal with them’ quickly can not be stressed enough, as mould can very rapidly become an issue. We practiced hands-on techniques and were given tips and guidelines on how to deal with wet items varying from photography and books to taxidermy.

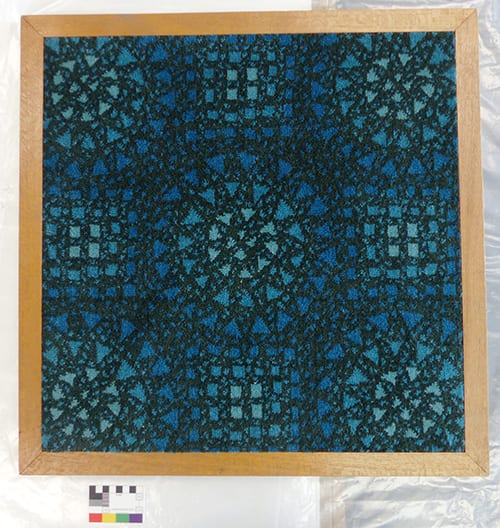
Wind tunnels were created for books to dry by using tarpaulins, plastic crates and fans, while other items such as rugs and cushions were left to air-dry.

There are so many things I learned on this course, but this blog post will have to end somewhere! I can’t recommend the course enough for anyone who works in an archive/museum/historic house: it is an incredibly eye-opening and very educational experience on so many levels. I am pretty sure my colleagues and friends now roll their eyes a little everytime I start a sentence with ‘when I was on the salvage course….’


PS In terms of fire prevention – test out whether your extension lead can handle all the equipment plugged into it with the socket overload calculator provided by Electrical Safety First online. Go ahead, give it a go! It can get a little terrifying though.

Book Conservation Skills for Paper Conservators

Within our collections, we have various books that are part of the archives we hold. Most notably FHK Henrion‘s library from his studio, which includes books in several languages on a variety of different subjects. Obviously books present a whole different conservation and preservation challenge, so…

… back in August this year I applied for a Continuing Professional Development grant from a funding pot held by the Anna Plowden Trust / Clothworkers’ Foundation for awards towards CPD for Conservation Professionals. In September I received an email with a decision that my application had been successful, and that the organisations would help with the cost of attending a ‘Book Conservation Skills for Paper Conservators’ workshop held in the National Library of Scotland in Edinburgh on the 14th and 15th November. In addition to this grant, I was also supported by the Design Archives to attend the workshop – so off I went to bonnie Scotland last week to learn!

First I must confess I arrived at this workshop with next to no knowledge of book conservation processes. I have a basic understanding of bookbinding techniques and some idea about the different types of bindings out there, but have never attempted or discussed book conservation in any shape or form. To be completely honest with you, the thought of it has always utterly terrified me as I have always felt there were simply too many things to consider when it came to the treatment/conservation/preservation of books.

We were a group of 10 eager people from various institutions from all ends of the country with varying professional backgrounds, including a Masters student from Cardiff University and a lady who came all the way from Kuwait to attend the workshop. The course was led by freelance Book Conservator Caroline Scharfenberg ACR.

We began by Caroline running us through a condensed history of bookbinding, giving us a general idea of the timeline for different types of bindings and materials, as well as the vocabulary used by binders and adopted by conservators. We went through the different types of damage you might come across including physical, biological, chemical and mechnical. We also talked about the different tools, materials, techniques, handling and appropriate ethical considerations to think about prior to any ‘action’.

We were given a selection of books from the National Library of Scotland’s collections to choose from to assess. We talked through what an assessment and a treatment plan should consist of whether this was done for an individual volume or a collection of books. Caroline shared with us her own documentation as an example from which we could create ones suitable for our own and/or our institutions’ needs. The most eye-opening thing in relation to the documentation process was to be given parts of Robert Espinosa’s structure outline for book description documentation – I am sure you would agree, this is rather extensive! The book cover structure and its text block always need to be considered separately with any treatment plans, making the process twice as difficult – or fun, if you’re that way inclined!

I wanted to share with you just one of the processes we went through at the workshop: consolidation and stabilisation of a damaged corner. The book I was working on from the Library’s collections was entitled ‘Pinkerton’s Enquiry into the History of Scotland Preceding 1056, Vol. 1’.

The process started by assessing the damage to the text block and the covers and listing all visible damage carefully, while documenting the original state of the book with photographs. All damages listed needed to be analysed and explained in terms of how they affect the book as a whole. It then needs to be thought out if treatment is absolutely necessary and what the alternatives might be. The final decision on how to proceed needs to be a joint one by all involved – this will lead to a better understanding of the processes by everyone. The exchange of knowledge also allows, and leads into, better treatment decisions.

Below on the left you can see the original condition of the book cover and corner in question. By following instructions from Caroline’s demonstrations, the corner leather and book board were cut with a scalpel and lifted. This is done by going about 5mm beyond the extent of the damage. The book board inside was sliced inwards in three places to enable its consolidation.

After lifting the corner, the book cover leather needed to be consolidated with Klucel G, also known by its rather less fetching name of hydroxypropylcellulose. Klucel G is a consolidant which forms a gel and is used by painting it on damaged areas with a brush. The lifted leather corners were painted with Klucel G with a thin blotter to separate it out from the text block.  This was left to air-dry for around half an hour. When the Klucel G has dried, pieces of cling film were placed undeneath the leather to screen it off from the board. The next step was to use a 10% wheat starch paste with a thick consistency to consolidate the board (image below).

The paste is worked into the board and brushed in as far as the board is open to reach all the nooks and crannies. It looked very gloopy (and a tad scary!) at this point, but this is then left as it is between 3-10 minutes – with care taken to not get any of the paste on the leather. After this, the boards got pushed together any excess paste was wiped off while shaping the corner back to its original shape.

This gets clamped down anywhere from 10 minutes to an hour with the cling film still in place to avoid contact between the leather and the wheat starch paste. Once the paste has soaked into the board thoroughly, the corner was left to air-dry for a few hours.

When fully dried, the leather and the board were again re-united by using EVA glue (ethylene-vinyl acetate) and left to dry thoroughly for an hour or so, first with clamps and then without. And there we have it – a stabilised book corner! Again I must point out the time conservation treatments can take: to consolidate one corner of a book, including all the drying times, can take over 5 hours.

It was interesting to think and discuss the ways in which book collectors, and ‘everyday book users’, view books: what matters the most is the content of the book with the bindings coming in second. The conservation perspective is to think of the book strucure being a part of the information contained within a book. I find the difference between these points of views fascinating and it is something I come across on a day to day basis at work too – the researcher being only interested in the content when my focus is mostly the condition of the paper on which the information sits. I can now, perhaps with slightly calmed nerves about the processes, extend this to include books.

The Archive of Willy de Majo Pt III

As a third addition to the de Majo archive’s story, I thought I would write a post about the more non-conventional items the archive holds. In my previous post I mentioned some of these items that did not go through the freezer process but I wanted to show you some more of the kinds of things which do not exactly fall under the ‘usual’ finds – at least not here in the Design Archives!

One of these is this collections of matchbooks. One of de Majo’s various commercial clients was Cronmatch. We have samples, documents and original designs from his work with the company, but presumably he collected these various matchbook samples for his own research purposes, as this particular collection consists of items not designed by him. The sorting process for these was interesting… Various copies of each matchbook were found and they needed to be joined up (I wanted to say matched…!) before cleaning and boxing them. Three copies of each matchbook design were kept. A lot of these particular matchbooks in the photo below did not have actual matchsticks attached to them, but I also came across various that do. This proposes the question of how to deal with this type of object, as they present a fire hazard. After discussions with our archivist Sue Breakell, our approach to them is to cut the igniting match ends off, but not before photographically documenting the item as it was found originally.

Another challenge was within some of the work de Majo did with the confectionary company Millar. The materials I came across while sorting varied from original artwork for designs for Millar vans to individual sweet wraps, of which there were many! The sorting process for the sweet wraps stepped up a gear and was rather more challenging than for the matchbooks, as there appeared to be what felt like hundreds of them in various packets and pockets.

It was one thing dealing with the wrappers as they were, empty and flat, but quite another when the wrappers actually contained the sweets within them! Obviously these could not be kept in the archive as they could raise the risk of pests and contamination of other items. After yet another discussion with our Archivist, I cut out the Millar Super Mints from their original packaging, disposed of the sweets and kept the original wrapper with the paperwork the packet came with.

While the mints actually looked like they could potentially be edible after all these years, the next example I wanted to share with you really did not. I came across this rather beautiful winter-themed gift box for Millar Chocolate Eclairs – again with original sweets still inside.

With this one, we obviously wanted to keep the gift box in the archive. As for the sweets, we carefully unwrapped and kept three of the wrappers while disposing of the rather hard and not-at-all-what-a-chocolate-eclair-should-be -looking sweets inside….

Another, and to me the most surprising, item to show you as an example is from the work Willy de Majo did with and for the drinks company Clayton. Obviously liquids in any archive is a no-no, so what can you do with archive objects which hold liquid within them?

Glass in itself is not a problem when packaged properly, but obviously the liquids had to go. It was a rather interesting experience to open these bottles. Amazingly the Peppermint Cordial still smelt very much of peppermint, but I can report to you that the lemonade had lost all of its lemon smell over the decades, despite being in a sealed, unopened bottle. Amazingly though, the lemonade still had a little bit of life left in it as it let out a little fizzy sigh when opened. The liquids were decanted and the bottles washed and dried thoroughly. As Sue and I were contemplating the process, the thought did cross our minds whether these liquids could have perhaps been of interest to someone in science and I still ponder on what these might have tasted like had someone dared to try them…

Last but not least, I mentioned before about the various photographic materials within the archive. These were separated from the papers and sorted by client and/or kept in the original packets in which de Majo had them. I wanted to share with you one of the more deteriorated (but strangely beautiful) items I came across. This was within the materials in relation to Biro – one of de Majo’s clients for which we have a lot of related photographic material. It is a 5×4 black and white negative of a Biro pen pack (we also have a print version). Not having much knowledge of photographic conservation and the various issues relating to it, I do not have a clue about what has caused the negative to deteriorate in this manner. If anyone can shed any light on this, I would very much appreciate it!

The verso of the negative has this ‘bobbly effect’ to it when looked at closely:

While the recto looks like this:

One of the reasons I wanted to share with you this deteriorated negative was that at the time I came across this photograph of the frozen sea outside Helsinki. The effect looks remarkably similar to the surface of the negative – wouldn’t you agree?

On that note, I will just let you know that the fourth and final part of the de Majo story should be coming along soon, so do look out for the conclusive ‘chapter’!