
Transparent papers
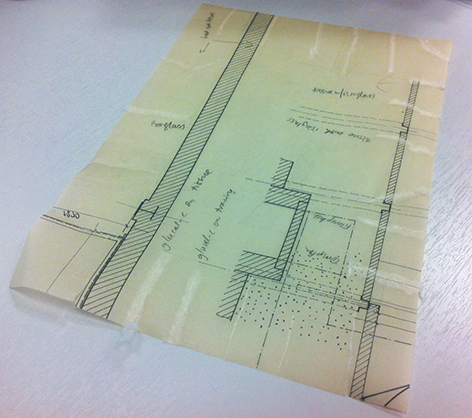
As my work over the past few years with the posters in the Icograda Archive is coming to an almost-but-not-quite-there-yet -end, I am starting to embark upon another long-term project working with the archive of James Gardner, who is best known for his exhibition work. This process started at the end of last year with an initial condition check of the materials.
The Gardner archive contains within it a large number of plans and drawings on transparent papers. As I was going through the materials I came to the realisation that I do not have much knowledge or experience with them. Needless to say, I was extremely keen to learn more about their structure, conservation treatments and behaviour in general. After reading a few articles online and getting increasingly confused about the variety of information on offer, to my joy I discovered a course I could attend to get some hands-on experience on the subject.

On the 13th and 14th of October 2014 I attended a workshop organised by International Academic Projects at the London Metropolitan Archives. I was successful in obtaining a bursary towards the cost of the course from the Clothworkers’ Foundation in addition to being supported by the Design Archives. I thought I would write up my notes for a blog entry to those interested!
The two-day workshop was taught by Hildegard Homburger, who has a long history of working with transparent papers. She is a fantastic teacher – sharing her successes alongside her failures and ‘experiments’ with transparent papers over the years. The attending group of eight people was very international in that The United States, Finland, Norway, Ireland and the UK were represented. On top of the workshop’s learning material, it was fascinating to discover and discuss the different resources archives from elsewhere have and how they operate.
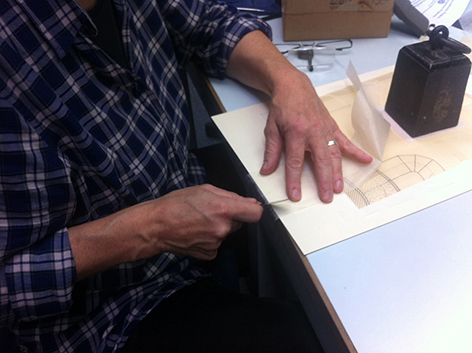
The two intense but utterly enjoyable days covered everything from the different types of transparent paper to their history and structure. From the hands-on elements of the workshop, the first was the chance to practice the different tear repair methods for transparent paper. The approach Hildegard has adapted as best practice is to use isinglass with a fibrous Japanese tissue, leaving the fibers of the repair tissue ‘loose’ around the the tear area, adhering only along the tear. Isinglass is a dried substance obtained from the swim bladders of sturgeons and in book and paper conservation, this substance is mixed with water to create a type of repair ‘glue’. This method requires a very specific and quick application of the isinglass and the tissue. Experimenting with it for the first time was challenging; I practiced on several of the tears on the sample paper with varying degrees of success. Granted, my tissue strips were not as neat or thin as the expert’s, but this was a great opportunity to try and try again and to have someone to ask about the process as and when things went wrong.
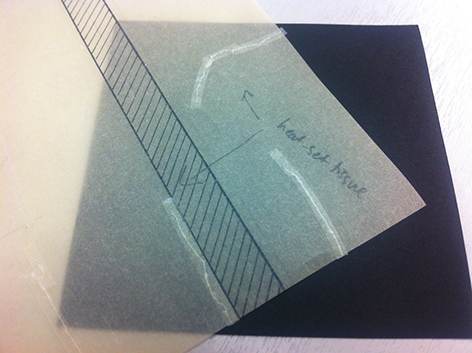
Alongside isinglass, we also tested out Klucel G. Wheat starch and methyl cellulose can also be used but these have a higher moisture content, therefore taking a longer time to dry, increasing the risk of cockling around the tear area. Using heat-set tissue obviously does not create a bond between the fibers inside the tear like brushing isinglass or Klucel G does and might give the repair a more ‘abrupt’ appearance, but for its ease of use I think this method should not be discounted entirely.
Mending and repairing of transparent papers should take place before humidification and flattening. This way the formation of visible gaps between the tears can be minimised, as the paper expands and contracts in contact with moisture. Lining can be applied by use of heat-set tissue (not with impregnated papers however) but the removal of this could create a nightmare for future conservators. We had an opportunity to line a piece after repairs by using the wet method, which was a highly valuable experience to have.
We had an interesting general discussion about items that have a large number of small tears along all edges. Repairing these tears individually would take a very long time and our ‘debate’ was focused on the ethics of simply cutting the torn edges off with a scalpel. The reasoning for doing seemed commonsensical; how many climates has the tracing paper already gone through in its lifetime? Can you argue that its current dimensions are its original ones? A possible decision to not remove original non-conservation quality edging tapes was also considered, as they would help keep the edges of the item from tearing in the future.
Old non-conservation quality repair tapes should, however, be removed. Any adhesive residues left behind by the carrier can be easily removed with ethyl acetate – this does not leave tidemarks on transparent papers due to their dense structure. As a more mechanical approach, the crepe rubber also works well.
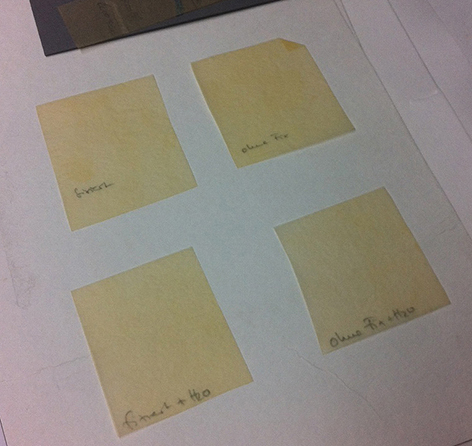
For me the most fascinating part of the workshop was learning about the complex humidification, drying and flattening procedures. In contact with moisture, transparent papers are extremely mobile – they can expand and contract up to 2cm during a humidification process. When repairing, buckling can very easily – and extremely obviously – form around the repair if the object is not humidified and flattened afterwards following the right procedure. A flattening time of a minimum of four weeks is advised using the hard-soft sandwich method taught by Hildegard. We also had the chance to dye repair papers and line a piece by using the wet method, as well as discuss the best practice for mounting of transparent papers.
When looking at the different types of transparent papers, it is quite difficult to identify tracing papers from vegetable parchment. I was particularly interested in the easy-to-identify diazotypes with their one-side lacquer layer, as the Gardner collection has a number of examples of this type of paper. From the selection of the samples I have come across, it is hard to believe these papers were originally blue. They turn yellow and various shades of brown with oxidisation and can begin to let out alkaline off-gassing. If the sensitised layer is removed, the paper will become blue again even after discolouring.
As I mentioned before, prior to attending the course I read a selection of papers online – written mainly in the 1990s. Comparing the methods tested and used by the authors to the methods taught by Hildegard are, at times, staggeringly different. During the workshop we also discussed how in the 1970s/1980s the removal of the impregnation of transparent papers with a solvent bath was commonly practiced. This changes the appearance of the paper from transparent to opaque and in 2014, this seems a shocking treatment to perform.

One of the most valuable things of the two day workshop, without taking into account the obviously rich content, was the way in which Hildegard teaches. She ran through all possible scenarios in a very clear and concise manner, without pushing for a one-and-only correct approach – letting us go through the motions ourselves to figure out which approach made the most sense. I would imagine that in the end, a lot of the us partaking in the workshop came to the realisation that the methods adapted by Hildegard are, in fact, the best for transparent papers – even if the vegetarian me might feel a little strange about it, it’s isinglass all the way!
Now where are those rolls of Gardner’s plans and drawings….
Nice work, thank you very much!