This is only for the the brave of heart.
Do not mess about with your original images.
Make a copy of the images you want to reduce and put them in a folder on your desktop.
Open Terminal app (space + terminal)
Type cd and a space then drag the folder with your copied images onto the terminal to save mistyping the path to the folder.

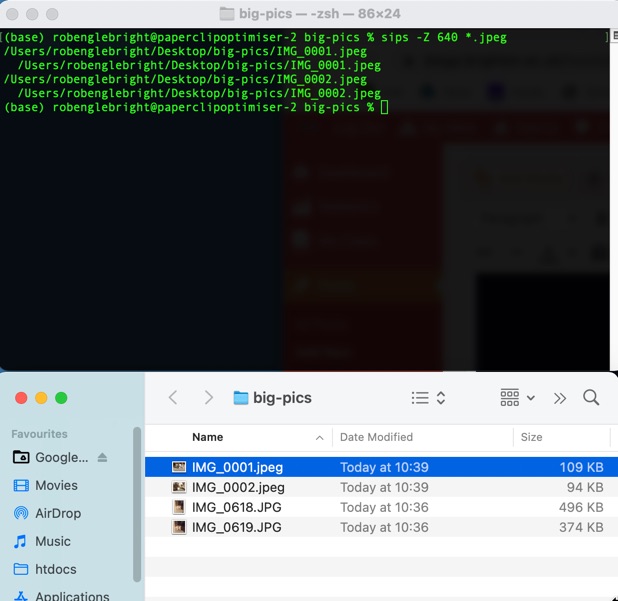
it should look something like this,
hit return.

next type
sips -Z 640 *.jpeg
the -Z says keep the image aspect ratio
the 640 says reduce the longest length to 640 pixels (you may choose a different length- eg 1000)
the *.jpeg says do this for any file in this folder with the extension .jpeg (if your images are .jpg use .jpg instead)
hit return
The files in the folder have been reduced in size- in this case the 3Mb file IMG_0001.jpeg is now just 109Kb


In a related question, do you happen to know what the magic words are to resize an image from 1920×1080 to 720×576? That would be some dark arts if you did?
yes
if you use the plain -z (little z) you get to pick precise height and width… which can mess up the aspect ratio hence the normal use of -Z (big z) which maintains aspect ration and just sets longest dimension.
So
your example 720×576
sips -z 720 576 *.png (or *.jpg, or *.jpeg) for a portrait image
or
sips -z 576 720 *.png for a landscape
-z [height] [width]
There are a whole bunch more tags, and flags to add – if you search for macOS sips it should return some useful results