
#12brightapps Day five – iMovie
Welcome to Day Five of 12brightapps – our app today – iMovie
What is it?
iMovie is a robust iOS version of the classic Mac software for video editing.
What?!?!? I’m on Android.
We aren’t deliberately being mean, if you’re on an Android device, we suggest Video Maker Pro Free – The activity will work with that app as well. Although, you’ll be a bit more on your own about how to make the app do what you want.

What can it do?
iMovie is a very robust and easy to use video editor for iOS devices. Many times you shoot a short video for class, or record a students presentation, and want to do some simple trimming and text additions to your video. iMovie is a great tool for that.
iMovie (and Video Maker Pro Free) also do a great job at making slide-shows with text and even audio, out of still images. Document your class/event with your camera app, and easily import the photos into iMovie, add text and even a backing soundtrack to export a video-slideshow of your event.
Download it now.
- Open the App Store, search for ‘iMovie’ and download.
(Or open the Googleplay and search for Video Maker Pro Free [or really just click that last link]) - Once installed, launch iMovie, and if you’re asked, allow iMovie access to your camera roll and camera and microphone.
10 Minute Task:
We may have given this away in the “What can it do” section, above… We’re going to make a winter-holiday-themed slideshow with iMovie, and… It’s all about you. That’s right, this will be the best and most narcissistic video-slideshow that you will ever make.
- First we need material. So, using your camera on your mobile-device start shooting a few ‘selfies’. Make one a very happy face, make one a very sad face, make one a particularly egregious duck-face photo (you know the type), and make another of your natural expression. Take as many more as you’d like.
- Once you’ve shot the selfies, let’s open iMovie on your device.
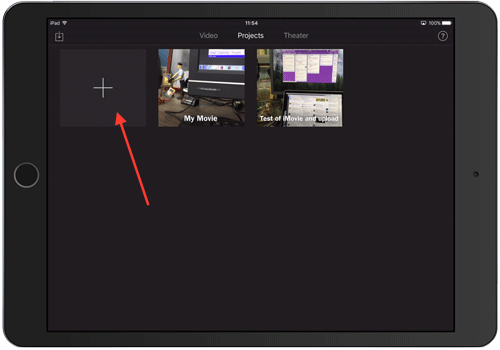
- Click the + symbol to start a new video project.
- Click on Movie (as opposed to Trailer)

- Choose the theme (transitions, look and feel of the project) or just leave it ‘Simple’ and click Create

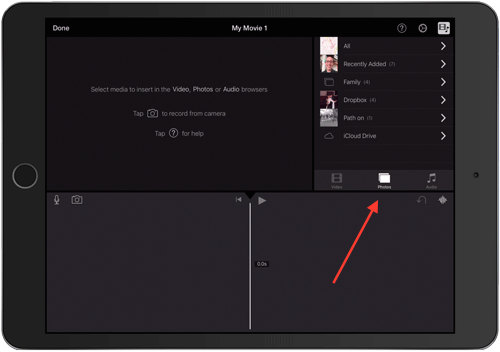
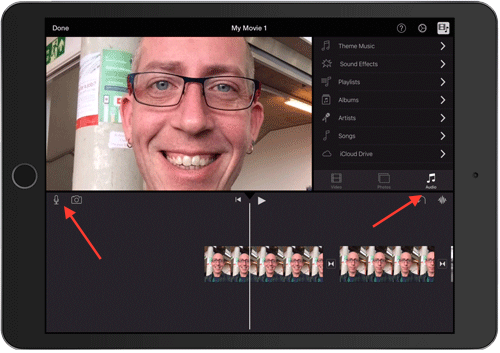
- Let’s find the photo library. The top left is your ‘viewer’, the top right is your library, this is where you would find your video, photo or audio file libraries. The bottom area is the timeline. Choose “Photos” to open your camera-roll library.
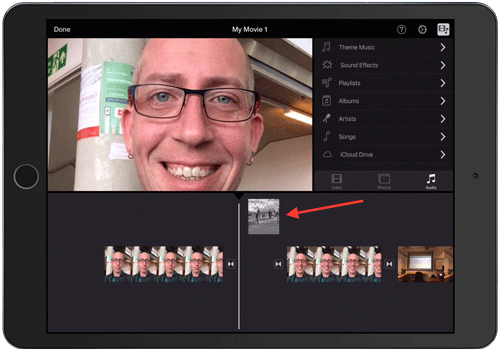
- Find your selfies in your library, and touch them. They should automatically be added to your timeline.

- Don’t despair… You can click on a ‘picture’ in the timeline, and drag it to a different place in your timeline. So the order doesn’t matter yet…
- Now it’s time to add some audio to your video-slideshow. You can either find some music in your iTunes library or add a voice-over by using the built-in mic function.
- Once you’re satisfied, click on the “Done” button in the top left corner of the screen, and you should see this window appear.
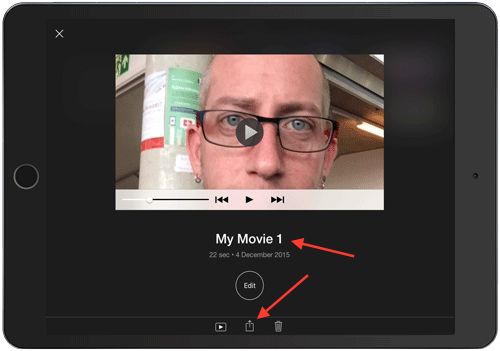
- Click on My Movie and you should be able to edit the text. Call it something like “Your Name’s” Emotional States During the Holidays. Then click on the ‘share’ icon in the center middle.

- You can share your video to other apps you may have installed, or save the video to your Camera-roll or iTunes or iCloud Drive account.
And Finally…
What do you call a little lobster who won’t share his Christmas presents?
Shell-fish.
PART 2:
Discussion Board and/or Twitter
Try to think up ways that iMovie (or Video Maker Pro Free) could work for you in your classrooms and lecture theatres? How would you use it? Recording student-presentations? Oral-Exams? Short video demonstrations that you can use to “Flip” your classroom?
PART 3:
Further Task(s)
You can record directly into iMovie, and choosing the ‘camera’ icon, start recording directly to a time-line. This can be great, if you want quick recording and easy manipulation before saving and sending a video to students, colleagues, or if at home, ‘Crazy uncle Eddie’.
If you have enough ‘random’ photos and videos on your device, using the “iMovie Trailer” function is a great ‘drag-and-drop’ way to make a frankly quite professional looking trailer about your ‘event’.
Useful resources
Here are a few useful links:
John Scotland’s iMovie tips and tricks. (YouTube)
Flippedinstitute.org – Mobile Video in the Classroom (PDF)
Animoto.com – 6 Best uses for Video in the classroom (Commercial app product, but good advice, none-the-less)