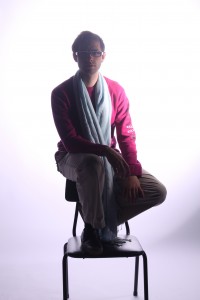
Monday 10th November
Setting up your camera for a shoot:
- It is best to use a RAW file not j.peg because it allows you to export in a larger film size, it also produces a better quality, has a greater colour depth and the resolution in relation to grey tones is better.
- ISO needs to be at 100 due to amount of flash that will be present
- White Balance should be set to flash
- Shutter speed can be at either 60 or 125
Using the light meter:
- Make sure you have entered the ISO you have set on your camera
- If using your own lights then set to Flash synced
Lighting:
- In order to have control of the picture you need to set your back lights so that they don’t escape around model
- To test this take a picture with only back lights (the result will be a silhouette)
- Once this has been checked you can then add front lights
- You can use soft lights which are nicer the skin and give a more even surface
- Alternatively you can use hard lights which pick up more shadows however are not so kind to the skin
I feel this session went really well and i really enjoyed learning new skills. As i am a novice when it comes to photography i am really interested in gaining experience and the knowledge needed to create a really strong shoot. I really liked to use the extremes of either a lot of light or hardly any at all. The crisp white background really appeals to me in the same way as a black back drop creating a small but really detailed picture does too. Overall a really insightful and fun day.
Its strange how exciting the sense of control you get makes you feel when being the photographer of a shoot, although due to my inexperience my comfort levels are definitely not as high as I hope they will be in the near future.

