For my shoot I looked into the stereotypical people who support each party and this is what gave me inspiration for my styling for the shoot. It also gave me inspiration for the locations of each shoot also.
Author Archives: Georgina Lowe
Diversity – Second Concept
I decided to rethink my initial concept after my unsuccessful test shoot and tutorial with my tutor.
I began looking into the different political parties and realised just how diverse they were.
I started looking more in depth about their policies and their target audiences. I also researched why they used the colours they do so I could incorporate these factors into my photography.
Diversity – Body Dysmorphia: First Shoot
Diversity – Artist Research: Cindy Sherman
The final artist I looked at was Cindy Sherman, because in some of her work she pretends to be different people. Another piece of her art – called Untitled A – looked at the process of turning one character into another. I thought this was an interesting topic because it slightly fits with my concept of body dysmorphia.
Diversity – Artist Research: Bart Hess and Lucy Mcrae
I then went onto looking at Bart Hess and Lucy Mcrae’s collaboration pieces. Their artwork captured my attention because its so unique and futuristic but also so simple. Their work was inspired by their interest in genetic manipulation, and how the idea of beauty will keep changing. This inspired me in how I wanted to take my photographs and still keep it simple.
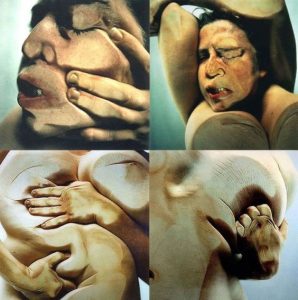
Diversity – Artist Research: Jenny Saville
Diversity Now! Initial Concept
I decided to start looking into body dysmorphia for my concept because its a very big thing in the fashion industry. I wanted to look into this topic because theres a variety of different cases – not all of them are the same. So I thought this would be a good topic to look into and focus on.
Final Outcome
Print on Paper – Second Experiment
I then tried to print onto my paper again, this time in colour.
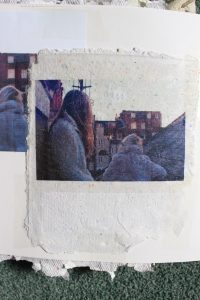
I wanted to try this experiment again because it worked so well the first time. However, I wanted to see what it looked like when I printed in colour. Initially I was a bit cautious because my hand made paper was quite thin and fragile. But I trimmed off one side of my paper so the end of the paper couldn’t get stuck and rip it. I was very impressed with the results, they turned out very successful and still kept in theme with my initial concept.
Below are some of my images.
Iron On Transfer Experiment
I then developed the tape transfer idea into ironing my photo onto my paper.
I did this by printing my photographs onto iron transfer paper. Then when my transfer had set, I then ironed my transfer paper onto my hand made paper and was surprised to see it actually worked! Although I had to reheat my paper occasionally because I didn’t iron it on long enough, however once I’d done that the print transferred perfectly onto my paper.
It was interesting to see the different texture I got from this compared to my other experiments. I also liked how some of the colours from the blended paper became more saturated once they had been ironed over. Below are my photos to document my experiment.


