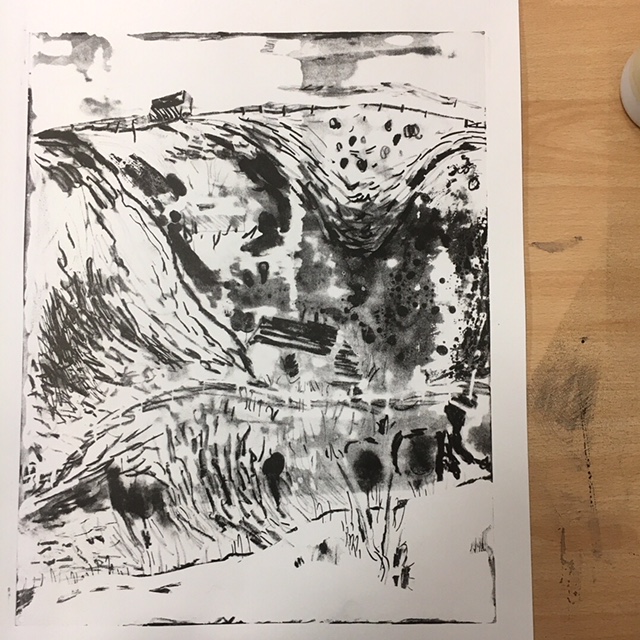
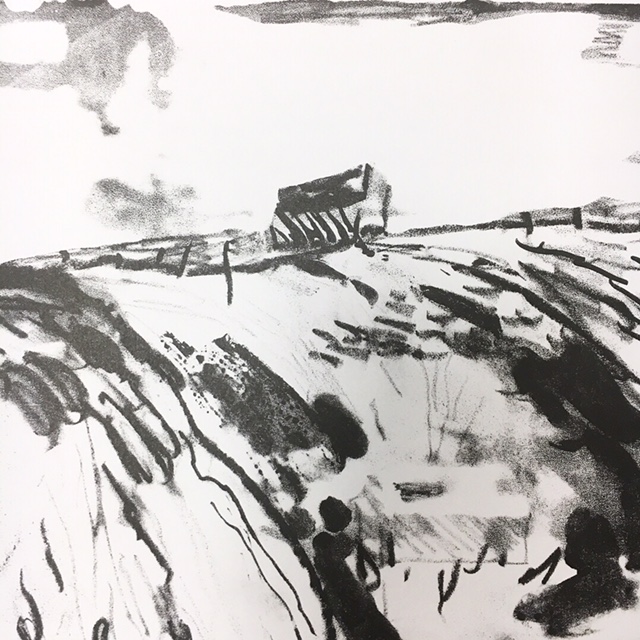
Our second lesson in Lithography was a fast-paced, practical introduction into using a Zinc Oxide plate. Although, I tried not to meticulously plan my print, as I knew it was a new process that I had never attempted before, I couldn’t help but have some expectations of myself. I had already determined from the last session that I wanted to utilise the quality of mark making that the Zinc Oxide plate creates. However, I didn’t know what I wanted my subject to be – on a whim I decided to use a recent landscape drawing I had drawn of Cuckmere Haven. Landscape drawing doesn’t come naturally so I didn’t feel precious over how I would recreate the drawing, it also had the opportunity for depth and texture to be worked into it using a variety of drawing materials.
The first part of the session was dedicated to creating the plate itself, this was slightly daunting as some of the drawing materials can’t be mixed with certain others. Also, I had to keep in mind that the plate cannot be touched as grease can make a mark which will transfer to the print. Despite, the difficulty overcoming new drawing techniques I enjoyed the plate I had made and felt that I had utilised many of the drawing mediums.
Inking the plate brought confusion for myself, I had trouble understanding how water could be continually applied to the plate while inking it. Now I realise that this is because the ink is oil-based and cannot be washed away with water. This was an important step to overcome early on and the same method is used to ink all plates. During the process, I had let the plate dry and inked over the top which had led to an excess of ink on the right-hand side. Luckily, it gave a nice effect to the print, also I asked my peers what they thought of the print and many saw images in the misprint that weren’t there but added to the image such as trees and people.
For an afternoon’s work I was impressed with my efforts and overwhelmed with the outcome. I had achieved in making it textural and graphic, while creating a sense of depth and perspective. I think the composition had some harmony which was improved by the ‘happy accident’ that happened during inking the plate. Also, I think it is the details in the mark making that make this piece interesting I’m looking forward to scanning the piece and using the details as larger pieces in my work.
Process:
- Draw and compose zinc plate, remembering not to touch the plate to ensure no grease marks are left.
- Make sure to dry plate.
- Dab over resin, delicately.
- Tap off resin.
- Dab on french chalk, brush off chalk.
- Brush on balm, with sponge, do not directly pour on plate.
- Wipe off balm with blue paper towel.
- Dry plate.
- Wash plate in white spirit.
- Wash with water.
- Brush off excess water with sponge, but leave it damp.
- Roll on ink (two charges of roller)
- Put on press.
- Up to four proofs.
Below is the print that I made in the session.