Sample Page

This is an example page. It’s different from a blog post because it will stay in one place and will show up in your site navigation (in most themes). Most people start with an About page that introduces them to potential site visitors. It might say something like this:

Hi there! I’m a bike messenger by day, aspiring actor by night, and this is my website. I live in Los Angeles, have a great dog named Jack, and I like piña coladas. (And gettin’ caught in the rain.)

…or something like this:

The XYZ Doohickey Company was founded in 1971, and has been providing quality doohickeys to the public ever since. Located in Gotham City, XYZ employs over 2,000 people and does all kinds of awesome things for the Gotham community.

As a new WordPress user, you should go to your dashboard to delete this page and create new pages for your content. Have fun!

boat frames

with the boat, i used the key frame from the story board redrew it on photoshop before colouring and creating the background. i was really running out of time to get everything finished ast this point. so i decided to leave the waves, and just focus on the netting coming off the boat. this is because even though the boat may not look very good by just sitting still in the water, atleast by putting netting down the boat it carries on the storyline.


this is the finished gif before its put into the animation. its very simple and plain, but at this point I am running extremely close to my deadline with a lot to do…though I don’t know how, I have been doing work almost every day since lockdown began.

seal and penguin part 1

I decided to create my frames with animation paper, an acme board and a lightboard. I would do these as pencil and then go over them with fine liner. After this I would put them onto photoshop where I would separate the line art from the background before colouring the drawings.


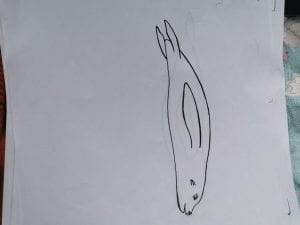
these are 17 frames of the penguin when hes swimming over the boat. i drew the penguin out on seperate animation paper to the seal as i wanted to concentrate the movement of each individual character.


i numbered all the sheets so i would always be able to order them. unfortunately i lost a few of the frames with the seal (result of using a student bedroom as a studio) so on photoshop ive been repeating the frames and changing the angle, hopefully that will work, however it could change a little too much between frames which is a worry.


final storyboard key scenes

I decided to do another storyboard, drawing out key scenes with what I wanted to be shown. by this point I knew the character designs pretty well so I was able to just sketch them out before refining the drawings with pen.

the animation starts with a baby penguin and two baby seals playing.

the penguin and the older/larger seal decide to go swimming. the smaller seal is scared and wont go.

they see a boat. but they dont know what it is.

they decide to go and take a look. this is them swimming in the water, playing on their way.

they reach the boat, they still dont know what it is. they see the net in the water but they dont know what it is either. they goo to play with it.

the baby penguin gets caught in the net which is pulled out of the water. the penguin is shocked and frightened.

animation skips to the baby seal that is back on land. hes meant to look scared and freaked out, but i messed up the mouth so he looks like he is smiling.

the animation then goes back to the other seal that wet swimming, here we see the seal caught in the net, he looks distressed and wanting to get free.

the seal breaks free and swims away as fast as possible, scared. he still has some of the netting around his neck.

here the seal gets back to land, he’s exhausted and traumatised. he still has the rope around his neck. this is strangling him and he ill slowly die.

the final image will be of the seal with the rope around its neck going to sleep/dying. the other smaller seal comes over and puts his head on the dyeing seal to comfort him, as a tear runs down his cheek.


character design and environment sketch

after deciding on the story i wanted to go with. i started doing character sketches, getting myself familiar with what i wanted to draw. i found it was easier to simplify and draw a character after doing a more detailed version as i was more familiar with the different shapes, tones and textures of the subject.


with my character design i made sure to do different views/angles and emotions/expressions. some of these designs didnt come out amazing, as sometimes the angle i was thinking was very difficult to think and picture, so sometimes the character drawing lost a bit of its likeness to the rest of the character drawings.

finally i decided to do a few environment designs, using watercolour as its nice and quick, as well as being able to get some really nice different shades of blue and green.


storyboarding

when i moved to story boarding i was trying to work quickly with the drawing, just trying to create storylines. at this point i knew lots of the information about all the animals, and they’re threats. so i did multiple storylines for different animals. at this point i had decided i wanted to do an animation, but i needed to think about what i would enjoy drawing and what i could actually do.


I wanted to represent all the different issues and threats towards these endangered animals. I had ideas of putting different scenes in of the animals when they were happy before making a contrast to the poaching.

For example I would have a scene of the baby rhino playing with its mum. then i would have a scene of the baby polar bear playing with its family. then it would cut to a scene of the rhino mum on the floor after its horn being cut off, with the little baby trying to wake its mum up, then it would go to a scene of the polar bears with their mum, trying to her up, but she’s died due to the heat from global warming.

while doing these storyboards I decided I wanted this animation to be sad rather than horrific or grotesque, as I feel that sad would evoke more emotion and make people think more about the subject.

After further reflection I decided to go with one idea from the storyboard. I chose the one with the seal and baby penguin.

Research into endangered animals

After doing a little research I had more of an idea of what I wanted to look into. I began to do research on specific animals. I used websites of organisations like WWF or BORN FREE to gather information on these animals. My main focus was the different threats to these animals. I accompanied the research with drawings. the purpose of this was to play with different mediums as well as get myself familiar with the animals.

rhinoelephantpolar bearorangutanglion


I really enjoyed doing all of these. The fine liners allowed me to work quickly but also make bolder marks, I found that doing this I was not worrying about making the drawing look good, this made it much more enjoyable. With the rhino and elephant, I used the red fine liner (as it reminded me of blood) to do the images where the animals tusks were taken away (poached). i really liked the look of this, but i thought that layering the drawings like i did with the elephants was slightly confusing and took away from the lost trunks.

I decided to try some digital experimentation. so i made a drawing of the jaguar on paper very simple so I could edit it on photoshop to separate the linework from the white background before drawing.

jaguar

this jaguar drawing I definitely spent way too long on. however it was really fun. I hadn’t used photoshop to draw in a few months so doing this got me familiar with the program again. I learnt more about working with layers, as well as using different brushes and using the smoothing tool.

in the future I think I will use photoshop to draw like this more often. However I would probably be less detailed than this, as doing multiple of these would only allow me to create a small quantity of work.

Rhino character design

Before doing my rhino character drawings on photoshop, I designed them on paper and drew them out properly. when I put them on photoshop I separated the line art from the background.

rhino rhino rhino

rhinorhinorhinorhino rhino


rhino body turnarounds

these are turnarounds of a rhino body that I created, I have done the front view, back view and side view. the front view looks odd without the head but its made like that so that I could easily place a rhino head from other drawings on top. each image is made of lots of different layers. the side view has the most layers, it has a layer for each leg, a layer for the belly and then a layer for the neck. this is done in preparation for adobe character animator. I’ve spent hours on tutorials watching the programs so that I could experiment with another way to animate so that I don’t have to draw everything out.  by making each limb, etc as different layers on photoshop it means they will be independent in adobe character animator and therefore able to move. this would allow me to create a walk etc.

rhino right body profile

this is an example of adding a rhino head onto the body layer. as can be seen it needs a little more work, mainly in terms of the colouring and a little bit with the shape. But this can be re-drawn easily enough on photoshop.

these are to different views of the head. there is two of each as one is with eyes closed and the other is with eyes open. the eyes are on different layers so that when using face-sync or a keyboard trigger in adobe character animator i can make the character blink.

this drawing has lots more layers. it has two different layers for the eyes; closed and open. and four layers for the ears, each forward or back facing ear is on a different layer so that i could have one ear facing back and one facing forward if I want.  there is also 2 different mouths for the rhino, it has a closed mouth and a slightly open mouth. the horns are 1 layer, an the bloody stumps where the horns are gone are another layer. At this point I still haven’t created my script, so this helps me with having an idea of what the characters will look like. at this point I also need to learn to use the program first to see what adobe character animate is capable of doing, and what it can offer me. I may decided it would be better to draw all the frames for my animation out.

Lion photoshop drawings and animation research

animation research

research and quick drawings of a cat jumping. thinking about the frames.

read through parts of the animators survival kit by Richard Williams.

lion angleslion angles

lion drawings, different angles and experimenting with ways of drawing. I started with drawing on paper which I took photos of and then drew on top of it on photoshop to create the line art. I put the line art for each animal on  different layer. I then experimented with ways to colour the line art in, I tried using the brush tool and the pen tool.  I’ve labelled the drawings on the right so you can see the different techniques I tried. I tried to make these drawings simple. I’m used to doing more detailed work, and as I’m thinking of doing an animation I needed to experiment with simplifying the drawings down. The different angles of the lion I found looked good, and keeping the colours minimal made the work a lot quicker. I did two drawings of the paw, one has no black outline. I’ve decided the drawings look better with the outline. i drew the more detailed paw with the brush tool, but again only used 3 tones on the fur, and 4 on the paws. however this still took to look and is therefore not practical for animation.