
Ever wanted to make a Camtasia Relay video look like it was embedded? Or perhaps make a weblink look a little bit more inviting? Here are some quick tips for using screenshots to add visual punctuation to your module.
Workflow Rating: Intermediate
1. Get yourself a screenshot of what you would like the students to see. I recommend leaving the page/s open in your browser tabs as you will it/them later.
Screenshots – on Windows: Using the Snipping tool to Capture Screenshots
Screenshots – on Mac: Keyboard shortcuts for taking pictures of the screen
Examples:
| A screenshot of a web page which you would like your students to visit | A screenshot of a Camtasia Relay Video |
|
|
 |
2. Go to your module and Create an Item from the Build Content options.
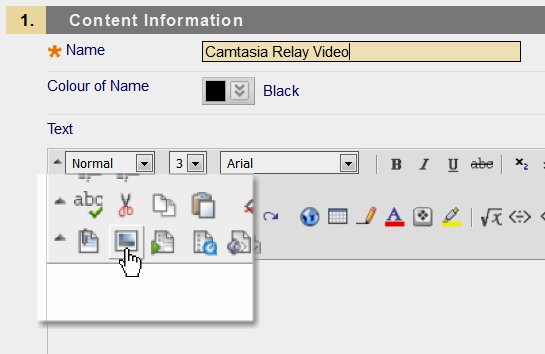
3. Upload your desired screenshot image to the textbox area of the item using the Attach an Image option tool (shown in screenshot below).
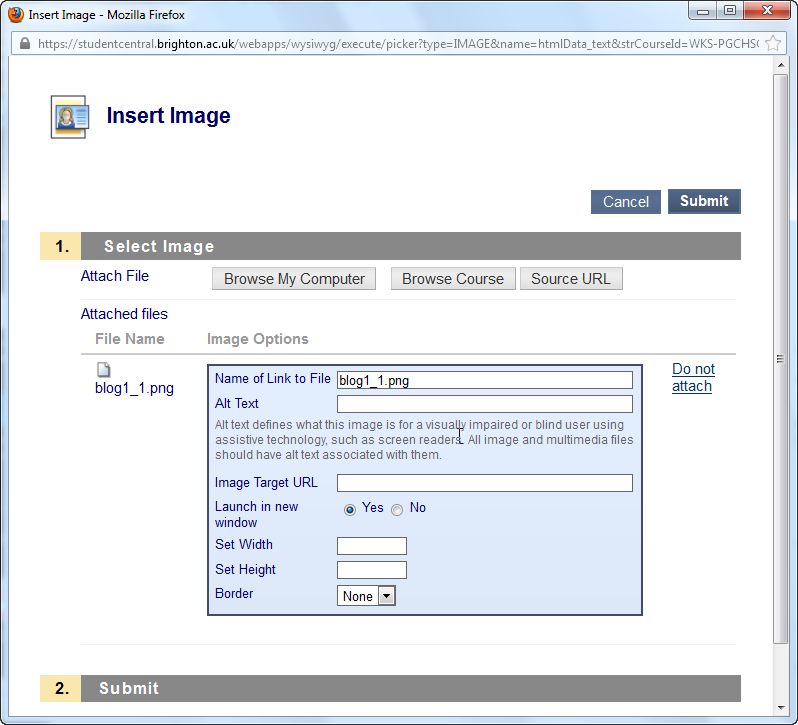
4. Use Browse My Computer to open a file browser and locate the screenshot image. Once it is selected, press open.
5. This next step is important: leave the window, shown in screenshot below, for a moment and go back to the website or camtasia relay where you originally took the screenshot.
Leave this window open for the next few steps.
6. At the original website or camtasia video: go to the top address bar and copy the web address (URL). The fastest way to do this is to click your cursor in the top address bar then press ctrl+a on your keyboard to select all and then press ctrl+c to copy the address (on a Mac it is cmd+a and cmd+c). You can access these commands from the right-click menu if preferred.
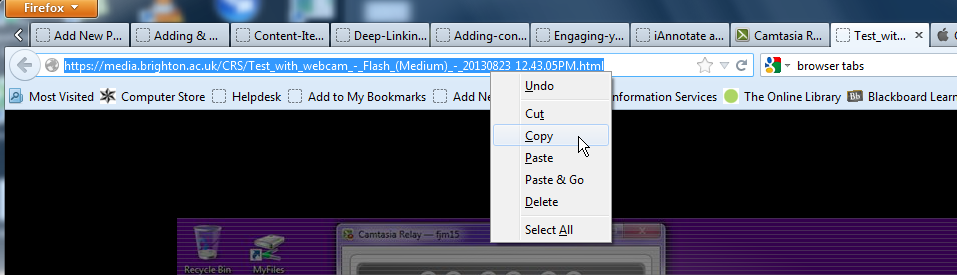
Copy the web address of the original website or camtasia video.
7. Now go back to studentcentral and the window for the image upload. You will see that there is an area called Image Target URL this is the web address which we just copied, so click that box to place your mouse cursor and then press ctrl+v or right-click to paste in the address (Mac: cmd+v).
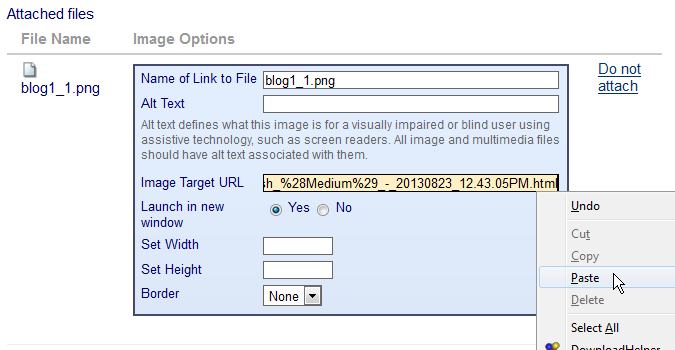
Paste the link into the Image Target URL area.
8. Recommended: set the link to launch in a new window using the Yes radio button. Also set to width to be 400, this will resize the image in proportion and will ensure that it is not too large for the page formatting in studentcentral.

Recommended settings
9. When you are happy with your settings click Submit and you will be shown a preview. Click Submit again to confirm. You will finally need to click Submit in the item in order to save your changes. The animated GIF gives you a preview of how a link like this will work in practise.

Linking a Mashup Image
A frequent suggestion I have made during workshops is to consider adding images to your content folder in studentcentral.
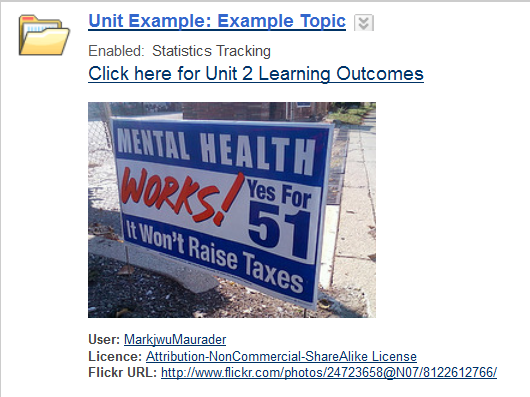
A content folder which has an image added to the written description area
This both helps to make the topic of the folder more enticing but also can help to add a visual cue for the topic or seminar materials contained within. A very easy way to do this is to add a Flickr mashup (instructions here), however adding an image to a folder also suggests an added layer of interactivity and the assumption may be that the image is a clickable link leading to the content within. Well the good news is you can make the image clickable and linked to the content in the folder, see step-by-step instructions below.
1. Create your Content Folder and use the mashup tool in the text box to add a Flickr mashup – as shown in the screenshot below.

2. Search for your photo, remember to change your search to any of the words and click on More Options to filter by creative commons license.

3. Recommended settings for Flickr photos. Once you have selected your Flickr image, I recommend the following settings for content folders. View: Embed Photo, Size: Small (240 pixels on longest side), Show Flickr URL: Yes, Show Flickr Information: Yes.
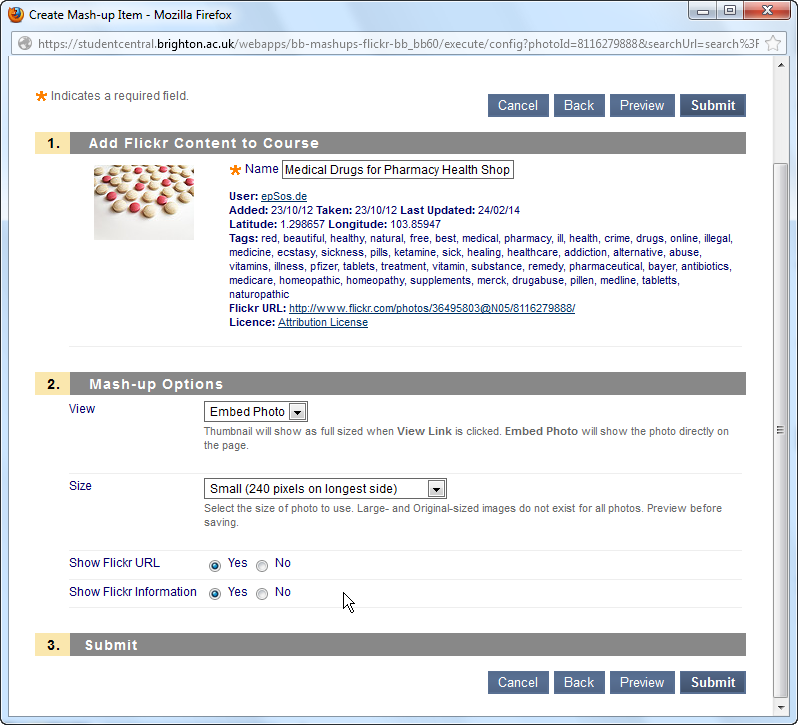
4. Click Submit to save your image. At this point I generally delete the image title, the longitude/latitude and tags, leaving only the user (photographer or image owner), the Flickr URL and the CC License.

5. Press Submit to save your content folder. Now to the linking part!
6. Right-click on your folder’s title and select Copy link location… from the dorp-down menu.

7. Go back into your folder to edit it, by clicking on the downward chevrons.

8. Click once on the image (which you added as a mashup) in order to select it and then click on the hyperlink icon (looks like a globe, shown below).

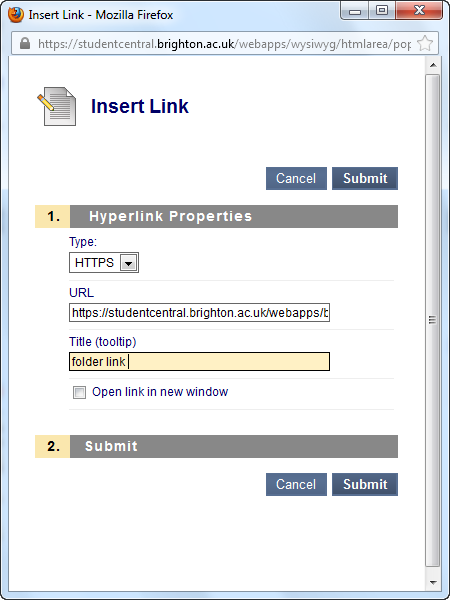
9. In the Hyperlink window select HTTPS in the dropdown menu and then use your cursor to highlight the https:// (we need to replace it, or we will end up with two https’s after we paste). Then press cntl+v or right-click paste in the URL area.
 10. Also be sure to add a Title (tooltip) to maximise accessibility, this should be a brief description of what the link is for or where it goes.
11. Press Submit in the Hyperlink window and then press Submit again to save your content folder. Et voila! Your link is complete, now you can test it by clicking on the image and it should bring you to the interior of the content folder.
I have been working in the Educational Technology field within Higher Education for eleven years. A big part of my job is finding new and innovative ways of integrating technology into current teaching and learning methodology. This can include assisting academic staff with Virtual Learning Environments/Learning Management Systems (Blackboard), implementing specific software packages, maximising current technologies and championing new ones. I find this profession both riveting and rewarding. I really enjoy life on the cutting edge, but I also enjoy being able to help staff achieve small and meaningful efficiencies; sometimes that makes all the difference.
