 |
Techsmith Relay (formerly ‘Camtasia Relay’)Simple ‘stop and start’ lecture capture software to record main lectures (as well as any on-screen recording/teaching) and make them available to students securely via the UoB video service. Official University of Brighton guidance Quick Guides for BSMS lecture capture: |
 |
Techsmith FuseMobile app for recording video on mobile devices (yours or students’) and securely uploading it to the UoB video service for teaching and learning. |
Camtasia Studio for screencastingCamtasia Studio is screen capture software that has a full editing functionality, so it can do more but takes a bit longer to learn. BSMS have laptops (Mac and Windows) for teaching staff to use and the BSMS Learning Technologists will train you how to use it. Quick Guide: Creating a screencast for teaching using BSMS laptop |
|
|
|
Other screen recording tools for creating videosThere are several so-called ‘whiteboard apps’ that record the tablet computer (e.g. iPad) screen activity and your voice to produce online explanatory videos for learners. ShowMe and Explain Everything are two good examples. There are free and paid-for versions; they have to be downloaded to your own device. (They are not part of the fully-supported list of software but the BSMS Learning Technologists can give you guidance.) |
 Recording good video on mobile devices
To create video you can use your mobile devices, both to film and edit video, using the built-in camera app and free apps like WeVideo. Here are some basic tips and tricks in getting the best video possible for teaching and learning:
Basic Video Skills |
|
Hold the camera steadyA wobbly shot is distracting but your mobile device doesn’t need to have a tripod mount for getting steady footage. To keep footage steady without a tripod, use both hands to grip your device, and keep your elbows close to your body, and lean against a wall or stationary object to help keep you steady. |
 |
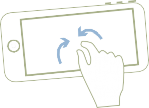
Use on-screen focusYou can tap anywhere on the screen to focus (a blue square comes up on the display as you can see from the image above). This not only focuses on that area (which may already seem clear in your display), but also adjusts the exposure and white balance automatically for the main area of your image. However, the focus does have a habit of searching around which can be distracting. There are other video apps (paid for) that override this feature for a more professional look. |
 |
Watch your lightingUse the best available light to improve your image. If you’re shooting inside, your back should be to any windows; avoid filming your subject in front of a window as this will force the camera to make the person very dark in the shot. If you’re shooting outside, shoot with the sun behind you and facing your subject, this allows for the maximum amount light to fall on the subject. |
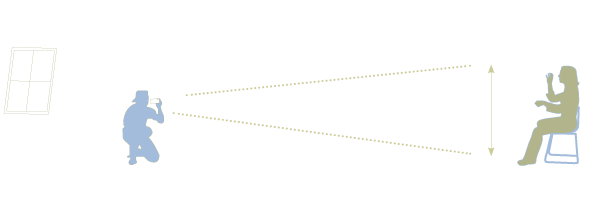  |
SilhouettesIf you want your subject to be anonymous, silhouettes are a beautiful way to capture the lines and form of a subject, preserving anonymity. To create a silhouette you must be shooting against a bright light, such as a window. |
 |
Operating a cameraExposureAlthough most device’s auto exposure is pretty good, places with both highlights, such as light streaming through a window, and lowlights, such as areas in shade, can confuse things. Tapping on a dark part of the image will lighten the entire frame; tapping on a light part of the image will darken the entire frame. Use this technique to get the exposure that you want. |
 |
ZoomingThe familiar pinch-to-zoom technique can be used in the video mode to zoom in, up to a maximum of 3x. It’s a digital zoom – that is, the device digitally enlarges the image reducing quality slightly. You can use the zoom before or during recording, although it’s best to set up the zoom first and use that for an entire clip, as it’s less distracting and looks more professional. |
 |
Landscape orientationRemember to film in widescreen mode (16:9). Your videos will look much better on the large screen (TVs, projector, computer etc). If you hold the phone in portrait mode, the resulting video ends up having vertical black bars next to it, which means that you’re only using a fraction of the available resolution. |
 |
Referenceshttp://teachingwithipad.org/2013/12/10/filming-tip-film-in-landscape-not-portrait/ http://www.expertreviews.co.uk/tablets/8055/how-to-shoot-better-video-on- your-ipad-and-iphone |
