#12brightapps Day 12 – Explain Everything

#12brightapps – Day 12 (The final app of 2015) – Explain Everything

First, a bit of begging on our part: Would you be so kind as to take our ‘leaving survey‘ on the #12brightapps course? Thank you! I have a couple of minutes. Now, to the app!

What is it?

Explain Everything LogoExplain Everything is an amazing whiteboard/animation/screencasting juggernaut of an app. We admit that this is the only app that we’ve covered that costs something, so we won’t expect you to download this app only on our suggestion, however… If you’re working on a ‘Flipped Classroom’ scheme, or need to do quick explaination videos for your students, it’s worth the few pounds that they’re asking for it.

What does it do?

Really, what doesn’t it do?  You start off with an infinite white-board that you can zoom into and out of forever… You can import images, video, draw on video, share websites, annotate on everything, animate your presentation, save it all as a recorded screencast in Mp4. Explain Everything works on iOS, Android AND Windows mobile devices. You can use it simply to record before your class, or if you have an AppleTV or GoogleCast or other system (Like Reflector 2), use it in the classroom live (but still record the session, as that would be wonderful for your students’ use during revision.)  Explain everything not only allows you to draw/annotate/animate but also has a built in Math Equations tool, for all our kind Maths teachers out there. (Note: Explain Everything’s tool is called the Math Equations tool, because of ‘American English’, not because we can’t spell maths correctly.)  All in all, although we tried to stay away from apps that weren’t free… We just couldn’t help ourselves.

Okay, but I’m still not interested in buying this app, no matter how wonderful you say it is…

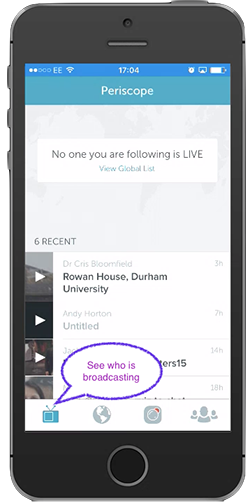
Fair enough.  We’ll be providing (what we hope) to be a very FUN and informative Periscope session about using Explain Everywhere on the morning of the 16th, just after 10am.  Please feel free to watch this instead of buying the app.  Who knows, after seeing us show it off… You may change your mind about the few quid the app costs.

Download it now.

1. Go to either the App Store or GooglePlay and search for Explain Everything.  Download the app to your device.
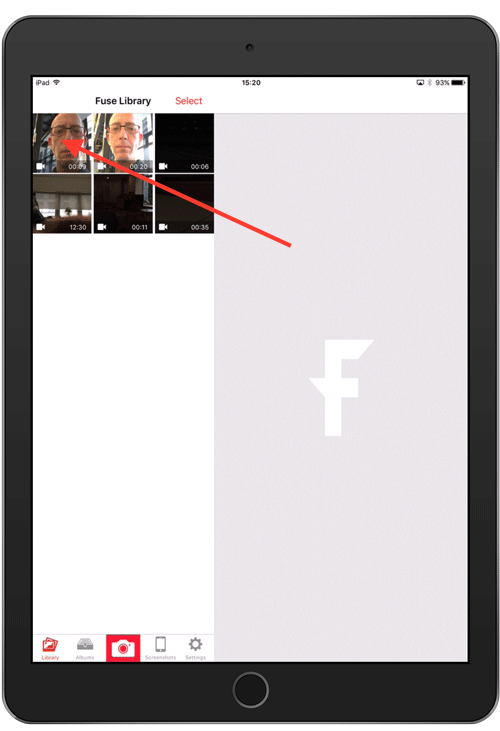
2. Open the app, press the upper-left + symbol to start a new project, and have a little play with the different tools.  Scribble on the whiteboard, and click an hold on the tool-bar to see other options available.

10 Minute Task

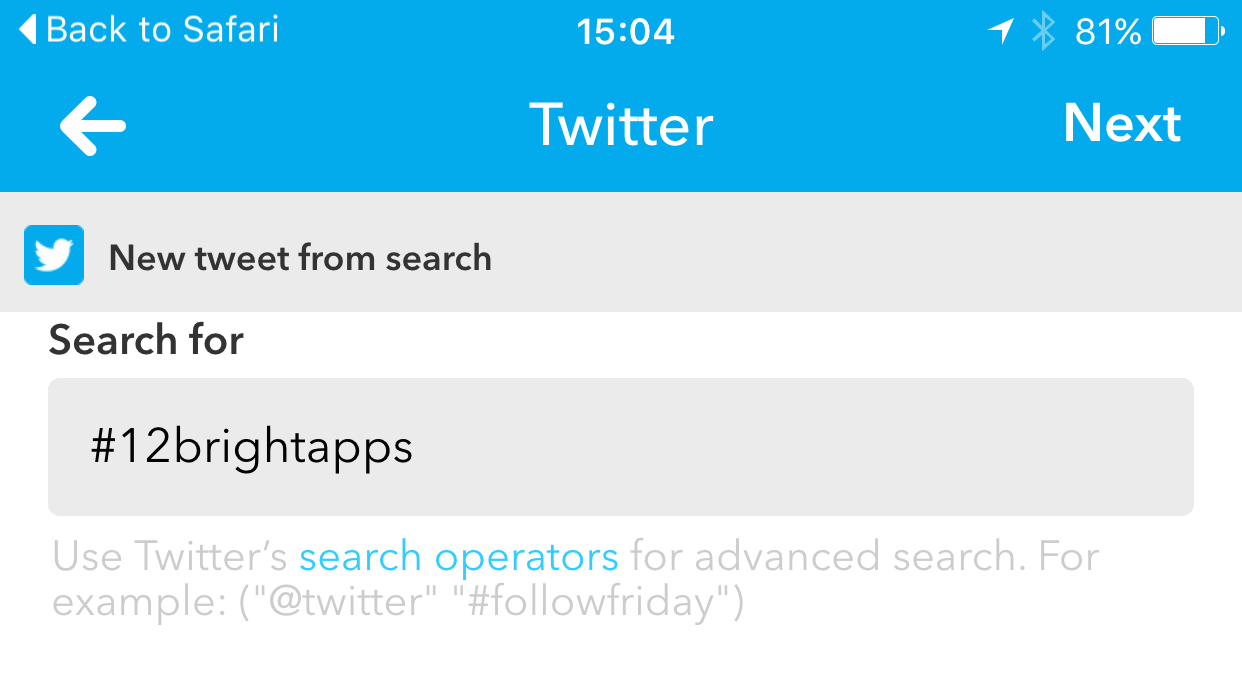
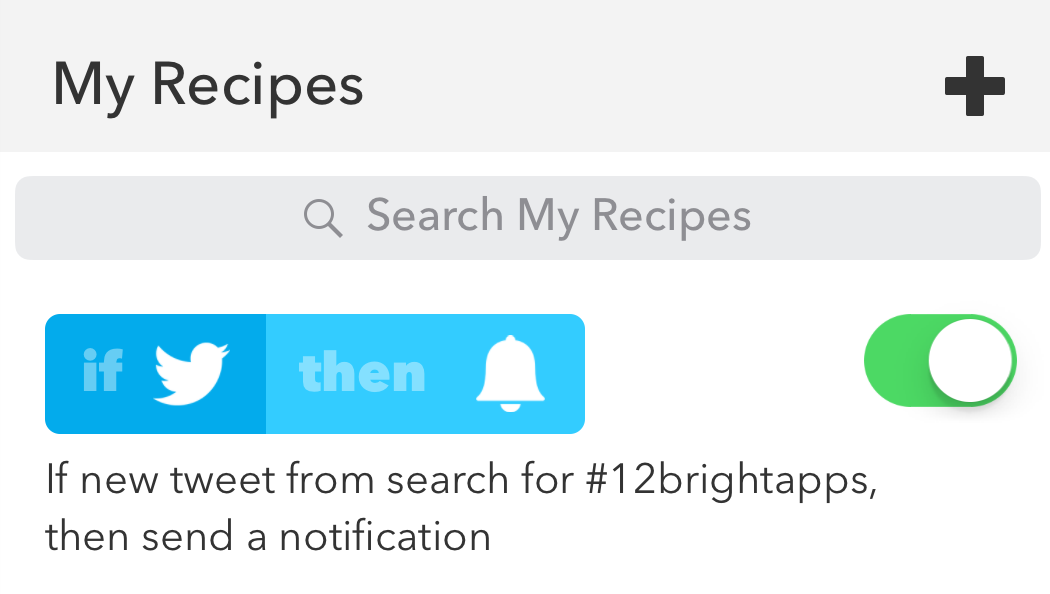
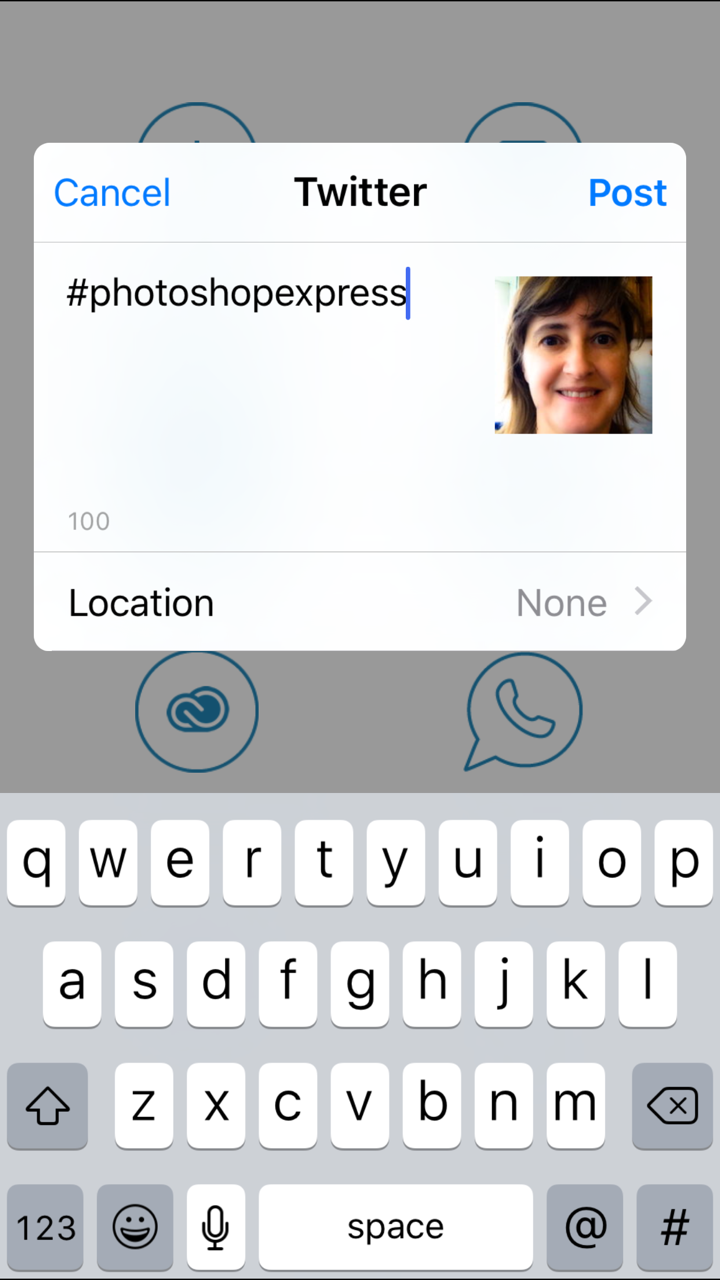
If you would like to see a live broadcast we are going to start rolling in about 15 minutes (15 past 10am-ish GMT)! The link will be posted to Twitter, but you don’t need to have a twitter account to watch:
https://twitter.com/hashtag/12brightapps

1. We’re going to make an agenda introduction to a talk/conference/lecture using Explain Everything.

2. Because it may be easier/quicker to start with something, open up your favourite slide-show creator (Powerpoint, Keynote, Google Presentation) and let’s make a slide that we can play with in Explain Everything. I’ve pre-made this slide and exported it as an image to my Dropbox.  You could also export it as a PDF, if you wish. Or save into your camera-roll if you made it on your device.

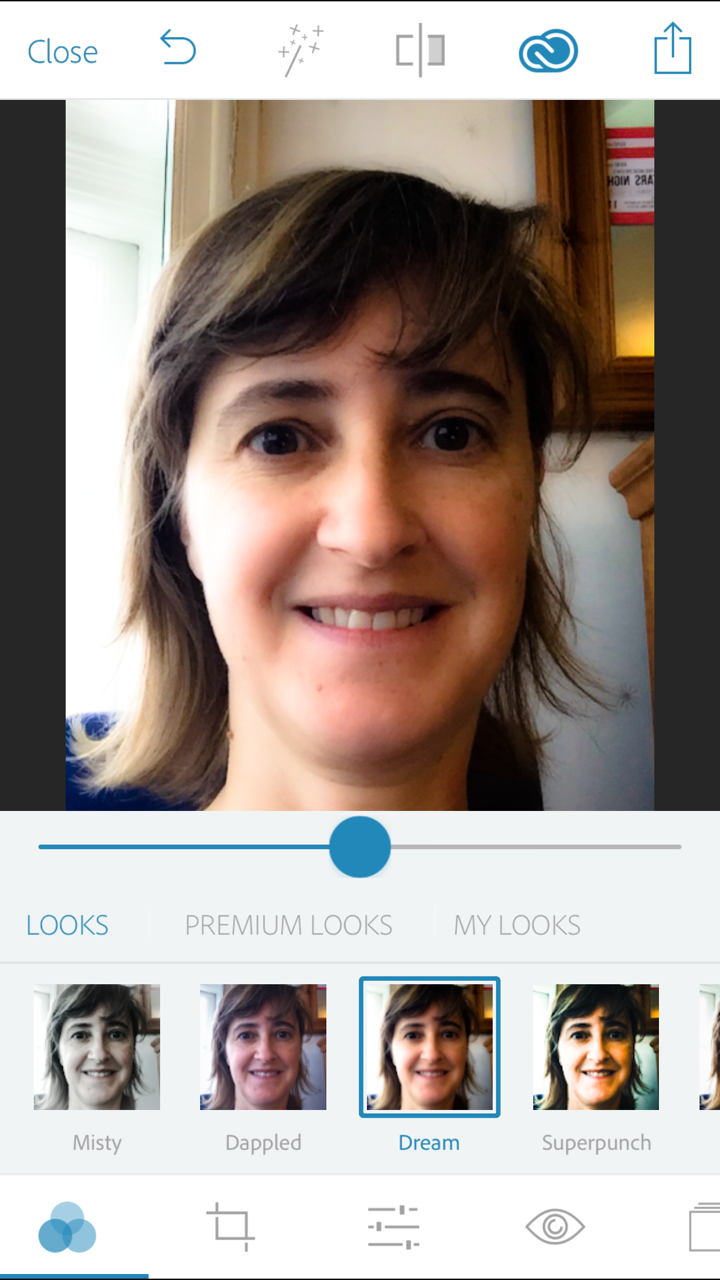
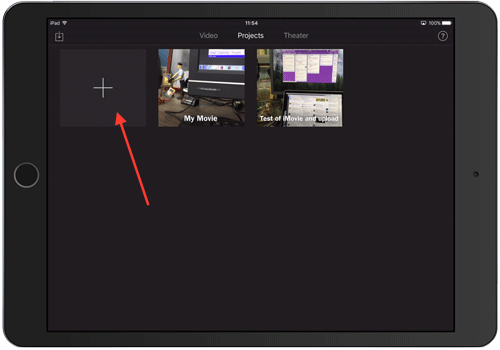
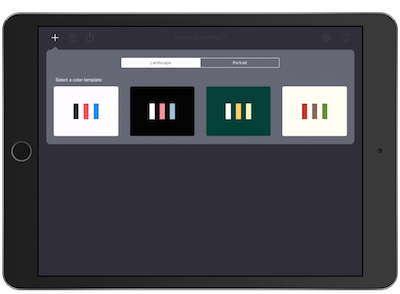
3. Open Explain Everything and click the plus-symbol in the upper left-hand corner.  Pick a theme (I like the cream one, personally)

theme chooser screenimage

4. Let’s take a quick tour of the app (in it’s pristine shape)

Tour of tools picture

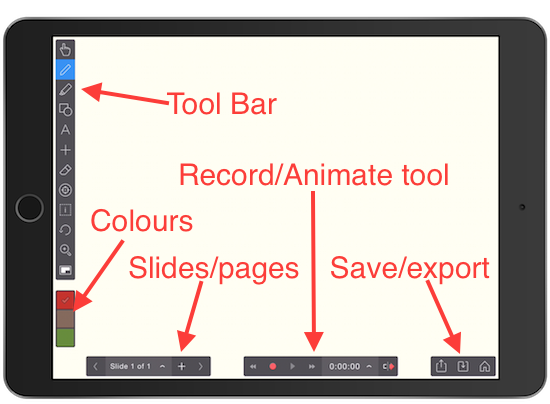
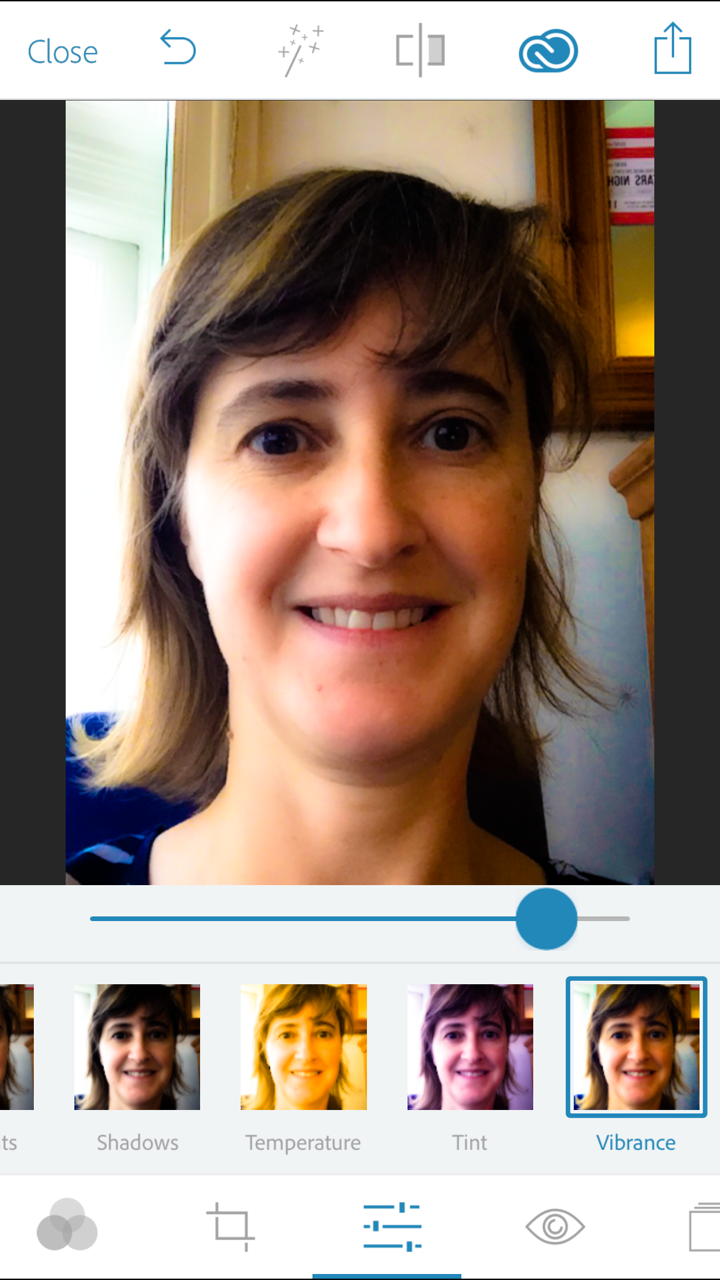
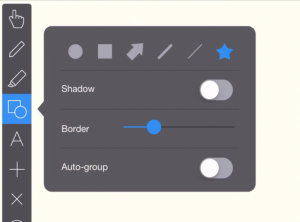
5. There are other choices for tools (under) many of the tools in the Tool Bar.  Check them out, by clicking and holding on a tool.
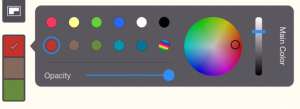
shape option picture Insert tools picture
colour picker picture

Above Left: Shape tools
Above Right: Insert Objects

Left: Colour Picker

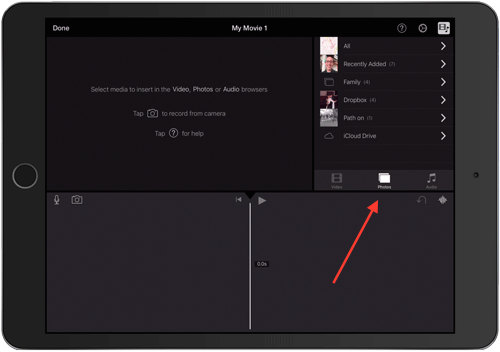
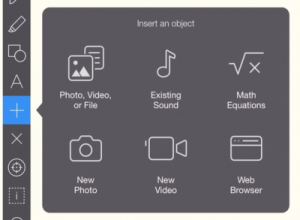
6. Okay, let’s import that ‘Agenda Slide’ that we did in our presentation software. Go to the plus symbol in the tool bar, and click on the top left choice “Photo, Video or File”

visual discriptive screen capture

7. Pick where your ‘picture’ is living, in a Cloud-service, or on your camera roll (Photos)? Click on it.

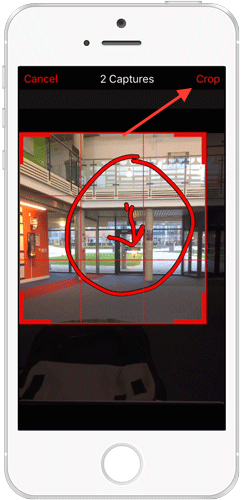
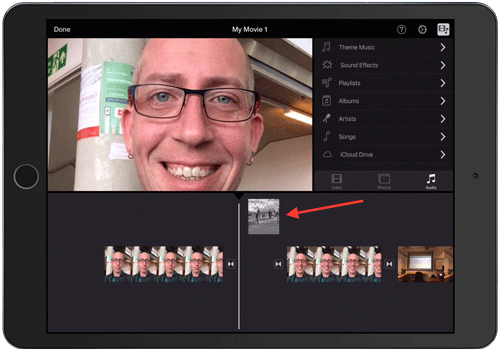
8. You can edit the photo (crop or rotate) then click Done.

visual discriptive screen capture

9. With the ‘Hand’ tool you can pinch and rotate the image to fit on your Whiteboard/canvas in EE.

visual discriptive screen capture

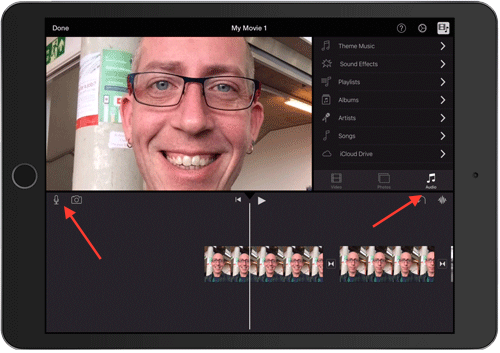
10. Let’s first zoom in, and then Hit Record! We’re going to make a little animation.

visual discriptive screen capture

11. I’m choosing a star shape from my menu, and then I’m going to move it around with the hand tool… (I’ll attach the video, so it will make more sense when you see that.)

visual discriptive screen capture 
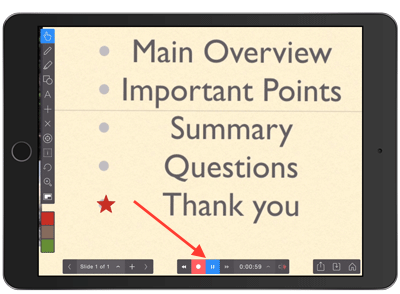
12. I’ve moved the star from point to point, and moved the screen around as well.  Now that I’m done, I’m going to hit the record button again to end the recording.

13. If I click on the timer, it gives me a timeline that I can scroll through, and make sure I like what I’ve done.

06-Timeline-scrolling
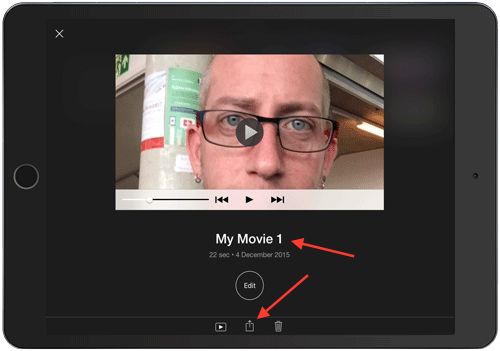
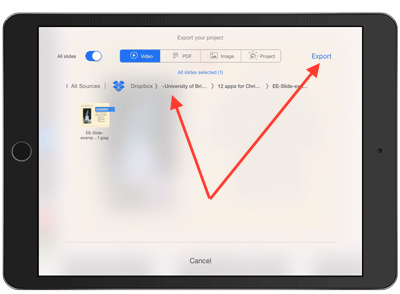
14. If I like what I see… I can then hit the export button.

visual discriptive screen capture
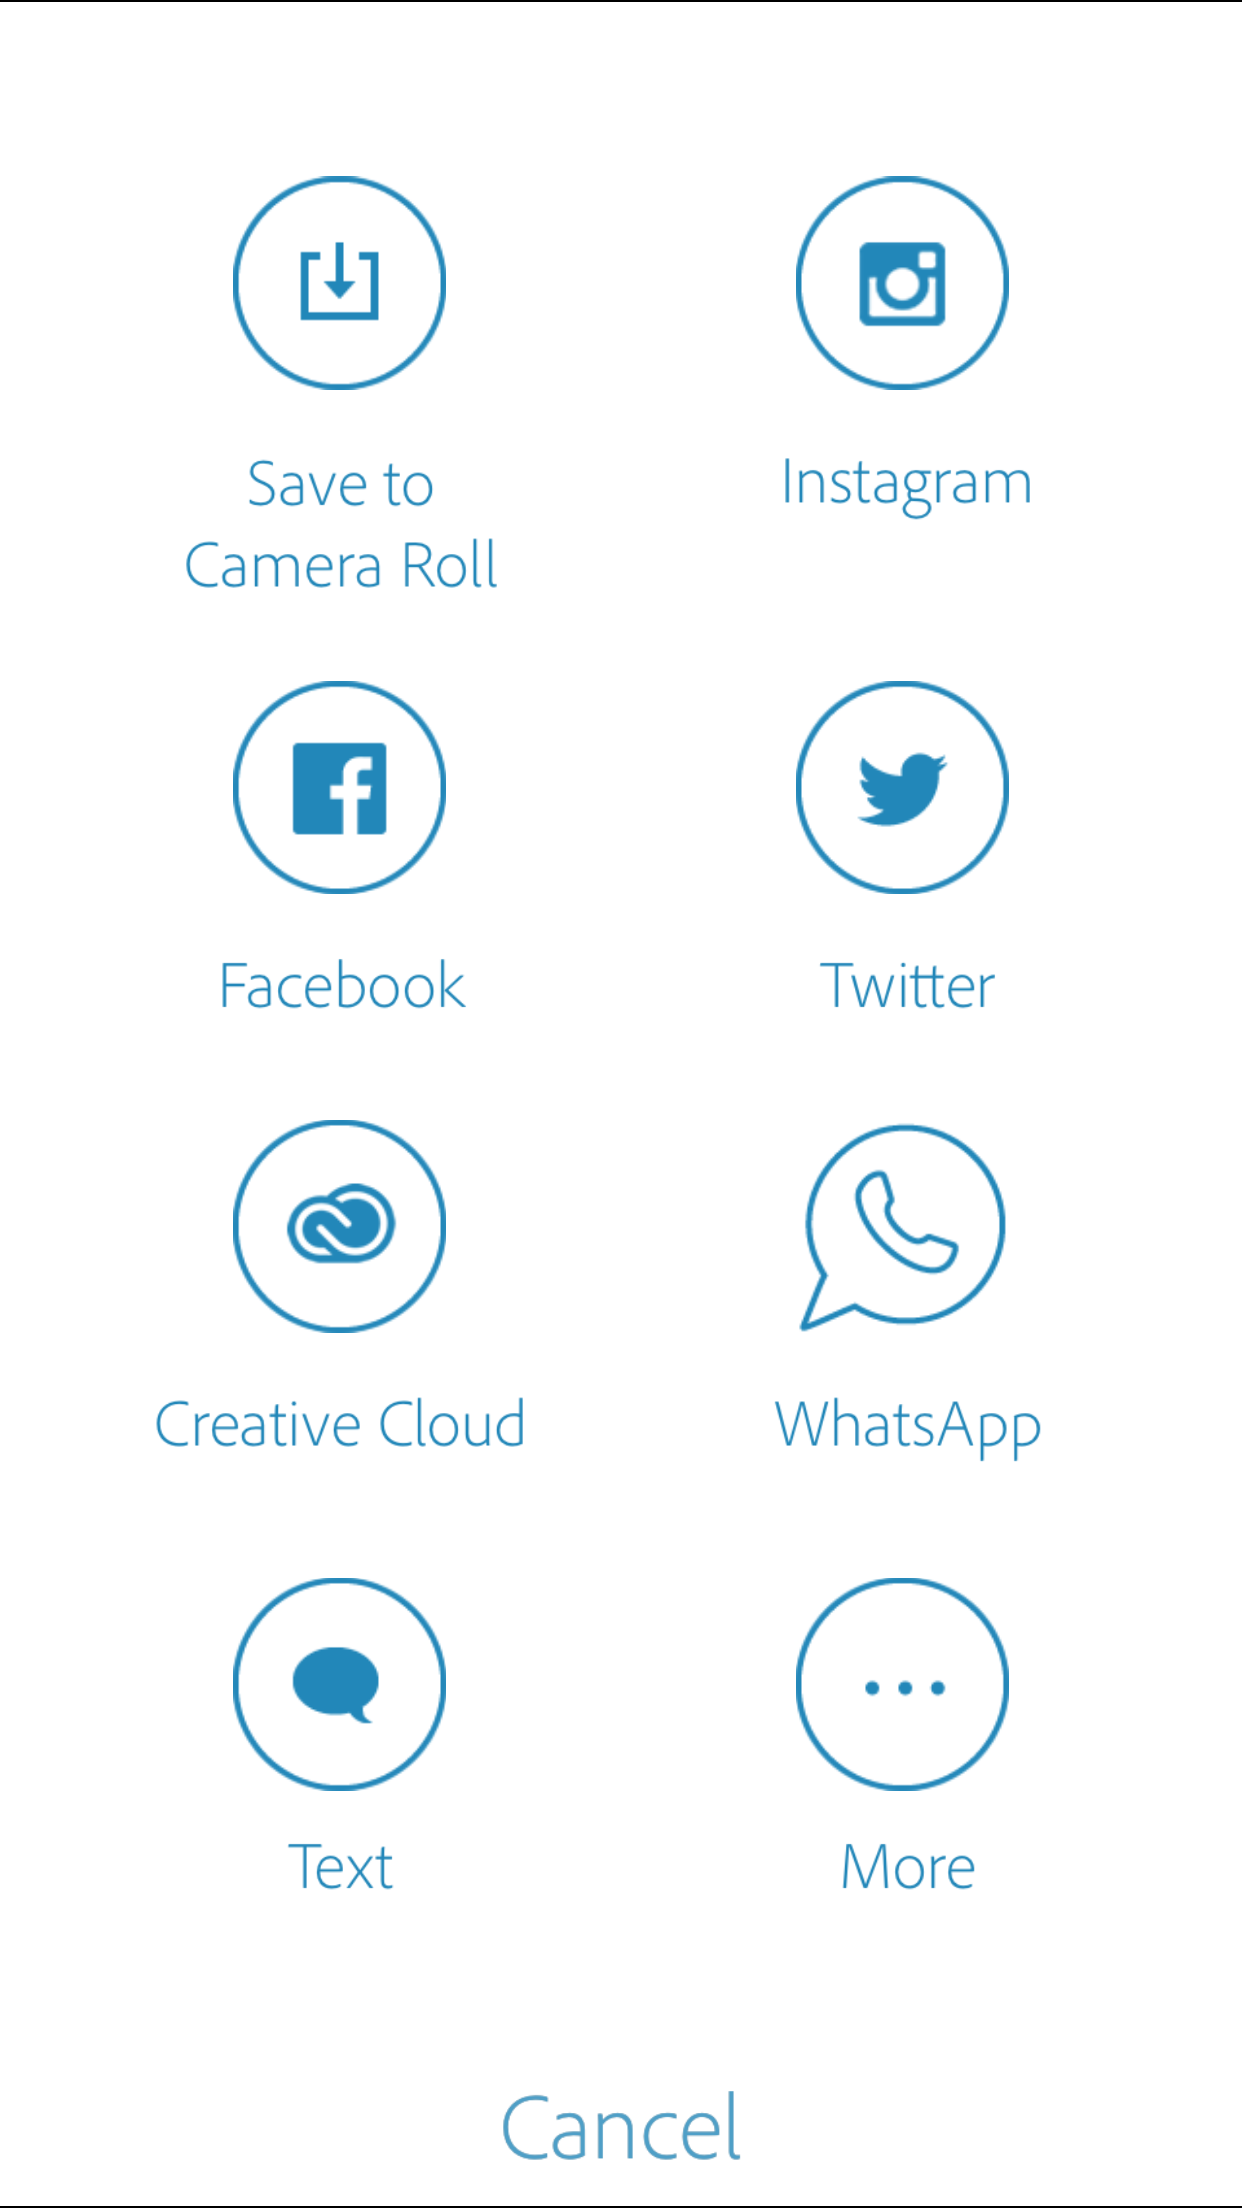
15. The export gives me many choices… Video, PDF, and more, as well as places to put them.

visual discriptive screen capture16. I’m going to make this a video, and export it back to my Dropbox where I originally got my presentation slide.  You can put yours where-ever you wish.

visual discriptive screen capture

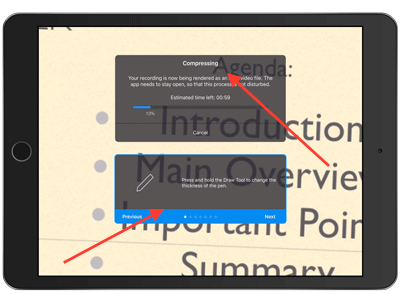
17. Explain Everything then has to compress my video.  But, it does give you quick little tips to read to keep you interested.

11-video-compression

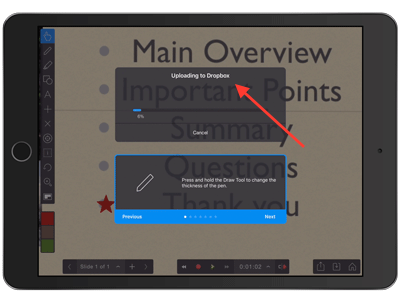
18. Once it’s compressed the video, it then has to upload it to the service that you chose.

visual discriptive screen capture

19. Once it’s done, it will tell you so, and you can click “Ok’.

visual discriptive screen capture

20. Although you’re done with this exercise… Feel free to keep playing!

visual discriptive screen capture

Here’s the results of my recording with Explain Everything:

And Finally…

What’s black and white and noisy?

A Zebra with a drum kit.

Part 2

Discussion Board and Twitter

As I’m pretty certain, many of you didn’t download the app yet… What other tools are out there that you like using for screen-capturing a learning object?

Further Tasks

Watch our Periscope – Star Wars vs Star Trek, with Fiona and Tucker starting around 10:15 GMT, or, once it’s been done, we’ll post it later to this blog.

The link will be posted to Twitter, but you don’t need to have a twitter account to watch:
https://twitter.com/hashtag/12brightapps

Oh… Hey… Survey!

If you’d be so kind… Taking our short ‘leaving survey’ would be really wonderful! It should only take a couple of minutes…

I’d love to take your survey!

THE CONTEST!

To win a £10.00 app voucher for the ‘store’ of your choice… Have you been paying attention? We’ve hidden secret codes throughout the #12brightapps course.  Fill in our list for your chance to WIN!

Star Trek vs Star Wars
The Explain Everything Challenge

#12brightapps – Day 11 – MS Office Apps

MS Office apps

icons for MS Office apps on ipad

MS Office apps on iPad

Welcome to the penultimate day of #12brightapps. Today we bring you the gift of the Microsoft Office apps.

What are they?

The University of Brighton has a site licence for Microsoft’s Office apps including Word, PowerPoint and Excel. The interface of these apps is optimised for use on mobile devices, making edits a doddle.

Not at Brighton?

Our activity below is Brighton-specific, however, Office is free for anyone, and there are great resources out there for both iOS and Android devices in using Word.

iOS | Android


What can they do?

With these  apps you can create, edit and view Word, PowerPoint or Excel documents on your iOS or Android device. You can connect these apps to any of the university’s SharePoint sites in Staffcentral, MyDepartment and MyFiles, thus making it easy to:

  • Take your own notes in a meeting and save them to your MyFiles area on SharePoint.
  • Write the minutes of a meeting and save them directly to MyDepartment or staffcentral
  • Run a PowerPoint slide show using your mobile device (you can even project this to a screen if said screen has something like Apple TV connected)
  • View MS Office documents clearly with all the formatting in place.

*Note that, as the Office apps can not be used to view or edit PDF files, these apps are not appropriate for browsing/finding documents and papers stored on staffcentral.

The apps are free for anyone to download. All University of Brighton staff and students  have an Office 365 account as part of our site licence.

Download them now

  • Download apps from the Apps Store or Android Market, search for Microsoft Word, Microsoft Excel, Microsoft Powerpoint etc.

Unless you register each app, you will only be able to view documents. In order to edit and create and save documents you must complete the following:

  • When prompted to register each app, choose your work account
  • Sign in with your normal email address (eg K.Piatt@brighton.ac.uk) and your normal university password​**
  • If you have already installed any Office apps using a personal account, sign out and sign in again using your university credentials as above.

**If asked to reset your password, do so. It should not affect the password you use to log in for other university services.

Task 1: Saving documents on your MyFiles site

Word open dialog - showing connections to existing sharepoint libraries

Connections to SharePoint libraries from Word

You can set up connections (or shortcuts) to your favourite folders/libraries to make it much easier to save and edit documents. With our first task, you’ll set up a connection to your MyFiles folder on SharePoint. MyFiles is your personal storage area on SharePoint and is a great place to save your personal documents. It is accessible from your mobile device via the MS Office and SharePlus apps, as well as from any computer with an internet connection.

Note, to set up a connection to a library, or folder, you  need to know the url (internet address) of that library/ folder.

  1. Open the Word app and check that you are logged in using your university credentials, as described above
  2. Press on Open in the left hand menu.
  3. Press on Add a Place
  4. Press on SharePoint Site URL
  5. In the URL box, type https://mysite.brighton.ac.uk/user/username where username is your university username (eg kh32)

You have now set up a connection between the Word app and your MyFiles area on SharePoint. Let’s see it in action:

  1. Press on New in the left hand menu to start a new Word document.

    wordsave2

    Left arrow in Office apps takes you out of editing and into file management

  2. Choose Blank document 
  3. Type 3 things for your list for Santa
  4. Press the back arrow at the top left of the screen (there is no Save button in the MS Office apps)
  5. Give the document the name List for Santa
  6. With SharePoint selected on the left, press on your username in the middle column, then press on MyFiles in the right-hand column
  7. Press on Save at the top-right of the screen

Great work! You’ve now saved that document to MyFiles on SharePoint. Let’s now edit it on a desktop computer.

If you are using a Windows PC on campus:

  1. Click on the Start button and click on Computer
  2. On the left of the window, click on Computer again
  3. Double-click on MyFiles
  4. Find your List for Santa file and double click to open it.

If you are using a Mac, or working from home:

  1. Open a web browser
  2. Go to https://mysite.brighton.ac.uk/user/username/MyFiles where username is your university username (eg kh32)
  3. Log in with your university username and password when prompted
  4. Find your List for Santa file and click to open it.

So, as you can see, you can create documents on your mobile device and then tidy them up on a desktop computer later on. It works the other way round too!

Task 2: Watch the show

We have created a very short PowerPoint show for you with some hot tips for entering and editing text on an iPad and we’ve stored it in a document library on My Department.

In this task, you’ll set up a connection to the document library on My Department and  open the PowerPoint presentation.

First you need to know the address (url) of the document library that we want to link to on My Department. The quickest way to get this information is to visit the library and copy the address:

  1. On your mobile device, go to https://mydepartment.brighton.ac.uk/sptraining/practise/ (you will need to log in)***
  2. On the left-hand menu, click on Documents
  3. Copy the URL for this page (should read https://mydepartment.brighton.ac.uk/sptraining/practise/docs/Forms/AllItems.aspx)

*** Tips for opening SharePoint pages via a mobile device:

  • If you have no luck using Safari, try using an alternative browser such as Firefox
  • If you get repeatedly asked to login, click on cancel and refresh your browser


Now we’ll set up the connection from PowerPoint app to the document library on MyDepartment:

  1. Open the PowerPoint app and check that you are logged in using your university credentials
  2. Press on Open in the left hand menu.
  3. Press on Add a Place
  4. Press on SharePoint Site URL
  5. Press the URL box and press Paste
  6. Delete the end of the URL so that you are left with just https://mydepartment.brighton.ac.uk/sptraining/practise/docs
  7. Press Next

Now let’s test the connection:

  1. Press on Open in the left hand menu.
  2. With SharePoint selected on the left, press on the docs link for https://mydepartment.brighton.ac.uk/sptraining/practise in the middle column, then press on Day 11 Office Apps task in the right-hand column
  3. In the right-hand column press on Task 2 presentation
  4. Click on the Slide Show tab and choose From Start
  5. Swipe to the left to move through the slide show

If your mobile device were connected to a screen right now using Apple TV or similar, you could use your mobile device to drive an interactive and high-tech presentation. You are free to move around the room whilst you deliver .

Alternative Task 2: Watch the show via SharePlus app

The task above showed how to set up a connection to a My Department site from within the MS Office apps.

But what if you already that connection set up in your SharePlus app (as seen on day 7 of the #12brightapps)?

Well, the MS Office apps work alongside the SharePlus app. Use SharePlus to navigate to your documents on SharePoint, then open them in the relevant Office app to edit them. Remember SharePlus allows you to see all types of files, images, blogs, PDFs as well as Office documents. The Office apps will only find their own documents.

This task assumes you’ve already completed the tasks on #12brightapps day 7 – SharePlus

  1. Open the SharePlus app
  2. Navigate to the https://mydepartment.brighton.ac.uk/sptraining/practise site that you added as one of the tasks on day 5 of the #12brightapps
  3. Open the Documents library
  4. Open the Day 11 Office Apps task folder
  5. Press and hold on the Task 2 Presentation
  6. Press on Open in and choose PowerPoint
  7. Press on the Slide Show tab and choose From Start

For help see the guides below:

And Finally…

What do you get if you cross a bell with a skunk?
Jingle Smells!

#12brightapps – Day 10 – IF

IF - The IFTTT AppWhat is it?

IF is the app that supports the IFTTT service (it stands for If This, Then That). It allows you to connect different applications together for productivity, communication and speed. Think: If this happens then do that!

What can it do?

It allows you to create ‘recipes’ connecting different services eg. If there is a TurnItIn service update, then send a notification to my phone or if I post a new photo on Instagram then also save it to my Flickr photos. You can use the service on a website (IFTTT) but the app also allows you to take advantage of features on your devices like alerts and location.

Download it now.

  1. Open the App Store or Android market on your phone or tablet, search for ‘IF’ and download.
  2. Launch IF and sign up for a free IFTTT account (or login if you already have one).
  3. You may be prompted to set your device to allow Background App Refresh, this allows the connections to work when you aren’t in the app, for this task just click OK which will not change your settings.

10 Minute Task:

Not for me?
Today’s task sets up Twitter notification. Not a Twitter user? We’ve prepared an alternative activity for the day, try Hopscotch instead!

This task is aiming to show you how easy it is to set up notifications on your device for things of interest to you, in this task we’ll set your device to notify you when you there is a new #12brightapps tweet so you don’t miss any!

Click the recipe icon at the top right and ‘ok’ if prompted to change your settings (this will not change your settings).

IF Add a recipe

Click + to add a new recipe.

IF Create a Recipe


IF will show you lots of suggested services you can connect to, but for now just click ‘Create a Recipe’ at the bottom of the screen.

You’ll be prompted to click the blue + to add what will trigger your notification.

Click it and select the Twitter service and choose ‘New Tweet from Search’ as the trigger as we want to check for our hashtag.

IF_authorise_twitter

You will be prompted to activate the Twitter channel by connecting your account to the IF app. Continue and complete this authorisation by logging into Twitter until you reach the ‘done’ screen.

You will now be asked what you want to search for, and for this task enter #12brightapps.

IF_set_search

You’ll see your recipe taking shape, now we need to add what happens when it finds a tweet, so click the red + and select ‘IF Notifications’, this will mean a notification will pop up on your device.

IF_part1_done

Choose ‘send a notification’ and again you will be prompted to activate this channel, continue and click done. It will provide some suggested text for the notification so you can just click next.

IF_tweet

You are done, press finish.

IF_finish

You can now leave the app, and as soon as someone posts a tweet with the right hashtag your phone will let you know (within 10 minutes, but often less). Try it out yourself by tweeting now!

IF_notification

Ok, it worked but now I’ve got too many notifications! You can easily turn a recipe off temporarily by using the green slider or you can edit the recipe by selecting it and changing what you search for.

IF_recipe_complete

And Finally…

Why don’t aliens celebrate Christmas?

Because they don’t want to give away their presence.

Discussion Board

What services could you connect to help your productivity? You can trigger events based on your (or rather your device’s) location, and use this to text your family or turn on your lights! How do you feel about that kind of automation?

Further Task(s)

When you connect a service the app will suggest recipes you might be interested in. If you are an Evernote user, try connecting that service to see the kinds of recipes it suggests, eg save your favourite tweets to an Evernote notebook, or save screenshots you take on your phone to an Evernote notebook. You can also use IF on your computer by visiting the IFTTT website (https://ifttt.com). You might find managing your recipes and services easier this way.

Useful resources

The IFTTT website

A how to guide for the app with more examples of services you can connect from HowToGeek

#12brightapps Day Nine – Photoshop Express

Photoshop ExpressWhat is it?

An easy way to touch up and improve your photos.

What can it do?

Correct and improve your photos with simple slide bar adjustments for different fixes and filters: crop, straighten and remove red-eye. Once perfected you can share your results easily from the app via social media, email and text message.

Photoshop ExpressDownload it now

  1. Open the App Store or Android market on your phone or tablet, search for ‘Photoshop Express’ and download.
  2. Launch Photoshop Express and for now choose ‘Maybe later’ instead of signing up.
  3. You may choose to sign up for free account at a later date which provides 2Gb of online storage for your images.

10 Minute Task:

This task is aiming to show you how easy it is to photoshop images like a professional.

To get you ready for the Christmas Party season we will take a selfie and make you look your best!

Within the app you will be prompted to select an image you already have or to take a new photo.

Click on camera so we can take a Selfie! You may need to autorise the app to use the camera which you should allow. You do not need to allow the app to use your location. Rotate the camera if your device has this option to take a photo of yourself, smile and press the camera icon to take the picture. If prompted allow the app to save the photo to your device.

Press the cross icon to come out of the camera. You can then search images on your device (‘on your phone’) and select the photo you just took.

Original Photo

Scroll through the different ‘looks’ available and find one you like. ‘Dream’ is a good choice to add soft-focus and take all the blemishes and wrinkles away!

Photoshop Express - Dreams look

The before/after icon on the top row allows you to switch back to your original at any time to compare the changes you have made.

Work through the toolbar at the bottom to test what each feature does to your Selfie:

PShopExpress_tool1 Looks

PShopExpress_tool2

Crop, rotate, straighten, flip

PShopExpress_tool3 Corrections (try adding some ‘vibrance’ to your photo)

PShopExpress_tool4 Fix red-eye

PShopExpress_tool5 Borders (vignette black adds a nice subtle effect to frame your face)

PShopExpress_tool6 Blemish Removal (you should zoom right in to give you accurate control here, then just tap a blemish to remove it!

Photoshop Express - Vibrance


It doesn’t always do what you’d expect so the undo arrow at the top may be useful as you experiment)

Once you are happy, press the Share icon at the top to save your work to the Camera Roll or share online!

Photoshop Express - Share

If you are feeling brave share your final work to Twitter with the #12brightapps hashtag for us all to admire!

Share on Twitter

And Finally…

The song told me to ‘Deck the Halls’…so I did!

Mr and Mrs Hall were not happy!

Discussion Board

Do your end results look ‘photoshopped’?

Does this tool give you more confidence to use photos of yourself online eg on studentcentral?

Further Task(s)

Another good use of this tool is for restoring old photos. Scan an old photo and try removing ‘noise’ or restoring scratches.

Sign-up for a free account to unlock extra ‘looks’ and add the ability to save your favourite settings to quickly apply to photos in the future.

Useful resources

Adobe’s help page on Photoshop Express http://www.photoshop.com/products/photoshopexpress

#12brightapps – Day 8 – Periscope

#12brightapps Day Eight – Periscope

Welcome to Day Eight of 12brightapps – our app is Periscope…RefME logo

What is it?

Periscope is owned by Twitter and allows you to stream real-time video using the built-in camera and microphone in your tablet or smartphone. Essentially it allows you to create your own impromptu micro-broadcast!

What can it do?

Periscope has a very simple premise, but it is incredibly versatile. We have used it to live-broadcast conferences presentations, to share live demonstrations and also to show a student cardboard bridge building competition (the suspense of watching the bridges bear the load of food tins was edge-of-seat viewing!). The app could be used for campus tours, lecture sessions, interviews etc. One point to consider is that the broadcasts are public, so anyone in the world can watch, from their mobile phone or a computer. This means that you need to ask people if they agree to be recorded as it is a public platform. The upside of this is that your broadcast might be good recruitment tool as it shows a slice of university life!

Periscope Demonstration

Download it now.

  1. Open the App Store or Android Marketplace (Google Play) and search for ‘Periscope’ and download.
  2. Once installed, you will be asked to Log In with Twitter.
    If you do not have a Twitter account yet, you may want to review the very helpful materials at #10DoT Ten Days of Twitter. Specifically this post from Anglia Ruskin’s #ARU10DoT provides a very helpful introduction to Twitter and setting up a profile: https://aru10dot.wordpress.com/2014/03/17/first-day-of-aru10dot-setting-up-your-profile/

10 Minute Task:

If you would like to see a live broadcast we are going to start rolling in about 10 minutes (10 past 10am-ish)! The link will be posted to Twitter, but you don’t need to have a twitter account to watch:
https://twitter.com/hashtag/12brightapps

Try your first ever broadcast in Periscope. Broadcast an object or book in your office and tell the world about it.

Press on the camera icon to access
your broadcast tools.
You can give your broadcast a title in
the the “What are you seeing now?” area. Then press “Start Broadcast” when you are ready.
broadcast tools 1 Start recording
Just above the start broadcast button you can edit your broadcast settings. Tap the setting once to turn it on or off:

  • Arrow: turn on/off your location
  • Lock: make your broadcast private (this is only shared with followers, but you may not have any followers yet)
  • Speech bubble: only allow in-video chat from your followers. This turns off potential chat from the public, but that can also close down interesting discussion too as your students will not be your followers in all likelihood.
  • Twitter logo: you can turn “Post” to Twitter on or off, so that you do or do not publicise your recording.

Here is one that I made earlier (I saved it and then uploaded it to our mediastream server in order to embed it here):

If you don’t have a Twitter account, or you’re not sure about using Periscope yet…
Here is an interesting broadcast from Jisc yesterday, this recording will persist on Periscope for 24hours from broadcast: https://www.periscope.tv/w/1MnxnqMYZBLJO
So watch some of it, before it disappears at about 13:30 today!

And Finally…

What do you call an android with too many Christmas text messages?

Innun-data’ed

Android phone

Linked from Star Trek Memory Alpha Wiki – Apparently the data plan wasn’t all it was cracked up to be…

(Again, I take full responsibility for this joke)

PART 2:

Discussion Board and/or Twitter

Do you think that Periscope is an app that you might use? What kind of event or happening might you record?

PART 3:

Further Task(s)

Change the settings in the app so that you automatically save copies of your videos. The screenshots below demonstrate the steps.

Press on the people icon and scroll
down the page to find your settings
Turn on “Autosave Broadcasts”
periscope settings 1 periscope setting 2

Try watching some other people’s Periscope videos. You can watch people you follow on twitter by pressing on the TV icon. Pressing on the globe button will allow you to explore video from around the world. If you don’t like the channel move on to watch something else.

Watch other broadcasts part 1 Watch other broadcasts part 2


Useful resources

There are some truly smashing blog posts about using Periscope in learning and teaching:

Here is one from our colleague, Sally Burr (@burrblog) at the University of Sussex: http://blogs.sussex.ac.uk/tel/2015/08/18/periscope-live-broadcasting-for-teaching-and-learning/

Sue Beckingham’s fantastic, Social Media for Learning Blog (@suebecks) – post about Periscope, with helpful explanations about how it all works: http://socialmediaforlearning.com/2015/08/18/using-periscope-a-live-streamimg-app-in-higher-education/


#12brightapps – Day 7 – SharePlus

The SharePlus app

This app was developed for the University of Brighton to enable staff to access SharePoint content through mobile devices.Sharepoint-logo

Brighton Specific App

Not for me?
Not at the University of Brighton? We’ve prepared an alternative activity for the day, try our ActionBound trip to visit Santa!


What is it?

SharePlus allows your iOS or Android device to connect to any of the university’s SharePoint sites in Staffcentral, MyDepartment and MyFiles.

What can it do?

The app has a different interface to the SharePoint websites which is more suited to mobile devices.  It allows you to access and edit SharePoint content on your mobile device.  You can even store key content offline so you do not need a Wi-Fi or data signal.

You can use it to:

  • Access and edit files
  • Manage lists
  • Contribute to discussions


Tasks

Today we have two tasks for you. If you have never used the app before we would recommend downloading and configuring the app as your task for the day.  Those of you who already have the app installed, or are keen to try an additional task after installing the app should follow Task 2.

Task 1 Download the App

The aim of this task is to install and setup the app on your device.

  1. Visit our mobile devices page.
  2. Select the link for Apple iOS or Android as appropriate
  3. Follow the instructions to download the app
  4. Connect your app to My Files; you’ll find the instructions and more in these guides

Apple iOS – Help Pages

AndroidHelp Pages


Task 2 Christmas Challenge

This task will get you used to adding new sites, accessing documents and contributing to lists.

  1. Connect to this site in your StaffCentral app https://mydepartment.brighton.ac.uk/sptraining/practise/

For help see the guides below:

Apple iOSHelp Pages

AndroidHelp Pages

  1. Find the Task 2 Word Document and follow its instructions.

And Finally…

What does Rudolph want for Christmas?

A pony sleigh station!


PART 2:

Further Task(s)

There are three more tasks you can choose to complete.  You will find each one in the document library in the StaffCentral (Sharepoint) App.

Useful resources

Here are some useful links on using the StaffCentral app

Our help page for mobile devices

Apple iOS Guide

Android Guide

#12brightapps – Day 6 – Techsmith Fuse

#12brightapps Day Six – Fuse

Welcome to Day Six of 12brightapps – our app is Techsmith Fuse…

What is it?

Fuse is an app that is used to interface with other Techsmith products such as Relay and Camtasia. However, it can be used by itself too.

What can it do?

Fuse works on both iOS and Android devices… It has added annotation tools if one is on an iPhone, however. It’s primarily used to interface with other Techsmith products. Relay (for streaming servers) Camtasia and SnagIt.  However, with the annotation tools, or even without, Fuse is an easy app to capture video, and to share it to other apps or your camera-roll.

Download it now.

  1. Open the App Store or Android market on your phone or tablet, search for ‘Techsmith Fuse’ and download.
  2. Launch Fuse

10 Minute Task:

Whether or not your institution has a Relay-server or not, this activity is spread into three pieces. Follow along, and skip ahead, as it makes sense to your own situation.

Part A.

First, we have to make a video.  As we draw to the end of this term (or, getting close, anyway) we will be gearing up for the new term soon.  Many times, your future students are excited to get started on the next course.  The first thing they see, is often a ‘fairly empty’ module/course waiting for them in their VLE/LMS.  A great way to start off the new term, would be to have a short introductory video greeting your future students to your module/course.  We’re going to make that video, using the Fuse App.

1. Open Fuse, and click on the video camera icon. It defaults to the external camera, so you’ll have to rotate the camera so that it’s “looking at you, kid.”Photo illustration of text description

2. Click on the Video camera in the middle, when you’re ready to make your course/module introduction.  It starts recording right away, so be ready to start talking!Photo illustration of text description

3. When you’ve finished click on the tick-mark.  Or, pause if you want to gather your thoughts. Fuse is happy to wait for you.Photo illustration of text description

4. Okay, you’ve reached the step where you can skip ahead to step number 11 if you’re not a member of the Uni of Brighton.  Brightonians: Once you’ve clicked the tick-mark DONE choice you should see this, click on the R, for Relay.Photo illustration of text description

5. Next it will ask you to scan the code.  Rather, click on “Manually Connect”Photo illustration of text description

6. Fuse will ask you for the address of the streaming server that Brighton uses.  If you’re from outside of the Uni of Brighton, it’s quite possible your institution has something like this.  Ask your technicians!Photo illustration of text description

7. Once you’ve clicked connect, it will ask you for your username and password.Photo illustration of text description

8. Once you’ve clicked ‘Done’ it will log you into the streaming server and ask for a title and description of your video.Photo illustration of text description

9. Choose the profile that fits what you want.  MediaStream for our ‘campus video service’ or “All formats” for our Relay Streaming Server (Brighton Only – If you’re not Brightonian, ask your media team what the options may be.)Photo illustration of text description

10. Once you’ve chosen your destination for the video, click Send.Photo illustration of text description

11. HEY WE’RE BACK TO EVERYONE! So if you’ve finished your video, you can go to the Library and there are a few more fun options (That don’t involve server things.) Now choose a video that you’d like to export.Photo illustration of text description

12. Once one is selected, go to the Share Icon to see the options.Photo illustration of text description

13. With Fuse, you can export the video to other apps and services, Nearpod, Dropbox, Faceboock, etc… Save your ‘Introduction’ video to your favourite service.Photo illustration of text description

Part B. – But WAIT, there’s more… I told you that there were more options, if one was using an iPhone. Annotation and Video Cropping!

Photo illustration of text description Photo illustration of text description

Otherwise the iPhone app has the same functions as the Android and iPad app.  Sending to other Techsmith Services or Apps or your camera roll.


And Finally…

What do you get if you eat Christmas decorations?

Tinsilitis!


PART 2:

Discussion Board and/or Twitter

Are you worried about the idea of having a video introduction on your modules/course areas? What other things could you do that would ‘humanise’ your module areas?

PART 3:

Further Task(s)

Make a silly Christmas/holiday greeting video with Fuse, and share it with your Facebook/Social media of choice.

Useful resources

Here’s the link to Techsmith’s website.

Helping Students Find Identity Through Student Created Video – A blog by Matt Miller a well known teacher and author.

Today’s secret code… (Keep this handy): “Luke, I am your father!”

#12brightapps – Day 5 – iMovie

#12brightapps Day five – iMovie

Welcome to Day Five of 12brightapps – our app today – iMovieScreen Shot 2015-12-04 at 11.32.01

What is it?

iMovie is a robust iOS version of the classic Mac software for video editing.

What?!?!? I’m on Android.

We aren’t deliberately being mean, if you’re on an Android device, we suggest Video Maker Pro Free – The activity will work with that app as well. Although, you’ll be a bit more on your own about how to make the app do what you want.

videomakerprofree


What can it do?

iMovie is a very robust and easy to use video editor for iOS devices.  Many times you shoot a short video for class, or record a students presentation, and want to do some simple trimming and text additions to your video. iMovie is a great tool for that.

iMovie (and Video Maker Pro Free) also do a great job at making slide-shows with text and even audio, out of still images. Document your class/event with your camera app, and easily import the photos into iMovie, add text and even a backing soundtrack to export a video-slideshow of your event.

Download it now.

  1. Open the App Store, search for ‘iMovie’ and download.
    (Or open the Googleplay and search for Video Maker Pro Free [or really just click that last link])
  2. Once installed, launch iMovie, and if you’re asked, allow iMovie access to your camera roll and camera and microphone.

10 Minute Task:

We may have given this away in the “What can it do” section, above… We’re going to make a winter-holiday-themed slideshow with iMovie, and… It’s all about you.  That’s right, this will be the best and most narcissistic video-slideshow that you will ever make.

  1. First we need material. So, using your camera on your mobile-device start shooting a few ‘selfies’.  Make one a very happy face, make one a very sad face, make one a particularly egregious duck-face photo (you know the type), and make another of your natural expression.  Take as many more as you’d like.
  2. Once you’ve shot the selfies, let’s open iMovie on your device.
  3. Click the + symbol to start a new video project.Screencapture showing step
  4. Click on Movie (as opposed to Trailer)Screencapture showing step
  5. Choose the theme (transitions, look and feel of the project) or just leave it ‘Simple’ and click CreateScreencapture showing step
  6. Let’s find the photo library.  The top left is your ‘viewer’, the top right is your library, this is where you would find your video, photo or audio file libraries.  The bottom area is the timeline. Choose “Photos” to open your camera-roll library.Screencapture showing step
  7. Find your selfies in your library, and touch them.  They should automatically be added to your timeline.Screencapture showing step
  8. Don’t despair… You can click on a ‘picture’ in the timeline, and drag it to a different place in your timeline. So the order doesn’t matter yet…Screencapture showing step
  9. Now it’s time to add some audio to your video-slideshow.  You can either find some music in your iTunes library or add a voice-over by using the built-in mic function.Screencapture showing step
  10. Once you’re satisfied, click on the “Done” button in the top left corner of the screen, and you should see this window appear.Screencapture showing step
  11. Click on My Movie and you should be able to edit the text.  Call it something like “Your Name’s” Emotional States During the Holidays. Then click on the ‘share’ icon in the center middle.Screencapture showing step
  12. You can share your video to other apps you may have installed, or save the video to your Camera-roll or iTunes or iCloud Drive account.

And Finally…

What do you call a little lobster who won’t share his Christmas presents?

Shell-fish.


PART 2:

Discussion Board and/or Twitter

Try to think up ways that iMovie (or Video Maker Pro Free) could work for you in your classrooms and lecture theatres? How would you use it? Recording student-presentations? Oral-Exams? Short video demonstrations that you can use to “Flip” your classroom?

PART 3:

Further Task(s)

You can record directly into iMovie, and choosing the ‘camera’ icon, start recording directly to a time-line.  This can be great, if you want quick recording and easy manipulation before saving and sending a video to students, colleagues, or if at home, ‘Crazy uncle Eddie’.

If you have enough ‘random’ photos and videos on your device, using the “iMovie Trailer” function is a great ‘drag-and-drop’ way to make a frankly quite professional looking trailer about your ‘event’.

Useful resources

Here are a few useful links:

John Scotland’s iMovie tips and tricks. (YouTube)

Flippedinstitute.org – Mobile Video in the Classroom (PDF)

Animoto.com – 6 Best uses for Video in the classroom (Commercial app product, but good advice, none-the-less)


#12brightapps Day four – Timer+

#12brightapps Day four – Timer+

Welcome to Day Four of 12brightapps – our app is Timer+…RefME logo

What is it?

Timer+ is a very simple app that allows you to set-up multiple timers for counting down to zero; it features some fantastically comical sounds.

What can it do?

It does exactly what it says on the box and sometimes that is what you need. This app is very helpful for keeping classroom activities on track, timing sections of a lecture so that they don’t run over and for scheduling in breaks during research periods. The variety of alarm sounds can provide a moment of levity during a classroom session, particularly when debating very serious subjects. Home-life uses include: timing cooking; setting a time for yoga stretches; meditation; steeping tea. The alarm sounds aren’t all silly, “Piano” for example, is very calming and can play once or on a loop when the timer finishes.

Download it now.

  1. Open the App Store, search for ‘Timer+’ and download.
    Timer+ is not available for Android, but here is a similar free (and ad-free app) Stopwatch & Timer (made by Jupiterapps based in the UK). Please note: that a number of the android timer apps do not have sound privacy policies, take care when choosing apps to install.
  2. Once installed, launch Timer+ and tap the “+” on the top-left to create your first timer!

10 Minute Task:

You are planning seasonal festivities for a day when you will entertain friends and family in your home.

Remember some tasks can take place simultaneously because Timer+ can run more than one active timer at once.

Amongst your plans are:

Task Approx time
Cooking a Turkey, Haggis or Nutloaf (or your choice) 4hr/2hr/1.5hr
Prepare an appetiser 30mins
Eating the appetiser 30mins
Eating the main course 1hr
Heating pre-made custard for desert, but making sure that you don’t get a burnt crust 15mins
Eating the desert 30mins
Playing a game of charades, but making sure that it doesn’t go on for too long as Uncle Bertie may become too competitive 45mins

Your challenge should you choose to accept it is to set timers for the events above. What time do you need to start cooking/preparing so that you be finished before the Strictly Come Dancing Christmas special at 6:15pm?

And Finally…

What’s a cross between a Jaffa Cake and a slug?

Jaffa the Hut

(I take full responsibility for this joke)

PART 2:

Discussion Board and/or Twitter

Tell us what time you will need to start cooking in order to be finished in time for the Christmas Special? We’d love to know what you choose to cook as that will, of course, affect your timings.

How do you think you might make use of Timer+ in real life?

PART 3:

Further Task(s)

Try out a few different sounds. Any favourites? I quite like telling students and workshop attendees that I don’t know what the sound will be!

Useful resources

Here is a useful link on How to Manage Time:

Some easy strategies for mindfulness and productivity (lots of opportunities to use Timer+ here): http://www.wikihow.com/Manage-Your-Time

#12brightapps Day three – RefME

#12brightapps Day three – RefME

Welcome to Day Three of 12brightapps – our app is ‘RefME…RefME logo

What is it?

RefME is a referencing and citation manager, which allows you to scan book barcodes and also to bookmark websites; the app then generates citations in your chosen style.

What can it do?

RefME is available on iPhone/iPad, Android and on laptops/desktops via a web browser. In Chrome specifically, there is a fantastic web clipper tool (extension*), which allows to quickly bookmark any website. This feature is also available in Safari on iPhone/iPad.

The video below shows a practical demonstation of how you can use the mobile app in conjunction with the browser-based software – the two sync automatically via your account.

Other great features:

  • Import RIS files exported from library catalogues, journal citations and endnote: https://vimeo.com/143852032
  • Export to common formats including: copy & paste; Microsoft Word doc, Evernote, BibTEX, Menderley, Endnote, RefWorks and Zotero

*For details on installing the Chrome installer: https://goo.gl/XBz03G. For Uni of Brighton folks, you can request that Chrome be installed on your work computer by contacting our service desk.

Download it now.

  1. Open the App Store or Android market on your phone or tablet, search for ‘RefME’ and download.
  2. Launch RefME and sign-up for an account (Sign up with Email recommended).
    screenshot of the sign-up page in RefME app
  3. Login in to your new account in the app.
  4. Add a new project using the Add Project button on the bottom left of the app and give your new referencing project a name.Screenshot of the app showing how to add a new project
  5. Press on your project in the list on the left to select it. On the top right you can use the “Change style” button to change it to your desired referencing style.

10 Minute Task:

This task is in two parts to demonstrate the versatility of bookmarking in RefME. The second part is only available to those on iPhone/iPad so is completely optional:

Part A: In the RefME app
Pick up a book in your immediate vicinity that has a barcode on the back of it. Position the book on a flat, well-lit surface and then press on the Add Reference button. At this point you may be asked to approve RefME’s access to your camera, please agree to this. Position your device above the book, so that you are viewing the barcode in the marquee area shown. You should hear a nice little beep to confirm and your reference will be shown: you can edit the reference, add specific pages and save it.

Screenshot of the app showing how to capture a barcode

Part B: Bookmarking in Safari – iPhone/iPad only (sorry!)
In Safari, the web browser app on your device go to a website, any website! Press on the share button on the top-right of the browser. You should now see that RefME is listed as one of your saving options. Press on the RefMe option and press Post to save your bookmark to RefME.

04refme

Troubleshooting..but RefME isn’t showing on my Sharing list?
In the share options press on the More button and turn on RefME as a sharing option.

05refme

And Finally…

What does Santa suffer from if he gets stuck in a chimney?

Claustrophobia

(From Cathy Frankland)

PART 2:

Discussion Board and/or Twitter

We would love to know about the books that you chose to scan in the Twitter chat or on the discussion board! Why did you pick that particular book?

Do you think that you might use RefME as a web bookmarking tool as well as a book reference generator?

PART 3:

Further Task(s)

Try editing your references. RefME is a good place to start and it certainly saves time when you are creating referencing and citations, but sometimes your references will need a bit of tweaking to perfectly accord with your referencing style. Luckily it is very easy to edit your references within the app or to change the format of the reference (e.g. article, video, report, many formats are supported) so that they match the document source format and referencing style.

Useful resources

Here is a useful link on using RefME:

The RefME help and support site, including helpful user guides and videos: https://refme.zendesk.com/hc/en-gb